


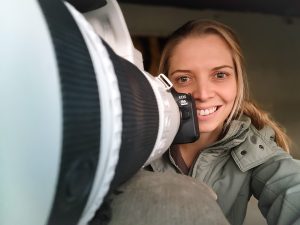
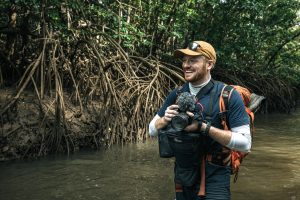
Contributor: Keenan Hursh | Backcountry Journeys
On the surface and from a purely technical perspective photography is simply the process of capturing light with an optical device and converting that light into an image that can be viewed. When you look at it this way, it doesn’t sound all that interesting, impressive, or transformational. Of course, the technical and scientific aspects of photography are quite important and as photographers it’s absolutely crucial that we understand how this all works.
That being said, there is an entire other side to this whole thing that can’t necessarily be explained with mere numbers, charts, facts, and figures. There is an emotional and experiential side to photography that is just as important. At the end of the day, photography is not only a science but an art form. It is a medium in which we can tell stories, evoke strong reactions, and share our perspective of the world as unique individuals. One of the most beautiful aspects of photography, at least in my opinion, is that it gives us a chance to experience the world through someone else’s eyes. Just like a good book, a good photograph can transport us into the lives of others.
In today’s article we’re going to closely examine photography as an effective form of storytelling. If you want to create truly compelling images you not only need them to be technically proficient, but they must ultimately tell a story and not just catch but hold the viewers’ attention. Let’s get right into it and dive into several ways in which you can improve your images with effective storytelling.
Before you hit the road or pick up your camera, it’s absolutely essential to start with a strong concept. You need to decide on and understand the story you want to tell. If you just head out into the field without any direction you might get lucky and capture a few decent images, but if you have a strong idea of what you want to capture and the story you want to communicate, you’ll set yourself up for success. Of course, you want to be adaptable and flexible when you make it to your destination but starting with a strong idea or concept will go a long way. Quite Simply, defining your story ahead of time will allow you to make conscious and purposeful decisions down the road when you’re in the field.
If you’re not entirely sure about the story you aim to tell, a good way to go about this is to ask yourself some guiding questions. Why do you care about this idea or concept? Why do you want to visit a certain location or photograph a specific subject? What about this has inspired you to put in all this work? What exactly are you trying to portray/convey about your subject? These questions can be a great starting point and can steer you in the right direction when deciding on an idea.
The concept is by far the most important piece of this whole process. Even if you follow the rest of the steps to a T, your odds of producing an exceptional image will drop significantly without a strong concept or idea. Take plenty of time to figure out the story you want to tell.
The concept is by far the most important piece of this whole process. Even if you follow the rest of the steps to a T, your odds of producing an exceptional image will drop significantly without a strong concept or idea. Take plenty of time to figure out the story you want to tell.
Once you’ve decided on a strong concept or story that you’re passionate about, it’s time to figure out exactly how you want to tell that story. A lot of the following tips throughout this guide will largely fall into this topic, so I’ll keep things relatively high-level off the bat. The key here is to start to think about the specific ways in which you want to communicate your concept or message.
Again, a good way to find some direction is to ask yourself some guiding questions that will start to paint a clear path forward. For instance: What are some specific things you can focus on to communicate your story in a clear and effective manner? What are some things you should avoid that will detract from the effectiveness and impact of your story? Do you want to capture an iconic shot that many have captured before, or do you want to shine a unique light and perspective on the subject you’re shooting?
Another way you can greatly increase the impact of your story/concept is to develop a strong understanding of the subject you’re going to photograph. If this is a place, spend a lot of time learning the ins and outs of the region and its landscapes. Understand the seasons, weather, and geography. Figure out where the sun will be during specific times of day. Understand how to navigate the landscape by studying maps. If your subject is a wild animal, spend quite a bit of time researching its behavior. Understand the times of day it’s the most active, know what habitats and environments it prefers, figure out what it eats, and when its mating season is. By thoroughly understanding your subject you can more easily identify effective ways to communicate your message.
Another great way to figure out how to effectively tell your story is to study the work of others. You should look at a wide range of images portraying the subject you want to capture and figure out what exactly works and doesn’t work. Identify the images that really stand out and grab your attention and try to identify elements and creative decisions that evoke this reaction.
Starting out with a strong idea or concept is absolutely essential but you also need to figure out the best way to communicate it. Spend some time on these first two steps and the following tips and tricks and the rest of the process will flow more naturally.
One of the most crucial aspects of any photograph, or any visual form of art, is composition. Not only is composition the general layout or distribution of things in a photograph, but it’s also a guideline that directs a viewer’s attention and controls how they view an image over time. A strong composition will lead someone through an image along a storyline and will hold their attention, while a weak composition will have the opposite effect.
Of course, there are basic “rules” or guidelines that we’re likely all familiar with such as the infamous rule of thirds, but I strongly encourage photographers to go beyond these generic ideas and think about composition on higher levels. Yes, there is science to support the rule of thirds, but just like all rules, this one can and should be broken. You don’t want to get caught up on strict guidelines that could potentially have negative impacts on your images.
Instead, I would recommend that you think about composition as a roadmap instructing viewers on how to experience an image. You can of course use leading lines to direct attention towards a primary subject such as a winding river pointing to a prominent mountain in the background, or perhaps two mountain ridges that converge on and point towards a wildlife subject. Another great way to draw attention to or highlight a subject is with the use of framing. If you frame a sharp wildlife subject with blurred and out-of-focus foreground elements the subject will pop much more and stand out from its environment. Leading lines and framing, whether obvious or subtle, can dramatically alter the way an image is interpreted and therefore the story you’re trying to tell.
If the elements of your image are words or vocabulary, then think of the composition as grammar. It’s what controls how all these elements affect one another and how they can all come together to create a message or story with a greater meaning than the individual elements themselves.

As humans, emotion is an essential part of our existence. Emotions control so many aspects of our lives and often times the most effective stories are the ones that evoke strong emotional reactions. When we’re telling stories through our images it can be very effective to communicate or incorporate a sense of emotion or drama. We can look for and seek out moments and situations that express feeling.
If you compare the same landscape in different circumstances, you can clearly see what I’m talking about. Let’s say you’re photographing a desert landscape. One image is captured mid-day with a bright blue sky and harsh light that eliminates many colors and details. The other image is captured during monsoon season just before sunset with dark storm clouds in the sky, a lightning strike hitting the ground, and golden light bathing the landscape. The subject or landscape is the same, but the conditions tell a completely different story. The latter image is much more likely to create a sense of tension and drama, draw the viewer in, and evoke a strong emotional reaction.
The same is true for wildlife photography. Photographing a wild animal bedded down and inactive during the middle of the day tells a completely different story than later in the evening when that same animal is active and perhaps searching for a next meal or a potential mate. If you’re lucky you may even be able to photograph the animal interacting with its environment or other animals as well. Again, the latter will likely lead to a much more compelling image by telling a story and creating an emotional response.
Along the same lines as the previous topic, the environmental light and colors that are present in your image can completely alter how it is viewed and interpreted. Although it may be more discussed in the art forms of painting and illustration, as photographers we can and should take a look at color theory to understand how we interpret certain colors and color combinations. On subconscious and even biological levels, colors have come to hold certain meanings and significance in our lives, and this all comes into play when creating photographs.
For instance, warm tones and hues like the ones found during the golden hour can evoke a sense of comfort and make an environment seem welcoming and hospitable whereas cool tones and hues that are common in winter or on cloudy days can create a sense of unease and discomfort. We are also naturally drawn to brighter and warmer light meaning these parts of an image will capture our attention first. So, by capturing a bright and warm wildlife subject in a dark and cool environment the subject will naturally stand out and grab our attention. Think about an elk catching some warm sunlight with a dark shaded forest in the background.
Of course, we’re just scratching the surface here, but light and color play an absolutely crucial role in the way our images are viewed and therefore how our stories are interpreted.

For instance, if we’re capturing a mountainous landscape, we can tell completely different stories simply by changing lenses. A wide angle shot at 15mm with some vibrant wildflowers large in the foreground and the entire mountain range small in the background paints a completely different image and story than a tight and zoomed-in shot captured at 200mm isolating and magnifying an individual peak in the distance. Both of these techniques can work well depending on the story you’re trying to tell. The wide-angle shot is all-encompassing and gives us a sense of the overall environment around us. In this instance the wildflowers up-close in the foreground are the primary subject. Whereas the tight shot is much simpler and isolates a very specific and perhaps prominent subject that is far away. A shot like this is much simpler and in this case, the peak itself is clearly the subject.
When it comes to wildlife photography, perspective is also very important. Not only can it lead to more aesthetically pleasing images, but it can greatly enhance the stories we’re trying to tell as photographers. Just like with all styles of photography focal length and depth of field come into play when capturing wildlife images. Do you want to capture an up-close portrait shot with a creamy and blurred background behind your subject or would you rather show an animal in its habitat with a zoomed-out environmental shot? Another great tip for wildlife photography is to get down low. Not only can this help to separate your subject from the background and foreground but by being at or below your subject’s eye level you can create a much more intimate and immersive image that puts the viewer on the same plane as the animal in a sense letting us see the world through their eyes.
There are many ways to improve your images with effective storytelling and perspective is one of the most influential. Next time you head out into the field, be sure to think a lot about the perspectives you’re choosing and whether or not they are helping or hurting the story you’re trying to tell.
Another critical element of any photograph is the perspective that we choose. Perspective comes down to a few main decisions that include the lens you’re using as well as your position relative to the elements of a scene. Different focal lengths can lead to drastically different portrayals of a scene and where you chose to position yourself can transform the story you’re trying to tell.
Throughout this article, we’ve really been focusing entirely on single images. Of course, there’s nothing wrong with telling a story using a single exposure but sometimes it can be beneficial to use a series of images. This can help to portray the passing of time, or a series of events and can be an effective way to communicate change or motion.
Whether you’re combining multiple images together in one shot or displaying multiple images next to one another this can be a great way to tell your story. Some common examples of this could include a composite of multiple images capturing a solar eclipse (like the one above) or perhaps a series of images capturing a red fox in winter as it leaps into the air and then dives into the snow in search of prey. Or maybe you’re blending many exposures together into one final image such as a star trail. Perhaps you’re capturing the exact same perspective of a landscape throughout the year portraying it in four different seasons.
Whatever approach you choose to take, it may well be worth communicating your story with a series of images as opposed to just one. Of course, this is all very situational and it ultimately depends on the story you want to tell.
When we think about telling a story through one of our images it’s quite common to primarily focus on and get caught up with the big things. This is natural, and often times the dominant subjects or elements of an image are essential when communicating our concept.
That being said, I strongly encourage all photographers to really seek out and pay attention to the small details. These can also have a large impact on the story we’re communicating and can help to hold a viewer’s attention for longer periods of time. Of course, when viewing an image, we’ll likely focus on the primary elements at first but if small details catch our attention we will be pulled in even further and start to think more about the story that’s being told.
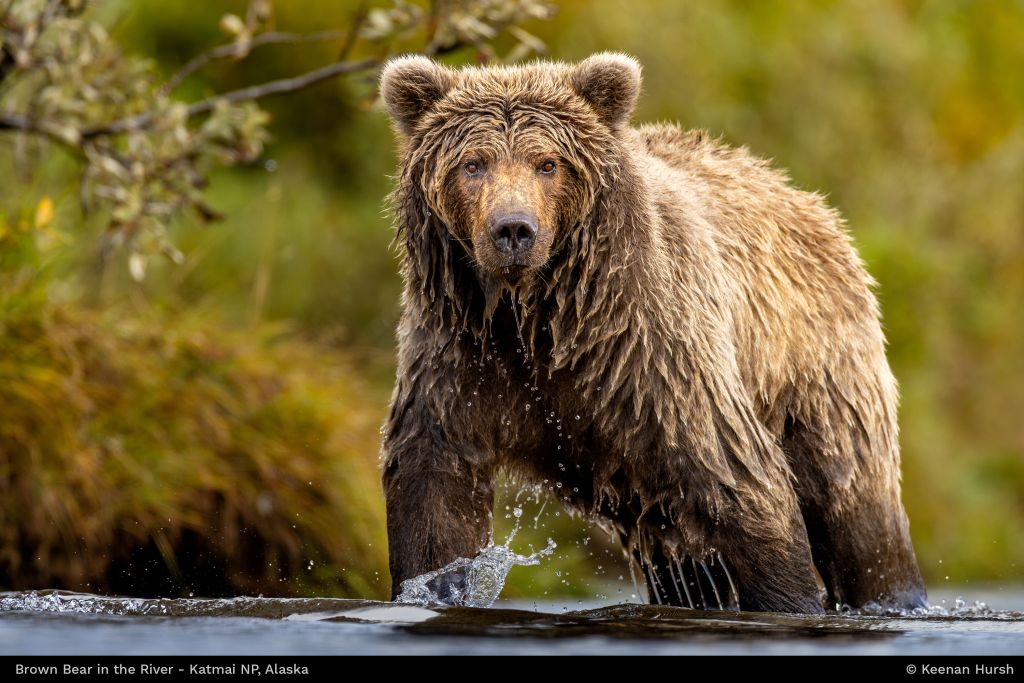
For instance, if you’re photographing a wildlife subject look for small details that help to tell the story of this animal’s past. Perhaps it has scars on its body (like the brown bear, Chunk, in the image above). These small details portray that this animal has seen its fair share of conflict and communicate that it is rugged, and hardy having survived up to this point despite some injuries. These scars can also communicate a story about the world and environment that the animal lives within.
When capturing your images and composing a specific story, remember to keep an eye out for small details that may seem insignificant at first. These can drastically help to improve your images and the stories you’re trying to tell.
Alright, this topic might be a bit controversial, but nonetheless I think it’s worth discussing in this article. Of course, photography is a subjective form of art. There are many different styles and as artists we make individual decisions on how we create our images. Some photographers are comfortable taking large creative liberties while others are not, and both are completely ok.
For me, as a nature photographer and an individual artist, I try not to alter or change my images too much. My personal philosophy is that I largely try to portray either the way I felt about something or the way I interpreted it through my own eyes. When people view my images, I want them to think about the scene they are viewing and not how it was edited or manipulated. I strongly believe that we don’t want to trick or lie to those who view our images. For the sake of today’s article, I’m going to approach this topic from my own viewpoint.
When capturing images of nature whether that’s landscapes or wildlife, I think it’s important to capture authenticity in the stories we’re communicating. We’ll talk a bit more about photo editing in the next section, but this also applies to what you do when capturing images. For instance, some photographers will bait wild animals, stage situations, or significantly manipulate their surroundings to create an image. Of course, these are all grey areas, but I think it’s important that we communicate our stories with authenticity. If our goal is to portray a wild animal in its wild habitat we don’t want to alter that animal’s behavior. Instead, we want to simply observe the animal allowing it to behave as it naturally would. Not only is this authentic but it will lead to better images at the end of the day.
Again, this is all very subjective, but in my opinion it’s important to capture authentic images and communicate authentic stories. As nature photographers we should aim to share stories from the natural world and not mislead those viewing our images.
And last but certainly not least, we’ve arrived at our final tip. One of the most important aspects of photography in the modern age is post-processing or photo editing. This is a way that we can really enhance our images, especially if you shoot in RAW, and ultimately bring our stories to life.
Of course, it’s easy to simply hit the “Auto” button in Lightroom or apply some basic edits, but I encourage all photographers to really edit with a purpose. You should go beyond what simply looks “good” or appealing and consciously think about why you’re making the adjustments you’re making. Of course, these basic sliders are a great starting place but it’s never a bad idea to go beyond them or even dial some of them back depending on the story you’re trying to tell.
When you’re adjusting the basics like contrast, color temperature, saturation, vibrance, and others think about the story you’re trying to tell. If you want a scene to feel warm and inviting perhaps adjust the color temperature slider accordingly. If you want to pull out fine details in the fur or feathers of an animal perhaps increase your texture and contrast. These are just some simple examples, but the key here is to think about the message you’re trying to communicate throughout your editing process.
Once you’ve adjusted the basics it’s time to take your edits to the next level. Of course, it’s often good to have a soft touch, but masking and localized editing can be powerful tools when it comes to communicating your story. This can be a really effective way of guiding the viewer’s gaze and drawing them to specific elements of your image. Masking is incredibly powerful and when done correctly, can completely transform an image and increase its impact.
I always try to get things as close to perfect as I can in-camera, but I also spend a lot of time editing my images. If you want to enhance your stories and create more compelling and intriguing images you need to edit with a purpose.
In many ways, Storytelling is the soul of photography and really any form of art or expression. It’s a unique gift that we have as humans and it’s something I think we all could appreciate a bit more. By approaching your photography with intention and a clear narrative and idea, you can create images that do more than just showcase a scene—they will resonate with viewers, grab their attention, evoke strong emotional reactions, and create a lasting impact.
Next time you head into the field or pull up an image for editing, think beyond the purely technical aspects and focus on the story you want to tell. The result will be more meaningful, engaging, and will elevate your photography to new heights. Remember, a great photograph is not just seen—it is felt, experienced, interpreted, and remembered.
I sincerely hope this article has been helpful and informative and that it’s given you some food for thought the next time you head out with your camera. Thanks for reading and happy shooting!

Keenan Hursh is a Photographer, writer, and creative storyteller based out of Bozeman, Montana. He draws inspiration from his frequent excursions into the natural world and always brings his camera along to capture whatever adventures he finds himself in. He is passionate about documenting and sharing fleeting moments from the natural world and focuses primarily on wildlife, landscape, and adventure photography. Keenan is both a Photography Trip Leader and the Website, Copy, and Content Specialist for Backcountry Journeys, the #1 trusted leader in small-group photography workshops, trips, and safaris with well over 100 trips across the globe. You can view Keenan’s portfolio on his website at keenanhurshphoto.com.
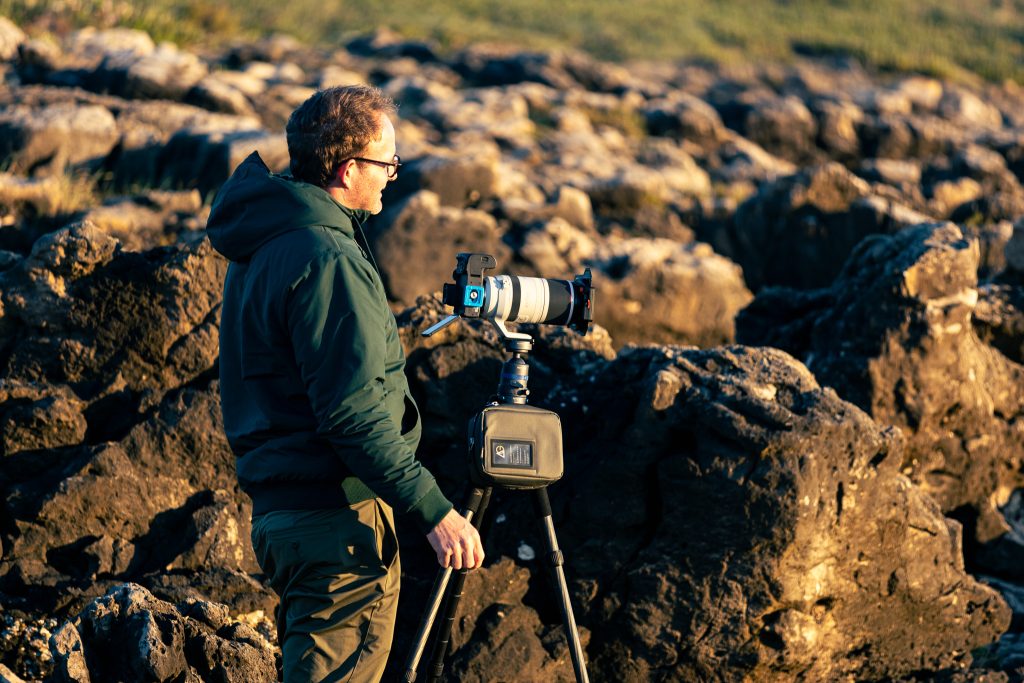
Marcello Cavalcanti is a pro landscape photographer, teacher and tour leader for photography workshop trips.
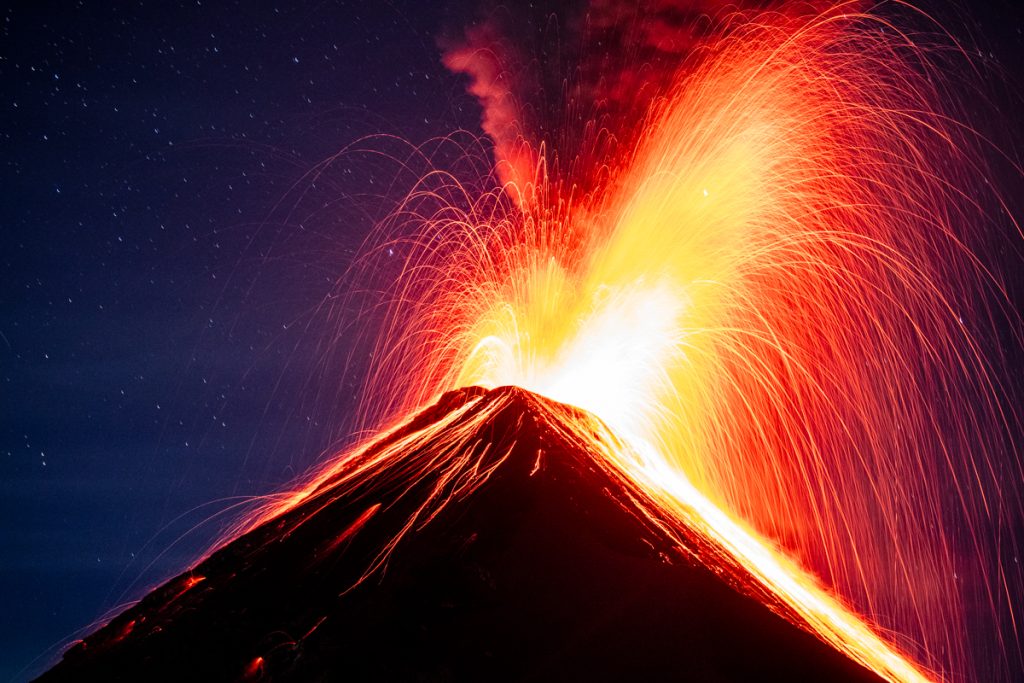
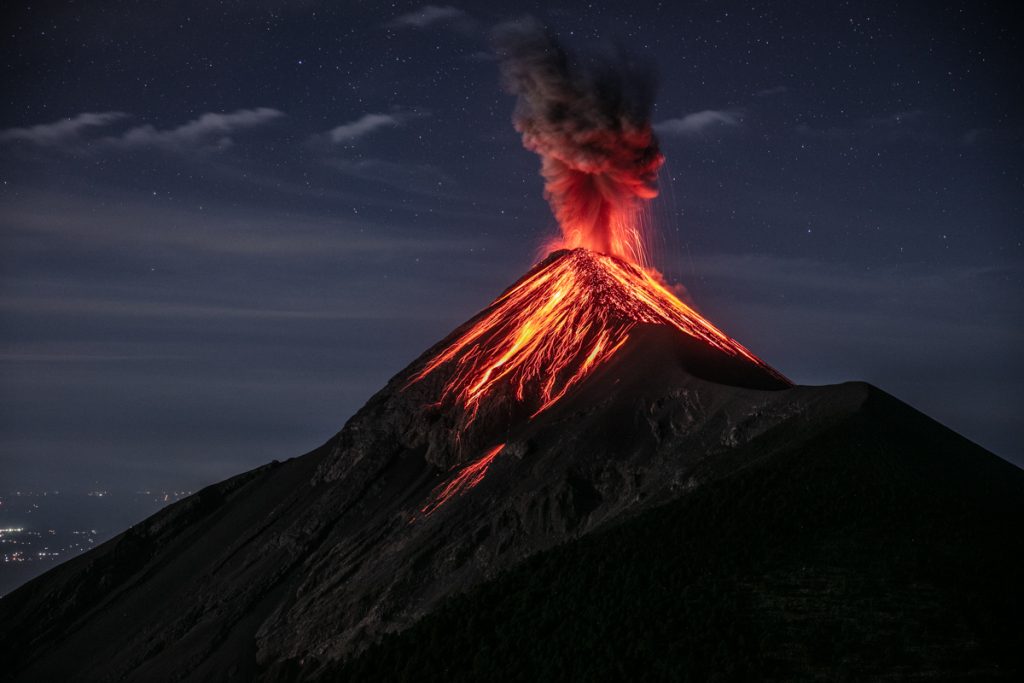
Recently he led a tour with 9 photographers to beautiful Guatemala, where you can get up and close with Fuego’s Volcano (Vulcán de Fuego), a stratovolcano with 3.763 meters high (12,345 ft) that spills ash, plume and lava every 10-15 minutes, sometimes longer, sometimes shorter.
To shoot this volcano with the best possible view, he took his group to hike another volcano (this one, inactive, of course), called Acatenango, that gives you amazing views of Fuego, and in a very close position - they are aparted 2 km (6500 ft) away!
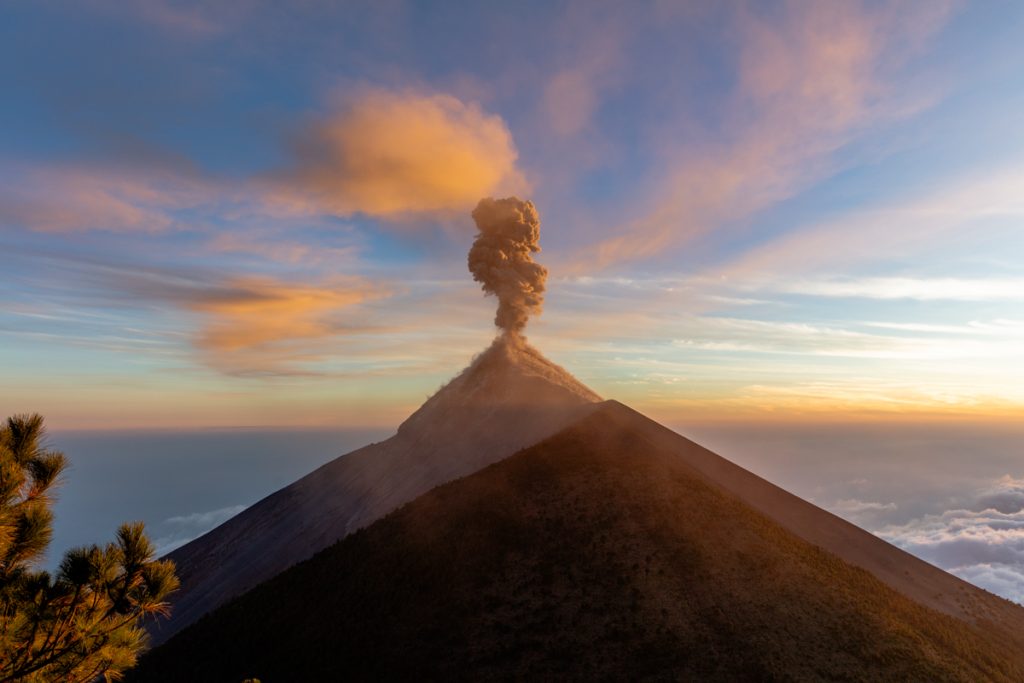
So, one important thing to know about volcanoes is that if they don’t make a lava river (like Fuego) you can’t see much during the day, unless a lot of smoke comes out of its mouth; the pictures of this huge column of plume are cool though.
As there’s a lot of light illuminating the whole scene, you can make these pictures with the camera in hands, without a tripod (as long as you use a high shutter speed like 1/500 or more) which gives you more freedom to create different angled shots searching for an interesting foreground.
But, it’s at night that the real spectacle begins. Without the sunlight, the explosions of Fuego bring up amazing red lava, rocks flying and smoke. That’s when the really cool images starts to reveal, as long as you follow some basic tips:
It’s really hard for any camera to autofocus in the dark, so rely on the manual focus, make it at any part of the volcano that you will be fine when the explosion occurs. Newer cameras like the mirrorless ones that have the live focus peaking feature are even easier to achieve the perfect manual focus. But, remember, if you change the lens or even change the focal length using the same lens, you will need to redo the manual focus.
In this experience we tried different focal lengths to have different shots every time Fuego gives his show. As we were really close from it, the longer length i used to frame the whole scene was 135mm, so a 70-200mm lens is more than enough to do the job. The results are impressive! On the other hand, if you want to make an image with the volcano plus the starry night sky (or with the long and tall smoke column) a wide angle focal length between 15 and 24 mm will work perfectly.

To make any active volcano pictures you will be around a lot of ash. Every explosion releases tons of ashes in the air, that falls within a radius of dozens or even thousands of kilometers. So my pick would be any f-stop with the Duradiamond exterior, to prevent ashes coming inside the backpack.
We spent the night at the base camp of Acatenango shooting Fuego, so you also need to bring warm clothes, gloves, water, some food, so think about a larger backpack than you usually use on your daily photo shoot sessions.
I used the Tilopa 50 during this trip and it was for sure the right choice not only because of its rugged exterior protection but also because it fits everything i needed for this adventure, including a 100-400mm lens that i used for closed shots of the volcano (i had this lens in Guatemala to shoot the quetzal bird, but that’s a story for another post! )
For any further questions, you can find Marcello on his instagram profile: https://www.instagram.com/marcellocavalcanti1/

Conor MacNeill, also known as the Fella, is a travel & landscape photographer. His biggest passions always was traveling and exploring which actually brought him to photography. Now he does both with a focus on landscapes, cityscapes, and sometimes astrophotography or even Deep Space.
Conor's philosophy extends beyond photography; he's also on a mission to greet every street dog he encounters, adding a heartwarming touch to his travels. Filmed at the Pro Hangout in North Macedonia, Conor reveals his minimalist approach to travel photography, showcasing how he navigates the globe with a compact, yet powerful photography kit.
After a trip in Kosovo Conor visited us at the Pro Hangout in North Macedonia and walked us through his travel kit


"I am not just here because of the photography and meeting everyone, I am also here to say hi to all the street dogs! "
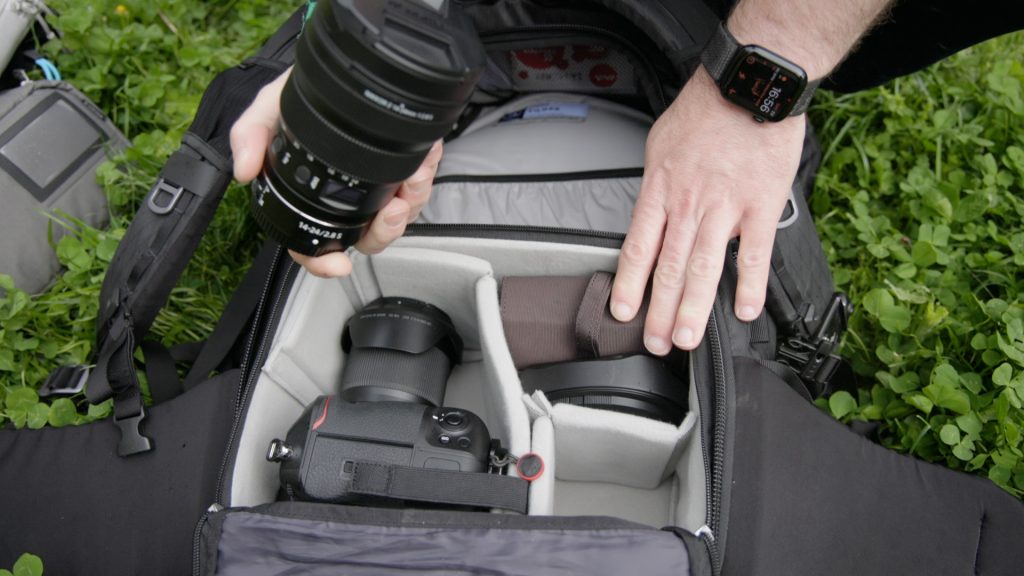
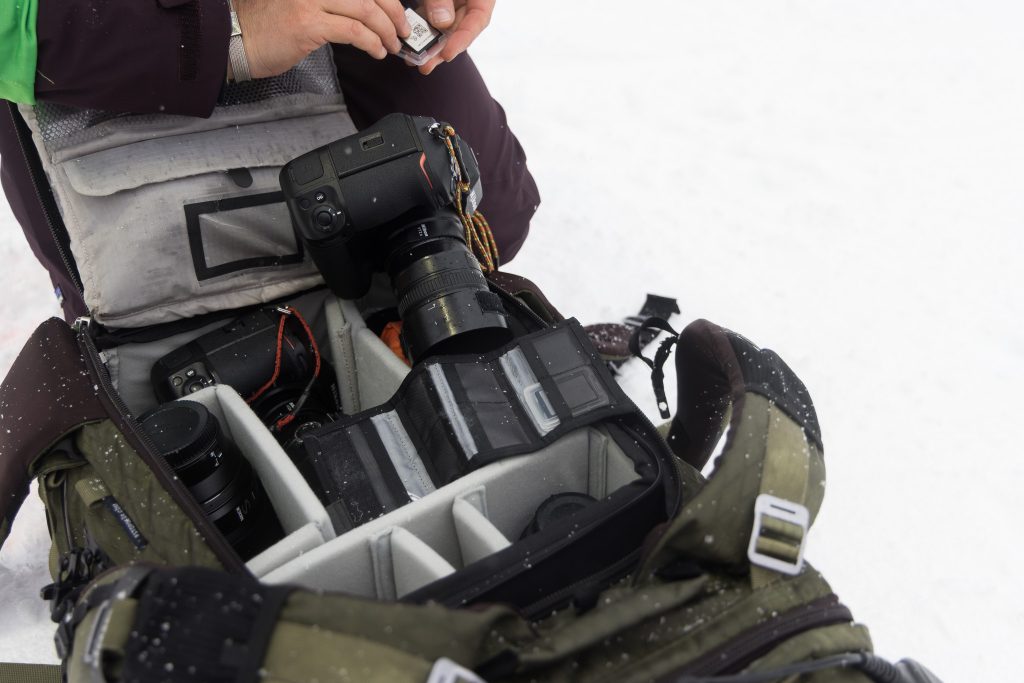
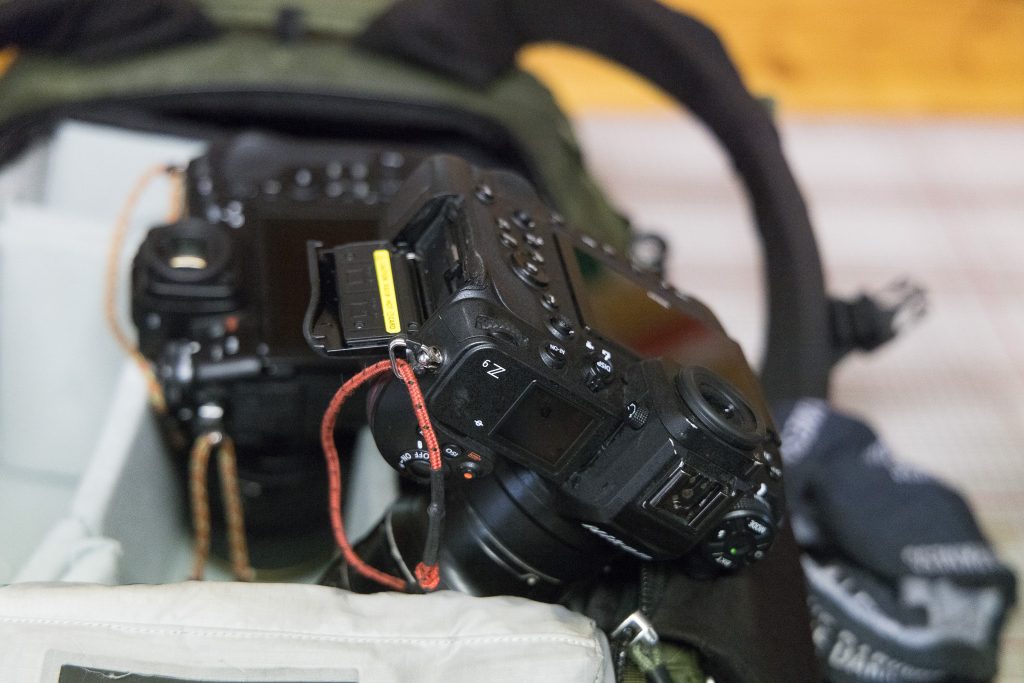
His Tilopa houses only his Small Pro Insert with one Nikon Z9Body with a Battery grip and 2 Lenses, a Lens Hood, a Filter case, a Tripod, a few receipts, a memory card case, and clothes. Throughout his traveling and multiple packing occasions, he learned packing light tailored for him without compromising. Conscious decisions about what to bring is his blueprint. Think about what you really need.
Which one is more important to you specifically – weight or variety of gear?
In the past, Conor had multiple Batteries with him for his Camera. For these, he had also different compartments in his pack arranged so he could know which Batteries were full or which were used. By now he is only using his Camera with the Built-in Battery Grip which gives him enough Power supply throughout the day. At night he just plugs the Camera in with USB C and charges it like this.
This Workflow also allows him to save weight and space on Batteries, chargers, etc. He reduced it to the most needed items.
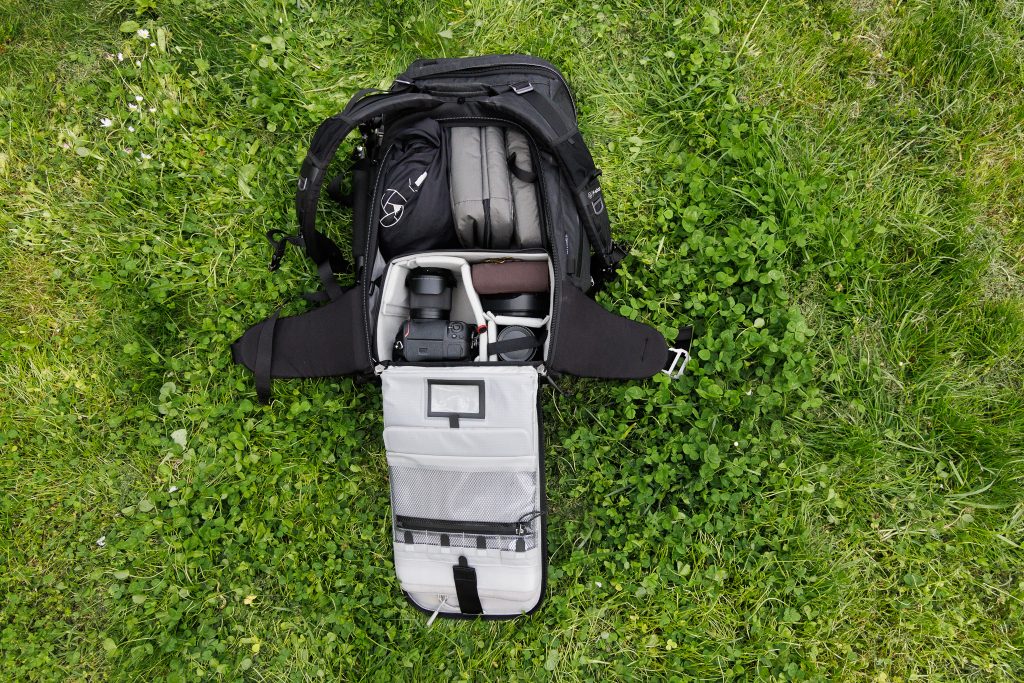
A look in his pack shows 4 parts of Cubes/pouches. Conor also repurposes some accessories like the dust cover as laundry bags in which the f-stop packs come shipped in, minimizing waste, and maximizing utility. He also gives the Accessory Pouches Large a different function to transport his clothing and keep it organized. Everyday items like socks, shirts, and undergarments are neatly packed away. The rest of his pack is very straightforward as well. Mesh pouches hold receipts and SIM cards or other items he needs when traveling for business while larger compartments hold his Gym Kit or a Jacket.
Heavier items, such as camera gear, at the bottom for optimal weight distribution. His laptop stays in the Laptop sleeve with an additional protective Case as well so he can take it out at airports and carry it around.


A well-padded laptop sleeve keeps my device secure, while a custom camera insert houses my essential photography equipment. Conor is selecting a compact kit tailored to my travel needs, including a large camera with a built-in grip and a versatile lens selection. USB-C charging capability further benefits my setup, reducing the need for multiple batteries. Having his items in different Compartments allows him to change, swap, and rearrange or similar quickly.

If Conor needs to take out the Camera Insert due to having to check in the Camera pack or he just needs to change it over in a different pack he folds up the flap of the insert, zips it up, and can carry it easily through the airport. Photos below show Conor with the Small Pro Camera Insert closed up - as he jokes with a camera Suitcase

Handling tripods can be cumbersome, especially during travel. With Gatekeeper straps, he fastens the tripod to the outside of the bag. The Bottom Gatekeeper strap over all three keeps the legs secure and the Top strap through two legs to secure it from slipping down.


In case Conor is planning to travel with small planes he makes his packs look more compact by removing the ball head and placing both the Head and the Tripod in his Camera bag next to the Insert. The Tripod without the Ball head perfectly fits in his Tilopa from the Height still, so a conscious decision on a tripod height or being able to remove a ball head is part of his strategy. For him, this is ideal for navigating through airports or tight spaces.
“As a conscious traveler, I strive to minimize waste and maximize utility. Making conscious choices that can enhance my travel experience!”
Connect with Conor : https://thefella.com
Nick's gear bag opens to reveal the main compartment, carefully organized to accommodate his primary camera system. His packing reflect Nick's commitment to professionalism and preparedness, vital qualities for any serious photographer or filmmaker.
...but as a vital component of a professional workflow.
With a nod to the unpredictability of industry Nick’s bag is not just a collection of gear; it is his safety net, ensuring that no matter the circumstances, he can always deliver.
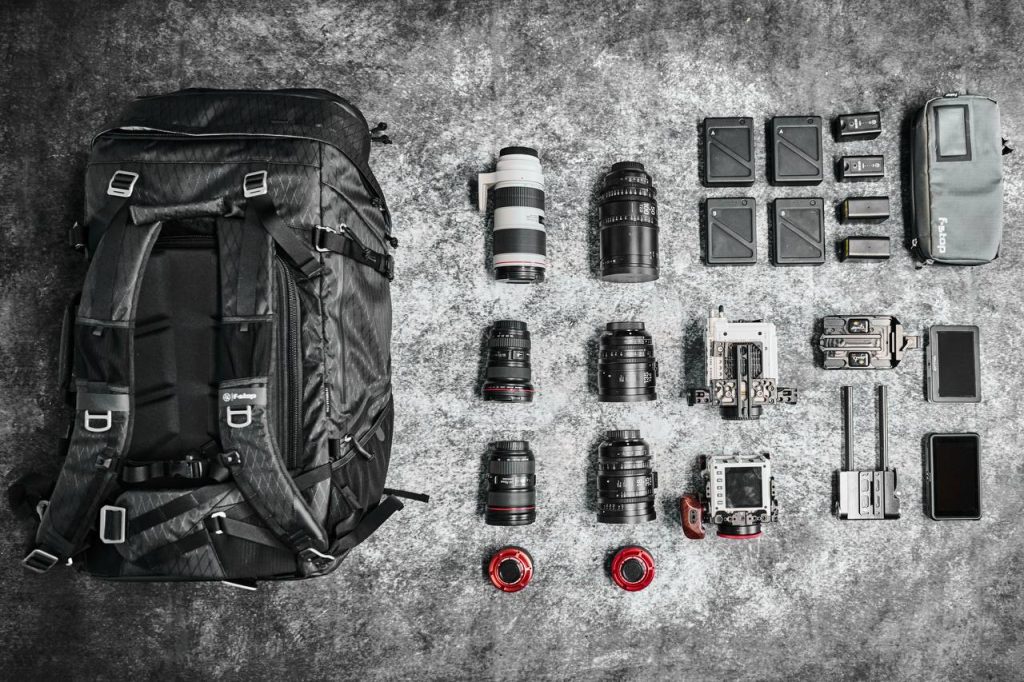
Nick relies on a range of gear depending on the project at hand. For smaller jobs, he opts for Nikon gear, keeping the load light and efficient. However, for larger shoots, he needs to utilize a mix of equipment, including drones, gimbals, and multiple camera bodies, such as RED cameras.
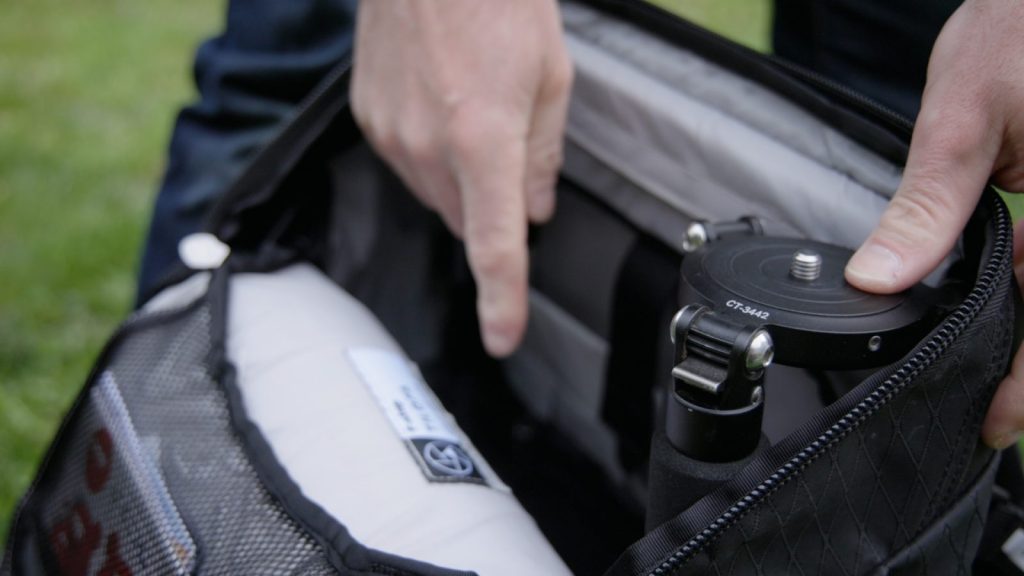
He takes advantage of the modular setup, utilizing interchangeable camera inserts (ICUs) often also pre-packed for specific applications. This allows for quick transitions between different types of shoots in between different packs. On the other side, he also stores the gear in the Camera insert at home in the Camera Units and just shoves in the pack what he needs.
"For me, it is the best way of keeping my gear organized when I'm not traveling. I just have things stored in Inserts at home like this, also ready to be put in a pack."
One of the most draining tasks next to shooting is to carry all you need with you from place to place. Arriving tired on set or just getting worn out throughout the day are two things Nick tries to prevent as best he can.
All the f-stop packs have a "comfort weight" as we call it and recommendations for carrying gear safely and comfortably, but what if you just need more?
Weight from not only the camera gear but also batteries, cables, hard drives, computer, and accessories quickly adds up. Nick has a high tolerance for the weight he can carry – so his comfort weight may not be the same as for someone else of the same build. A lot of factors come in here like condition, muscles, resilience, etc. Some say Nick is a packhorse when it comes to carrying gear - We call that dedication!
The first thing he does is to make sure he selects the right pack for the right needs. Every pack is purpose-built, and the f-stop pack up from 50 L has thicker padding to provide more carry comfort for heavier packs, longer trips, etc. His go-to pack is the Tilopa 50 L due to the compact weight distribution which allows him to carry everything as close to his weight center as possible. If he would need more room, he takes the Shinn 80 L.
Central to Nick’s workflow is the organization of his gear.
When packing, he rather takes the time he needs than pack in a rush. It needs to fit and fulfill his needs so smart arrangements will save him time, having to repack, and avoid any frustrations. When packing the Inserts for specific jobs, he just takes all dividers out and rearranges gear how it fits best.
Another big focus when arranging his gear is distributing the weight as evenly as possible and ensuring easy and fast access to essential items.
"I've always taken the approach that I can work harder and carry more as long as it's going to give me the best results. But I need to balance that with not being tired and wearing myself out or being slow. I need to be able to be agile. I need to have the gear that I need and not take too much whilst also having enough that I'm not left lacking."
Be creative Arrange the gear in how it works best for you specifically.
“I've been packing these bags for some time, and I find that the more creative I am and the more I allow myself to experiment and take my time instead of rushing, the better the outcome. Having redundancy in gear, even if it makes the pack slightly heavier, is far more important to me than the weight of my pack alone. Obviously, carrying weight safely is crucial, which is why I ensure everything is secured at the bottom. But as long as I'm packing safely and taking care of myself, avoiding arriving on set tired, I find it to be incredibly valuable.”
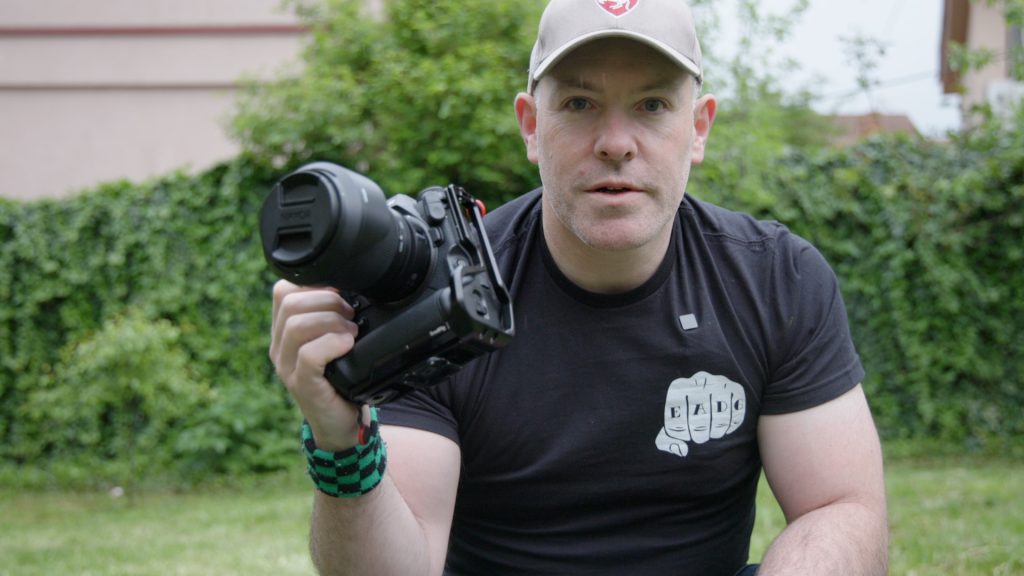
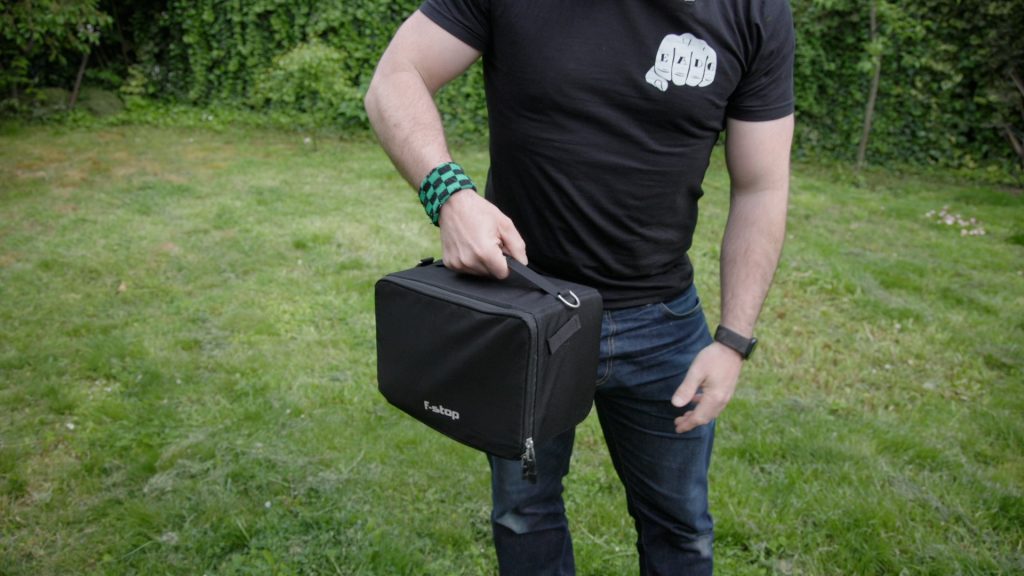
Nick Leavesley
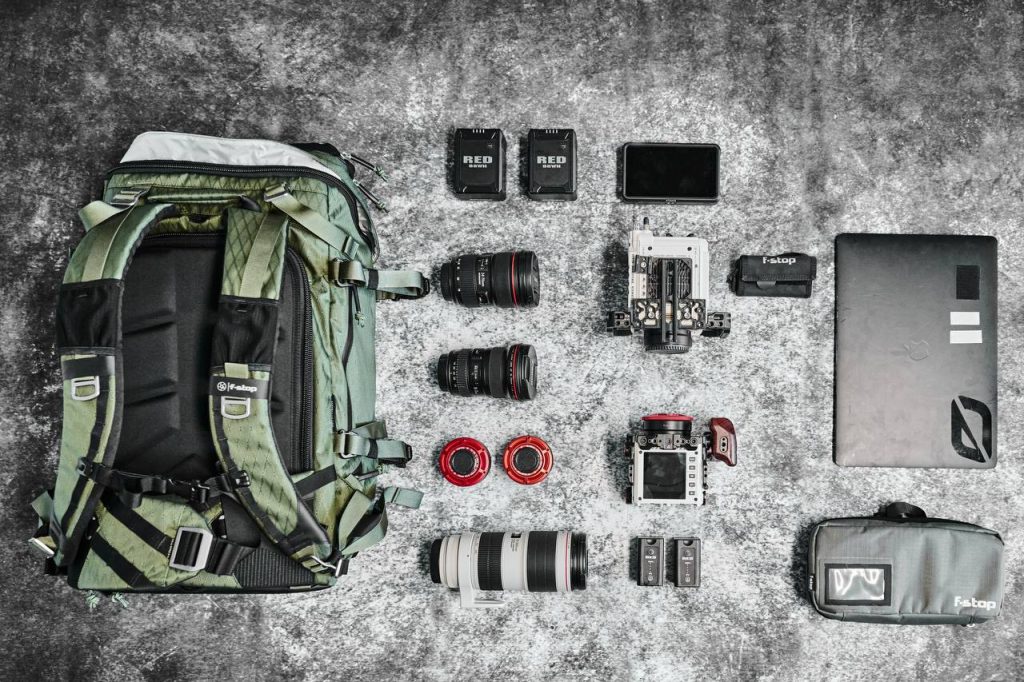
At the center lies his workhorse camera, a state-of-the-art RED model paired with two more Camera Bodies and lenses alongside a drone in this setup. He makes sure he is equipped to tackle any photographic challenge and be flexible and versatile for whatever he gets his teeth hooked in. To complement his RED setup, Nick also includes a compact DSLR as a backup camera, ensuring redundancy in case of equipment failure or unexpected contingencies.
Heavy equipment like the RED Brain camera, together with the V-Log and also the monitor adaptor for the RED 7-inch touch screen, is placed at the bottom to prevent any long-term warping of the camera insert and maintain balance during transport. He finds it's nice to be able to just put it pre-assembled straight in the bag. It saves me from having to assemble everything.
Nick is all about adaptability and preparedness. Through investment in versatile gear and a flexible organizational system, he avoids stress and saves time, so he can handle a broad spectrum of projects. Every aspect of his setup is designed to maximize efficiency and creativity in the field. Not needing to worry about where things are or having to repack his pack to stay organized is highly valuable for him and keeps him focused on what in front of him.
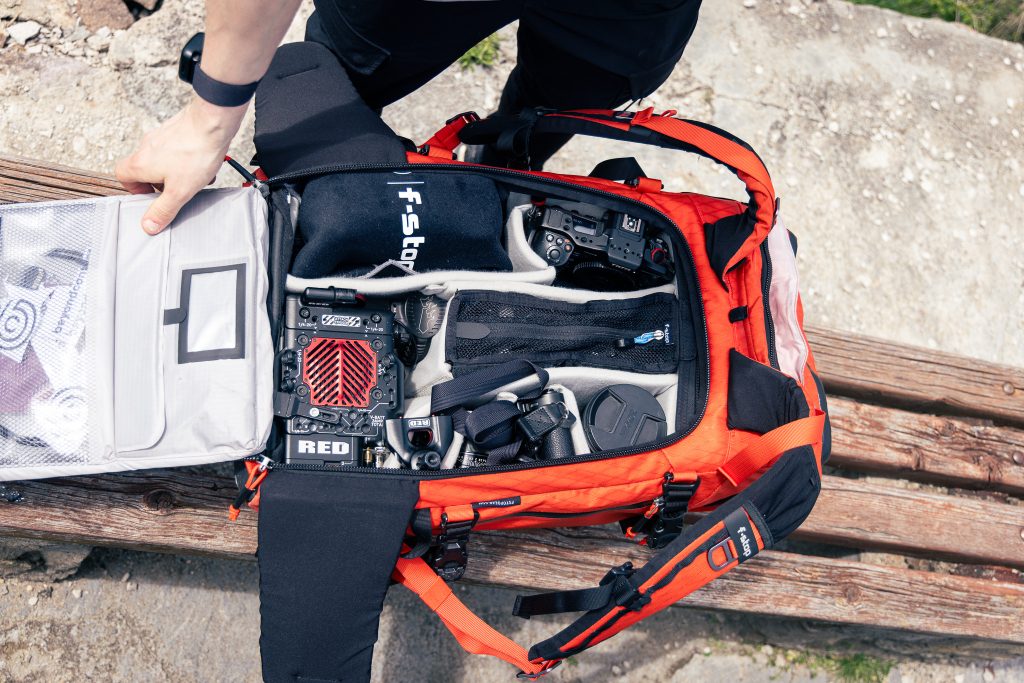
Items such as a drone (DJI Mavic 3 Pro or DJI Air 2), lenses, sound equipment, and accessories are strategically positioned for convenience and efficiency. He carries the Drone in a Protective wrap and due to the depth of the Insert can place another Lens stacked on top (in this case a 200 mm)
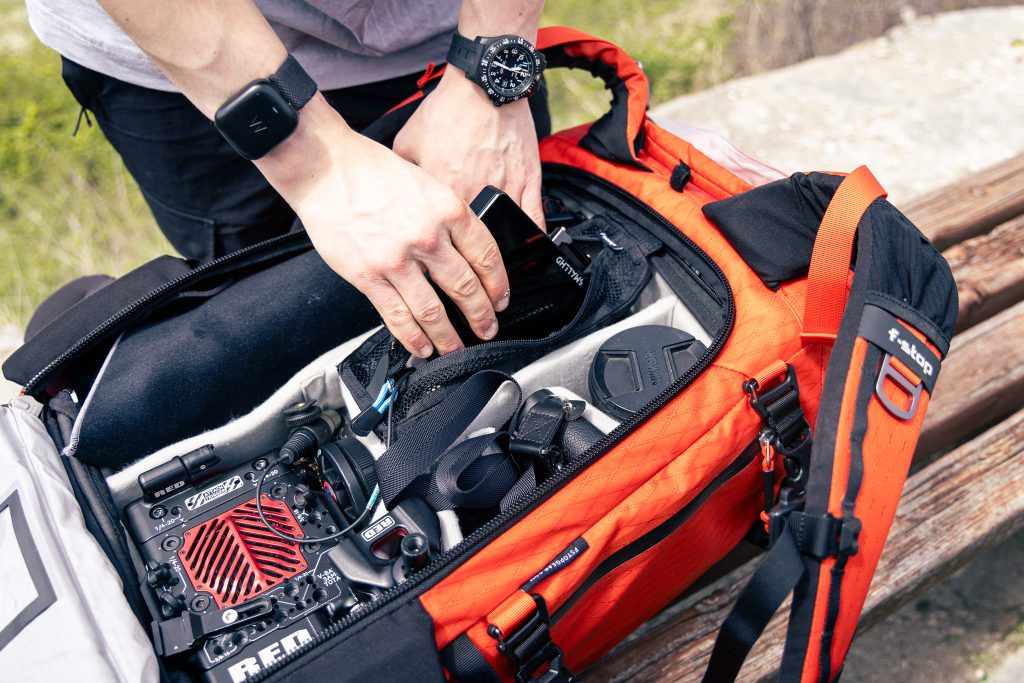
Adjacent to the main camera setup, Nick's gear bag houses an array of essential accessories He brings small accessories and cables in dedicated pouches and compartments to prevent loss and ensure easy access.
A robust V-lock battery pack ensures uninterrupted power supply throughout long shooting sessions, while a specially designed adaptor allows seamless integration of a seven-inch touchscreen monitor, enhancing monitoring and playback capabilities on set. Nick's dedication to detail extends to the placement of smaller accessories such as backup cables, chargers, and adapter plates for quick retrieval when needed. This organization not only maximizes efficiency during shoots but also minimizes the risk of misplacing or losing valuable equipment in the field.
He also always carries a variety of Gatekeeper Straps, allowing him to attach miscellaneous items outside the pack. Sometimes, he attaches a lens (in a case), a tripod, ropes, etc. One or two small carabiners are always found hooked in the gatekeeper attachment points.
"You never know when you're going to want to clip something to your bag, whether that's a water bottle or just a random kind of bag or something that needs to be carried. Sometimes I also use these gatekeepers to carry longer lenses, so if I'm doing any telephoto stuff, these will be perfect. I always go overkill on how many gatekeepers I need because on shoots, I often change this setup live. It's nice to be able to have the flexibility and plenty of gatekeepers to do that.
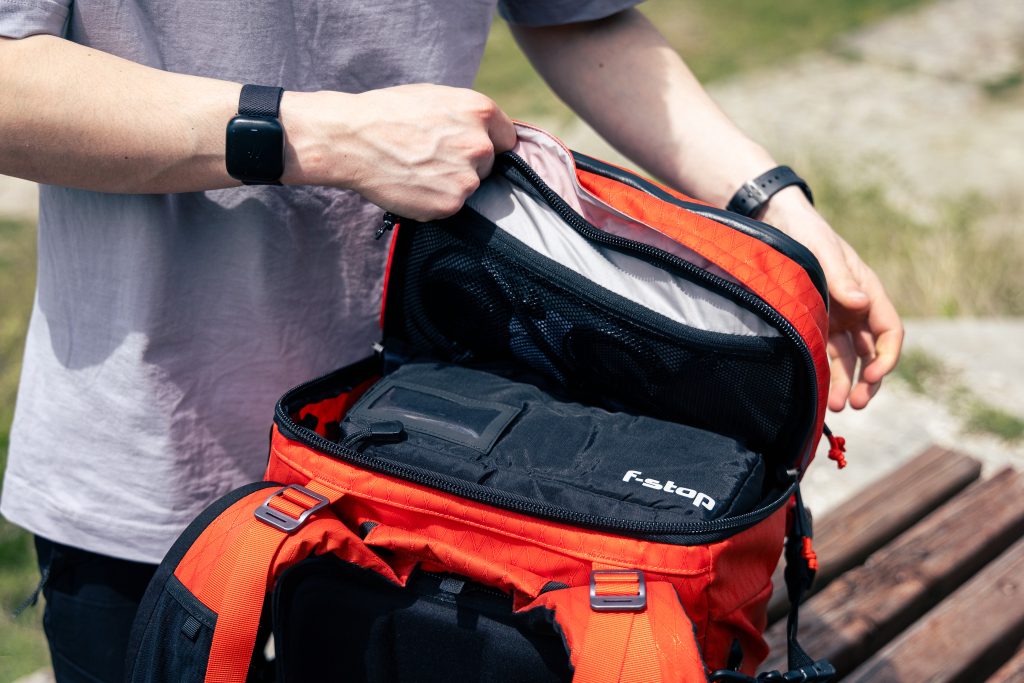
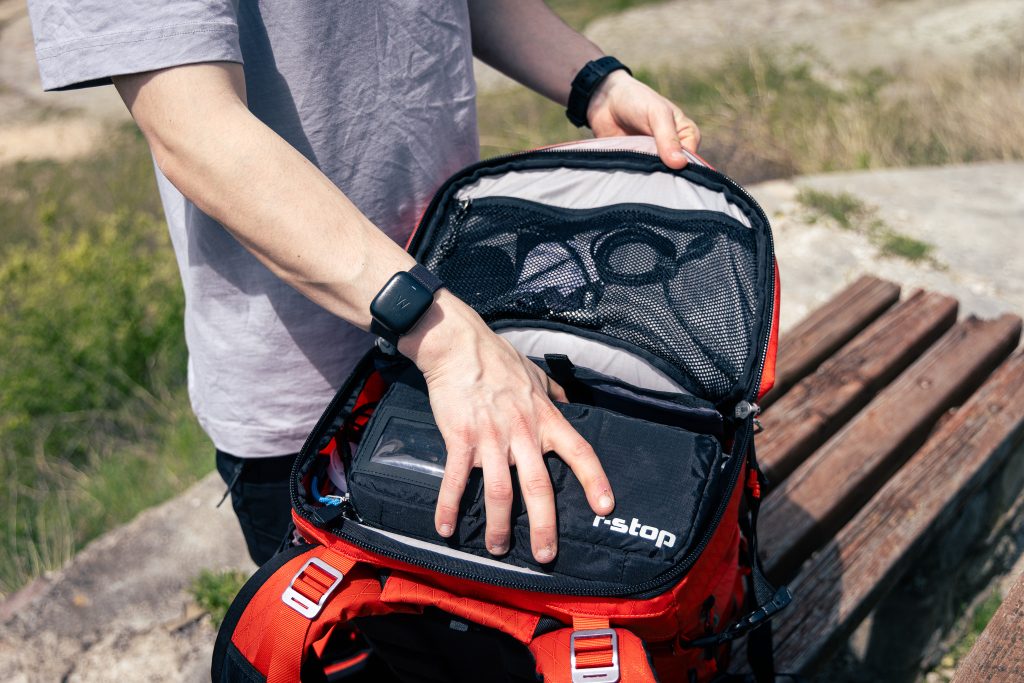
At the top of Nick's gear bag lies his mobile editing workstation. Nick always tries to bring a powerful laptop at all times. Currently, he is using the 16-inch M1 MacBook Pro.
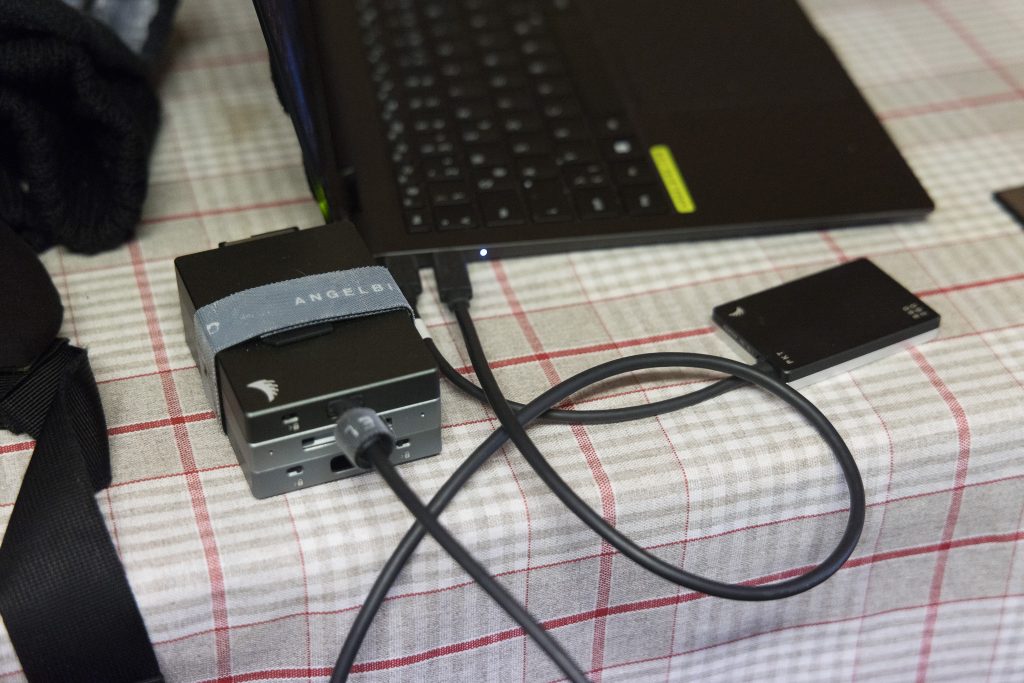
In a dedicated compartment within his gear bag, Nick stores a variety of hard drives and memory cards essential for data management and backup. Portable SSDs provide redundant storage solutions, safeguarding project files against loss or corruption. Spare cables are readily available for connectivity and data transfer. Data management remains a top priority, with redundant storage solutions and backup drives ensuring critical files are consistently safeguarded.

“I try and tailor my workflow around USB-C. I think it's a great format and allows a lot of flexibility and all of the computers I use can take USB-C. But I do need to make sure that I have cables in place so that if a client doesn't, I can give them a USB cable.
To store data securely and have all necessary resources at your disposal. At the end of the day, clients are paying a lot of money. He therefore maintains a few in-progress hard drives and hot spares ready, just in case of failures or the need for backups. When working in a team or with multiple bags Nick makes it a practice to distribute a project across two bags, mitigating the risk of total loss due to damage or if someone loses a bag. In challenging shooting environments stress levels can be high and distractions frequent. So you need to calculate this in.
“Given my frequent juggling of multiple projects, the ability to store five or six projects simultaneously is essential. This is particularly vital when working with RED cameras. TB quickly add up!”
In addition to video, Nick also captures stills, organizing hard drives by year or project. These drives contain not only the images but also the Lightroom catalogs. He maintains a separate directory for RAW files from Capture One at the top of each drive. Additionally, Nick always packs a few backup micro SD cards, which are easy to overlook but essential. For instances where a client needs a quick photo directly from the camera or a device, I ensure an SD card to lightning cable is on hand for immediate file transfer, facilitating instant sharing of quality images.
The importance of having all data backed up and securely stored can not be overstated. Losing data is not an option; thus, whether through cloud backups or multiple hard drives, safeguarding data is imperative.
The front pocket! This is one of my favorite parts of the Tilopa because it allows me to store my batteries in a very efficient way, especially the V-mounts. It's deep enough that I can store two of them stacked sideways, effectively fitting almost double the number of batteries in this space. At home, I might even have up to eight V-mounts neatly packed in this top section.
Connect with Nick . https://www.instagram.com/beyondnick/
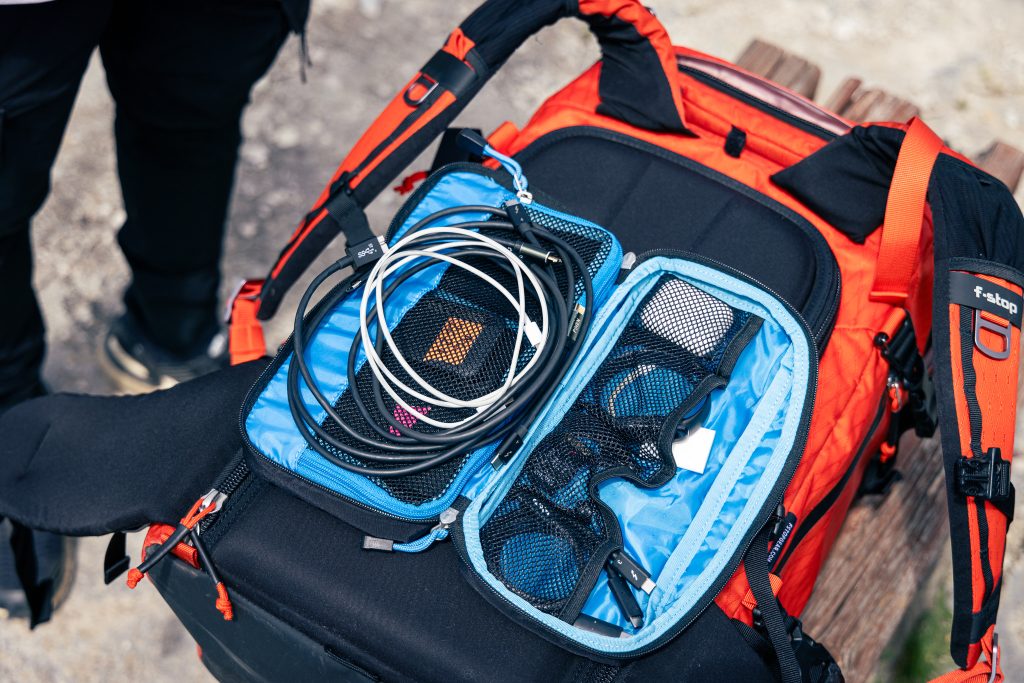
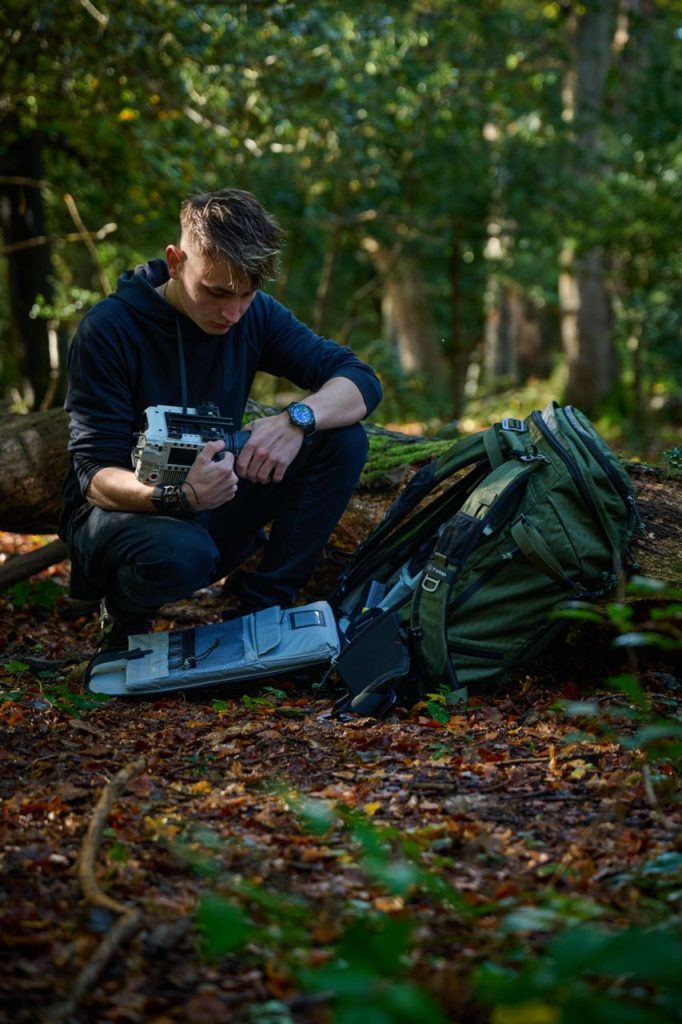
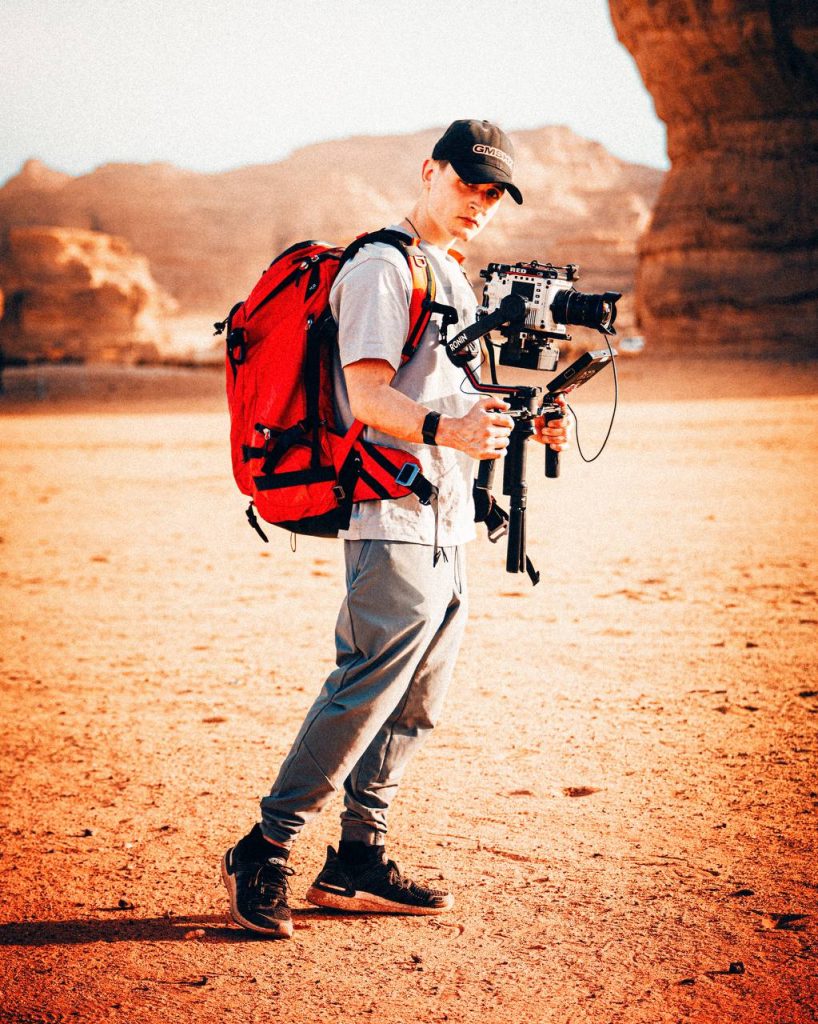
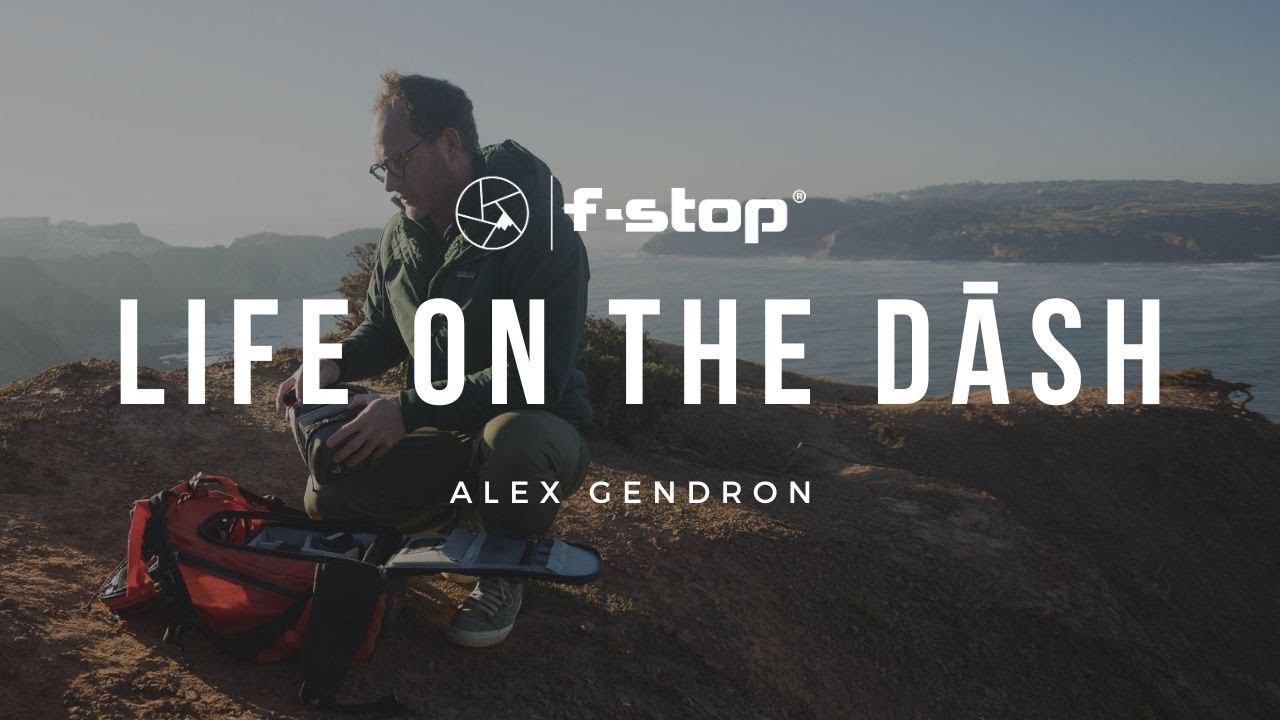
f-stop Ambassador Alexandre Gendron visited us in Portugal during our Pro Hangout. While he was with us, he walked us through his travel setup, using his AJNA 37L DuraDiamond®. Read more below about the tips and tricks that make his life as a working professional easier!
"When it comes to packing and organizing for any photo shoot, whether it is real estate, adventure, or travel photography, I believe in thorough preparation and attention to detail. Firstly, I have my checklists for all the necessary equipment, depending on what I will be shooting. This ensures I have my key equipment, such as camera body, lenses, tripod, spare batteries, memory cards, and any other specific gear required for the shoot.
I prioritize lightweight and versatile gear for adventure and travel photography that can withstand various weather conditions and rugged environments. In terms of physical organization, I use my f-stop AJNA for shorter trips, or my Tilopa for longer journeys with the Medium Slope - Camera Insert to safely store and transport my gear. This ensures everything is easily accessible and protected from any potential damage." - Alex Gendron

To organize and prep for a shoot, I have three top tips and tricks that could enhance your travel experience.

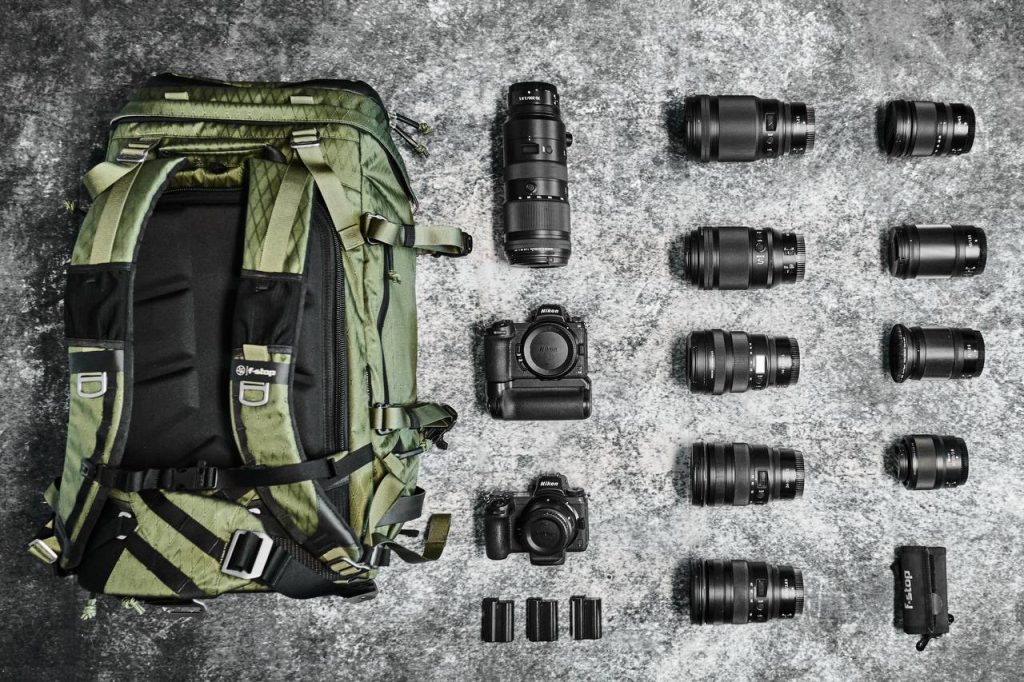
Alex's equipment consists of the Ajna 37 L DuraDiamond® (Magma Red) along with the Medium Slope Camera Insert.
He shoots with the Canon EOS R5 and R7 bodies, the Canon RF 15-35mm f2.8, Canon RF 24-70mm f2.8, Canon RF 100mm macro f2.8 and the Canon RF 100-500mm f4.5-7.1 lenses.
The additional gear he carries when needed includes his Binoculars for wildlife (vortex 10x42), a Drone (DJI Air 2s and DJI Air 3), and a tripod which is attached to the outside of the pack. For overnight trips, he uses an insulated mattress (thermarest Neoair Xtherm) and a sleeping bag. In our video, Alex has brought his travel kit, consisting of the Canon EOS R5 with the Canon RF 24-70mm and the Canon RF 15-35mm.
He uses the f-stop Filter Case with his K&F Filter kit ( ND and Graduated ND filters) and sees his Navin Pouch DuraDiamond® as a must-have for hiking.
Alex also uses the Tilopa 50L and occasionally the Sukha 70L along with his Pro Large Camera Insert. His main setup is the Pro Small Camera Insert or the Medium Slope - Camera Insert paired with either his Ajna 37L or his Tilopa 50L backpacks.
As a professional photographer for more than ten years, Alexandre has a taste for adventure and the great outdoors. In 2013, he left Paris for Australia, where he honed his skills as a photographer.
Seeking new challenges and adventure, he returned to Europe in 2016 by bicycle. He cycled 14000 km and travelled a further 8000 km, mostly on sailing boats, hitch-hiking from marinas and boat yards, to Vietnam where he ended his bike trip and trained to become a yoga teacher. He then travelled through France, Italy and Switzerland by van, before returning home.
He now teaches photography and explores the natural spaces of the Annecy region. His work has a refined style that often emanates a mystical ambience.


Everything is constantly moving and changing. When you are always transitioning from one assignment to the next, life can be hectic. Saving space, distributing weight, and planning ahead for a day in the field are all essential considerations when you are on the go. Join us as our Ambassadors share tips and tricks they have learned over years of traveling, with Life on the Dāsh.


If your sternum strap was snagged and become detached from your legacy or classic Mountain Series pack, reattachment is simple, easy and secure.
All you need to do is follow these simple steps to get you ready for your next adventure:
1. Make sure that your strap/buckle is facing outwards from the pack
2. Position the sternum strap attachment point against the rail on your shoulder strap at around a 45 degree angle and push towards the rail
3. Wiggle the sternum strap attachment point as you push in a downward motion. This will encourage the attachment point to wiggle onto the rail.
4. Keep pushing and wiggling until the attachment point is firmly on the rail. That's it. You're ready to get back out there.
Remember: Enjoy the Journey. Be safe. Keep telling stories!
Note: This applies to legacy or classic series f-stop Mountain Series camera packs such as the Lotus, Ajna, Tilopa, Sukha and Shinn.
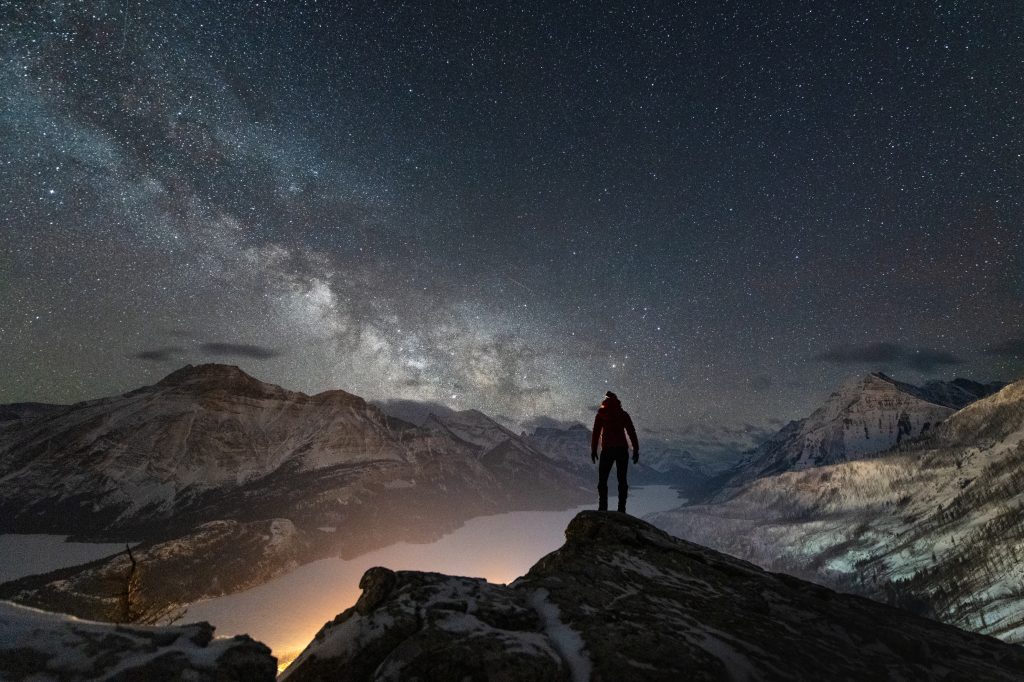
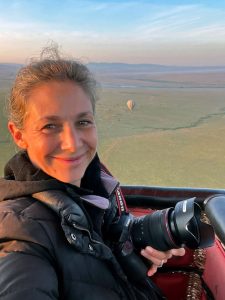
We were delighted to hear that our Pathfinder Ambassador and Astrophotography specialist, Monika Deviat won the Aurorae Category of Astronomy Photographer of the Year with her image "Brushstroke". She was also then featured in a mini documentary by the Royal Museums Greenwich, which explores her experiences and highlights her creative process, perfectly showcasing her talents behind the camera with her favourite backpack: the Tilopa 50L DuraDiamond®.
Monika loves astrophotography as well as night photography in general and shares her passion with others through workshops. But there is more than meets the eye to the Alberta-based photographer. She is a metalhead, pole and aerial instructor, educator, and speaker, which are all personified in her work.

The quality of Monika’s work speaks for itself. Her level of experience is evident in every frame she captures, which is why she is the perfect person to give you essential tips on shooting the Northern Lights:
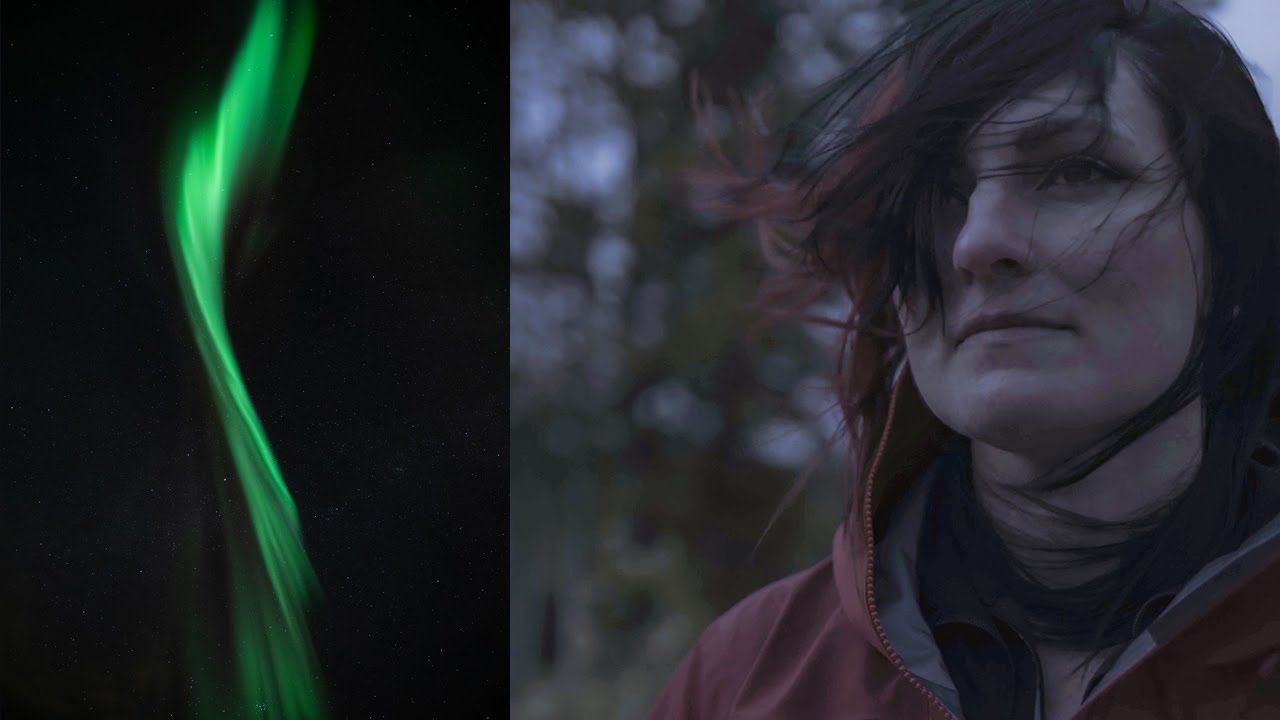

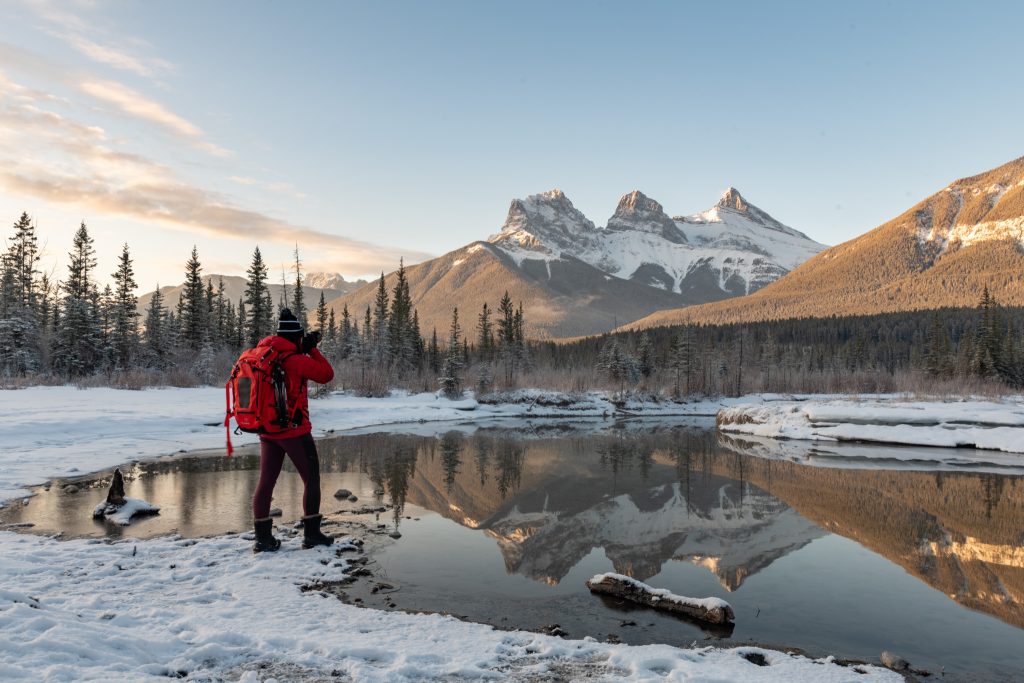
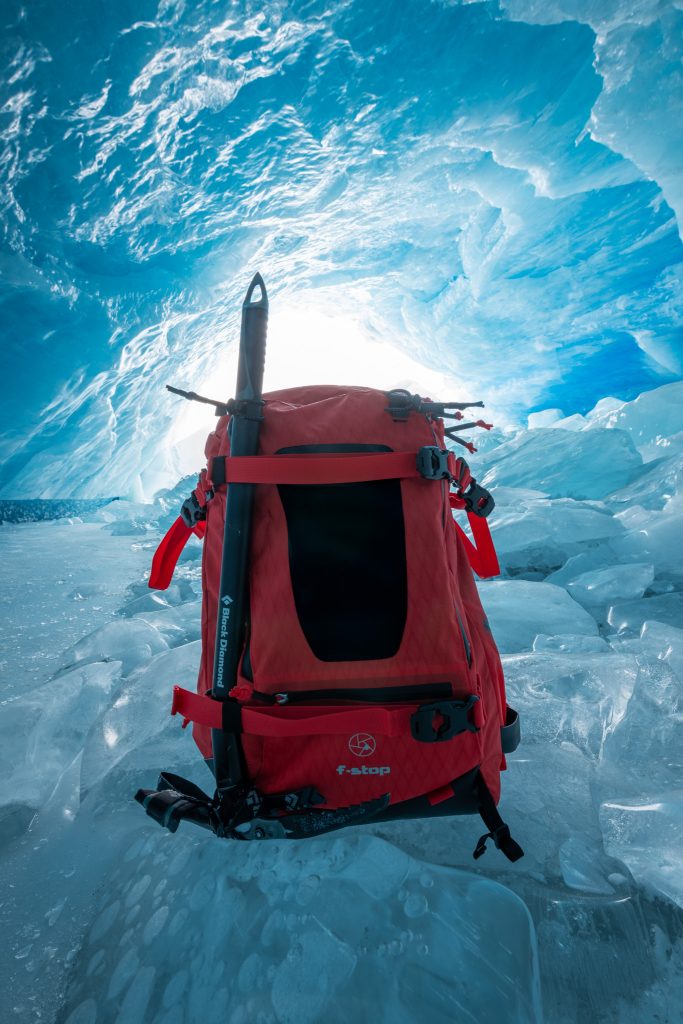
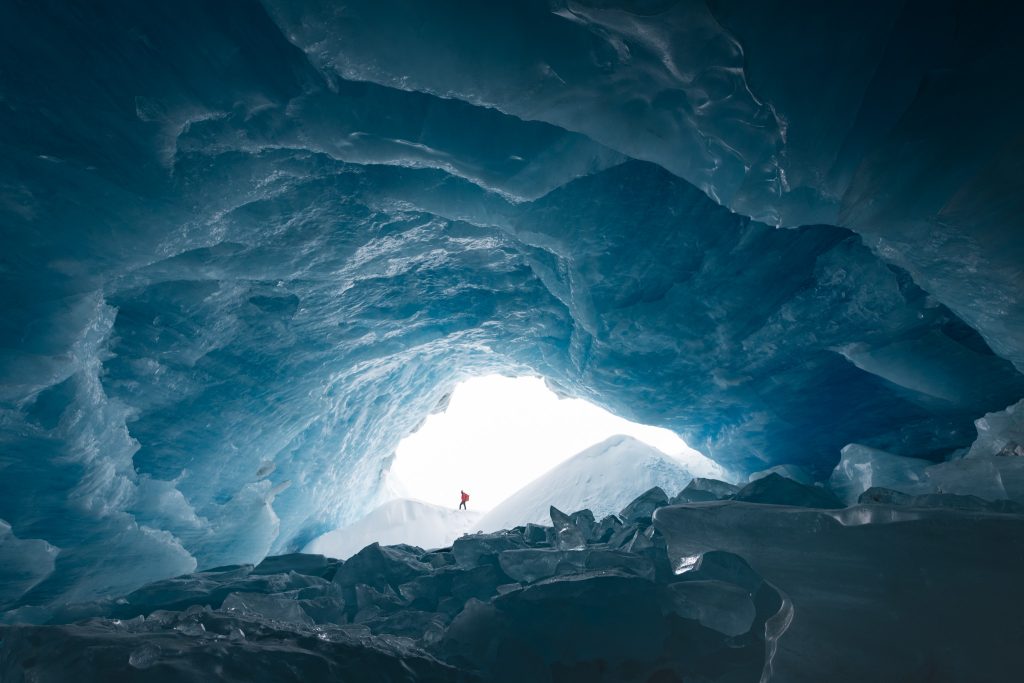
f-stop Ambassador and Astrophotography specialist, Monika, states that her two go-to backpacks are her Tilopa 50L DuraDiamond® in the Magma Red color option and her Ajna 37L DuraDiamond® in Anthracite Black. Her Tilopa travels with her for most adventures, including visiting ice caves in glaciers in the Canadian Rockies, hauling night photography gear up mountains and road trips to badlands. The Ajna is usually her travel pack pick when she needs to stay agile or deal with space restrictions on vehicles or with groups, but does occasionally go on mountaineering trips with her.
For more adventurous trips, Monika uses the Medium Slope Camera Insert to keep her kit safe and organized. This still gives her enough space for a camera body or two, two or three lenses and leaves room to add things like Avalanche Gear, cookies (Essential!), water bottle, thermos, extra Layers, first aid kit, and various small accessories. Her crampons/micro spikes, ice axe and tripod attach securely to the outside of her pack using the Gatekeeper Straps and the other various attachment points.
Monika uses her Pro Large Camera Insert for photo-focused trips that need less adventure gear. For an "easy" night hike up a mountain, Monika will take two bodies, three lenses, two tripods, a star tracker, extra layers, water, thermos, snacks, a first aid kit, and camera accessories.
Competition: https://www.rmg.co.uk/whats-on/astronomy-photographer-year
Website: https://monikadeviatphotography.com/
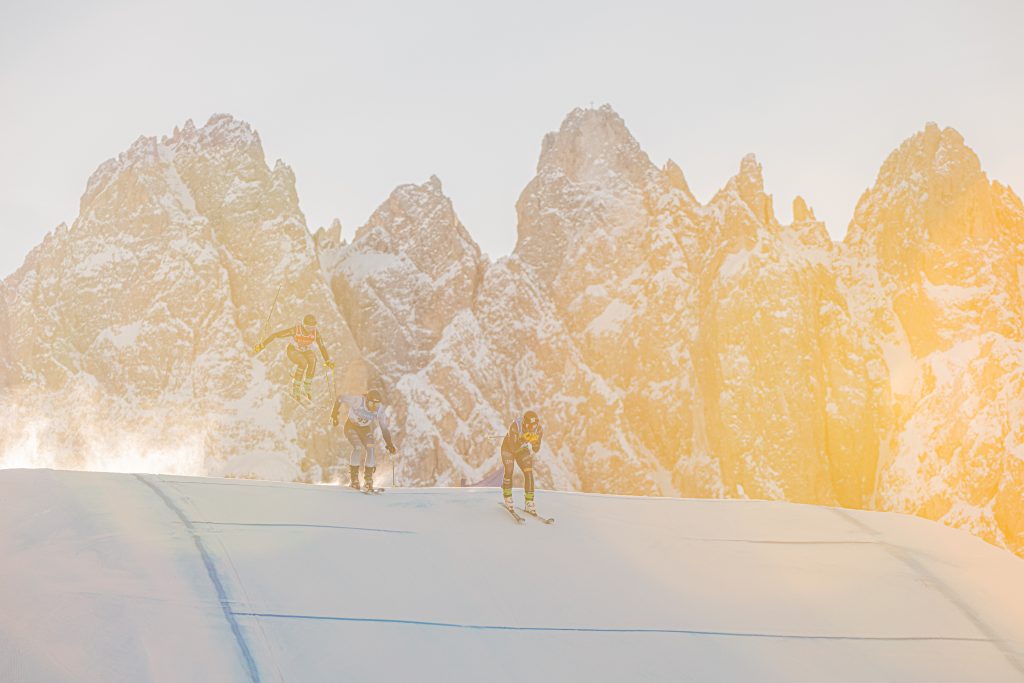
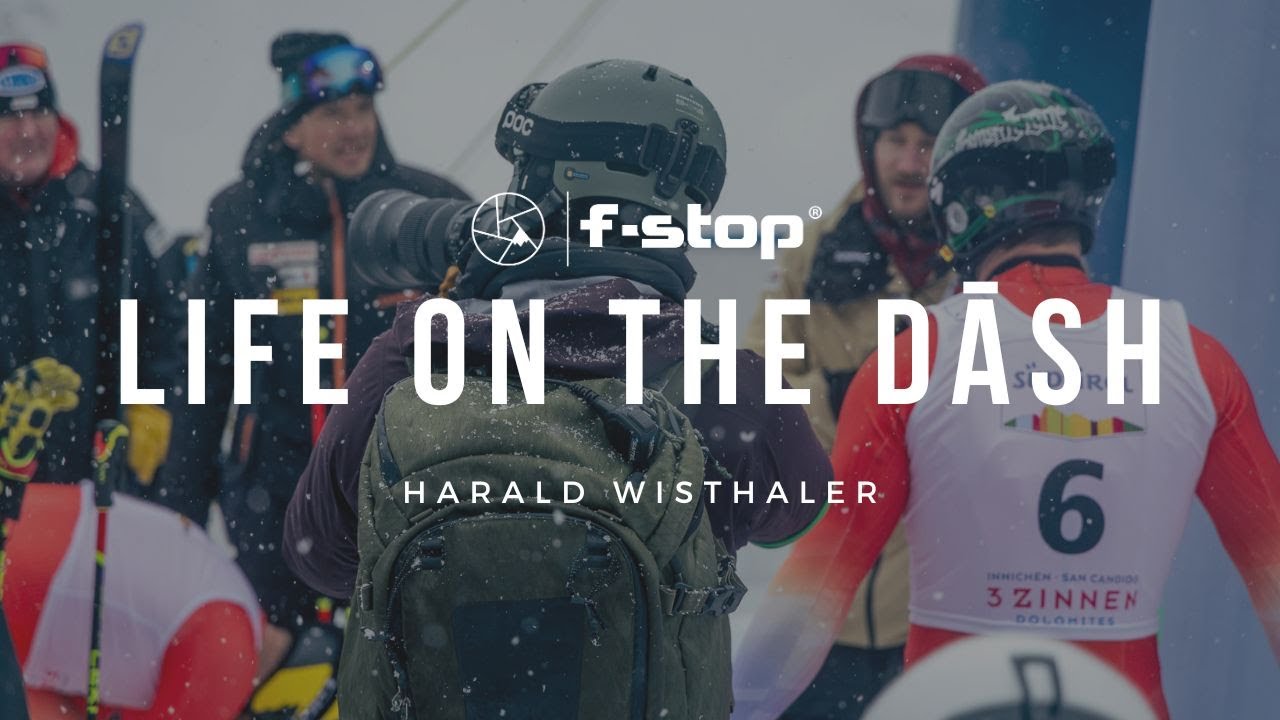
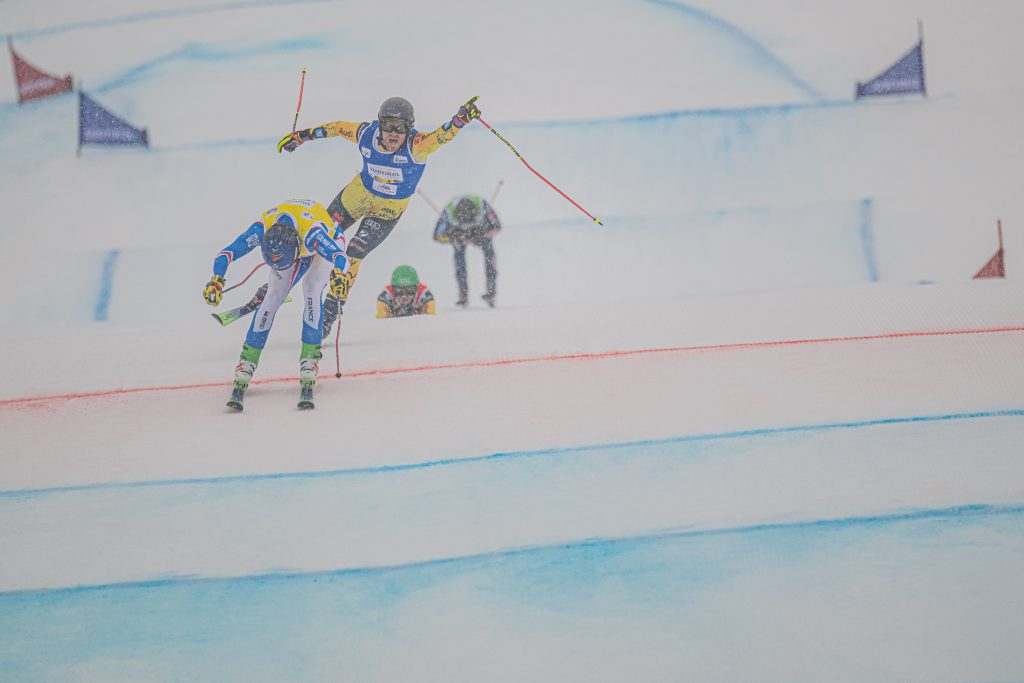
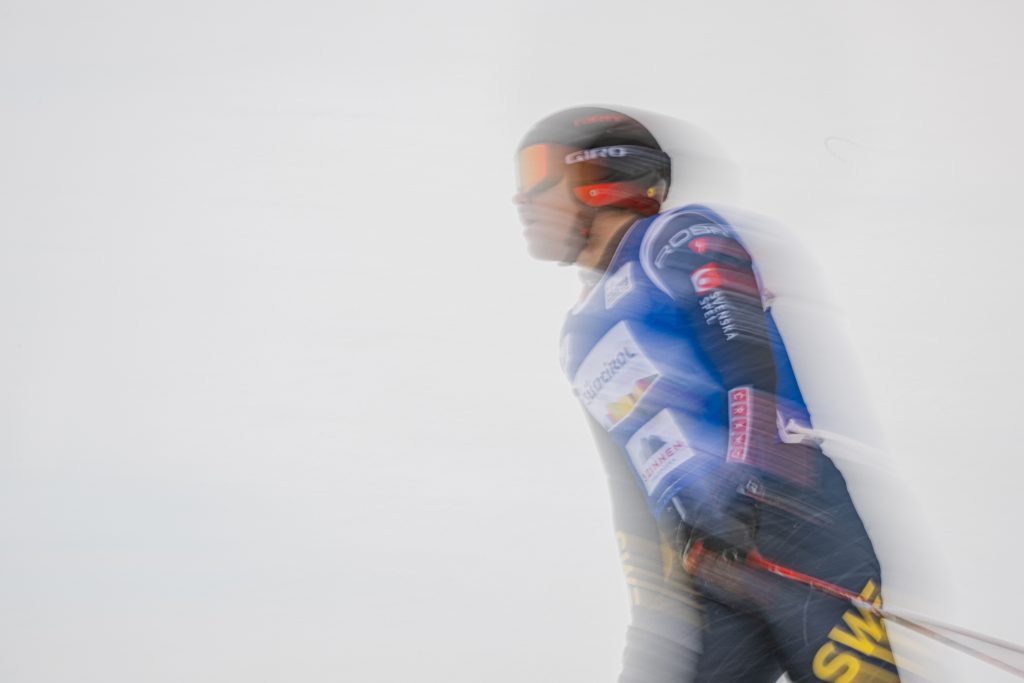
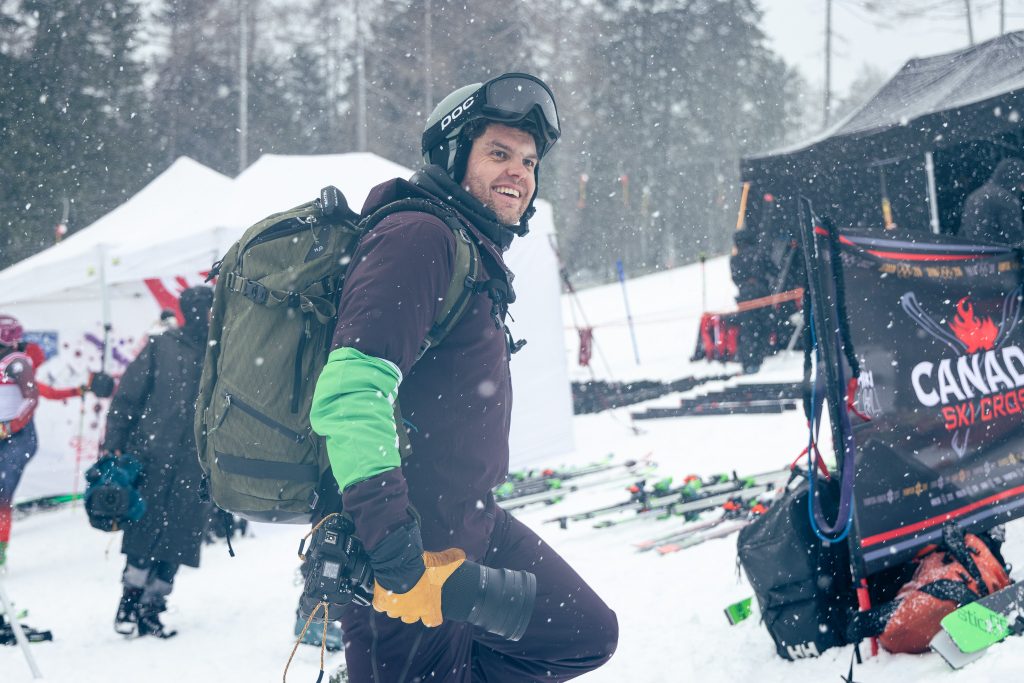
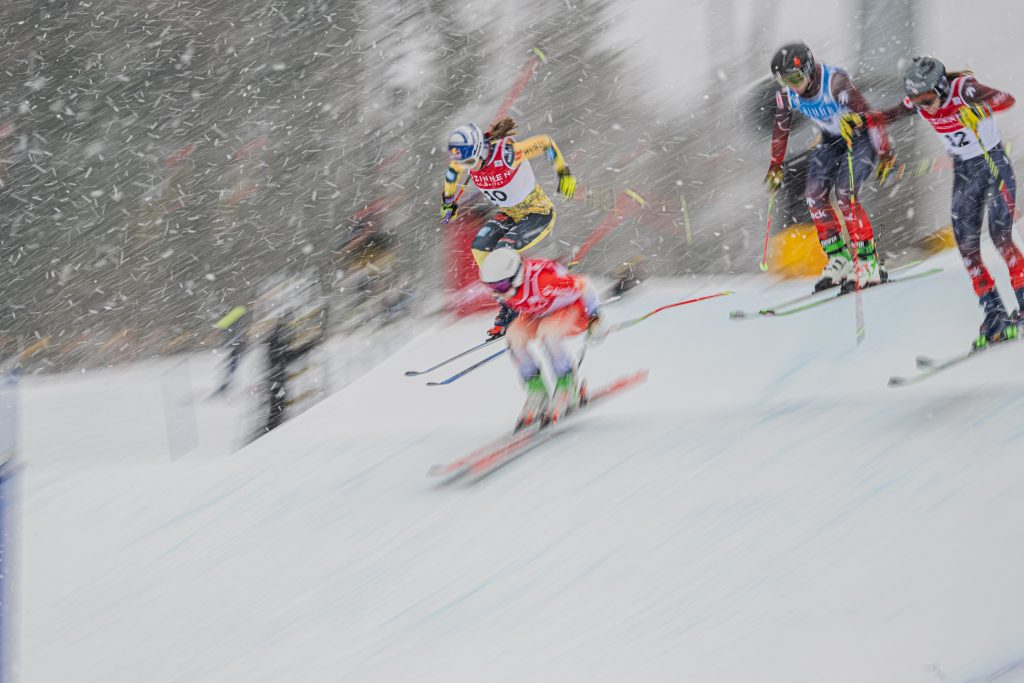
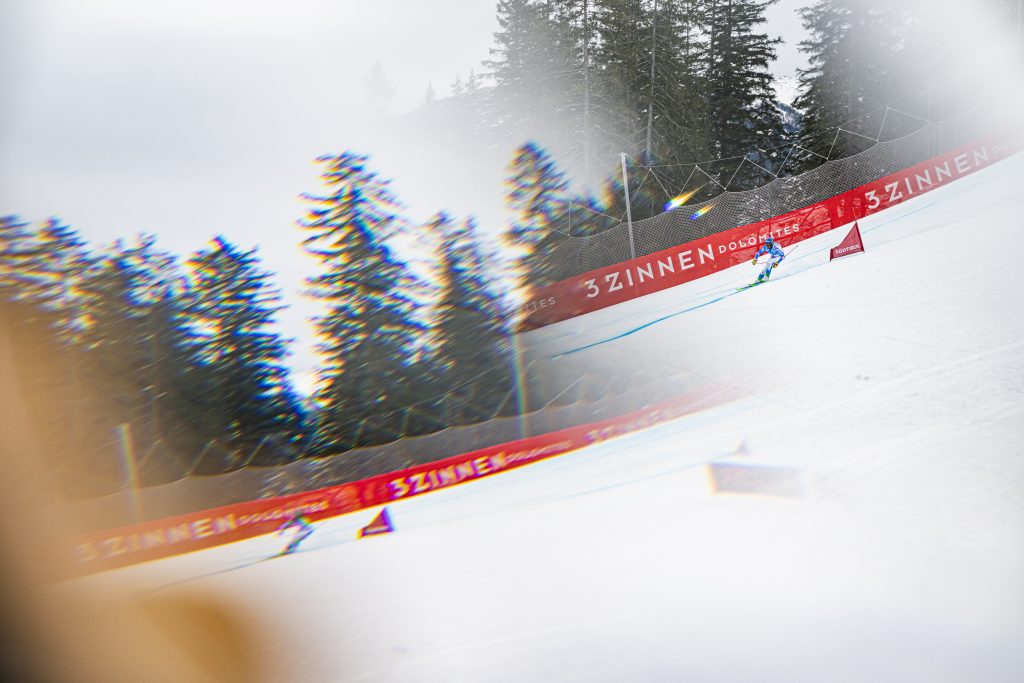
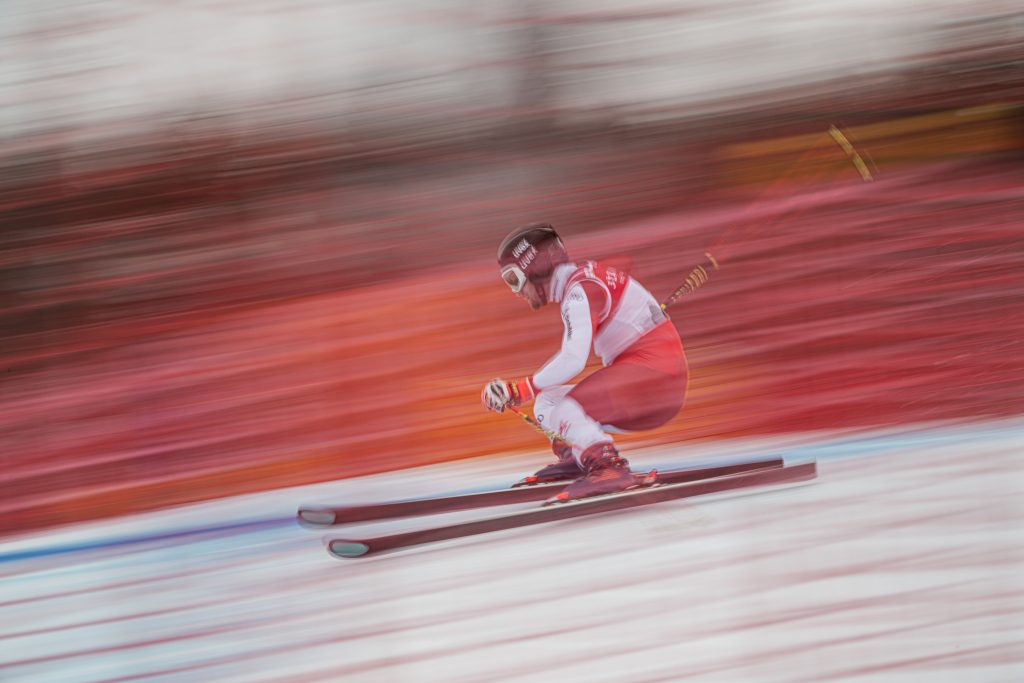
In outdoor sports photography, being prepared is not just about skill, creativity and having the right gear. It's also as much about your level of organization and how you pack. Join us as we explore the world of Pro Photographer and f-stop Ambassador Frien Harald Wisthaler, as he navigates the demanding and exhilarating world of the Ski-Cross World Cup in Ineichen.
Nestled in the Dolomites, Harald's home in Italy (South Tyrol) offers the perfect canvas for his 15-year photographic journey. His latest challenge? Only capturing the high-speed action and raw emotion at the Ski-Cross World Cup.
The Gear:
The toolkit at Harald's disposal is as diverse as the sport itself. With his Mirrorless Nikon camera bodies, his range of lenses from wide-angle to super telephoto lens sets, alongside protective gear and outdoor wear, he geared up for a vast range of shooting situations. But it's not just about having the right gear; it's about knowing how to pack it. Harald emphasizes the importance of being consistently organized, but also flexible, often changing the equipment he packs based on the day's conditions and location scouting insights.
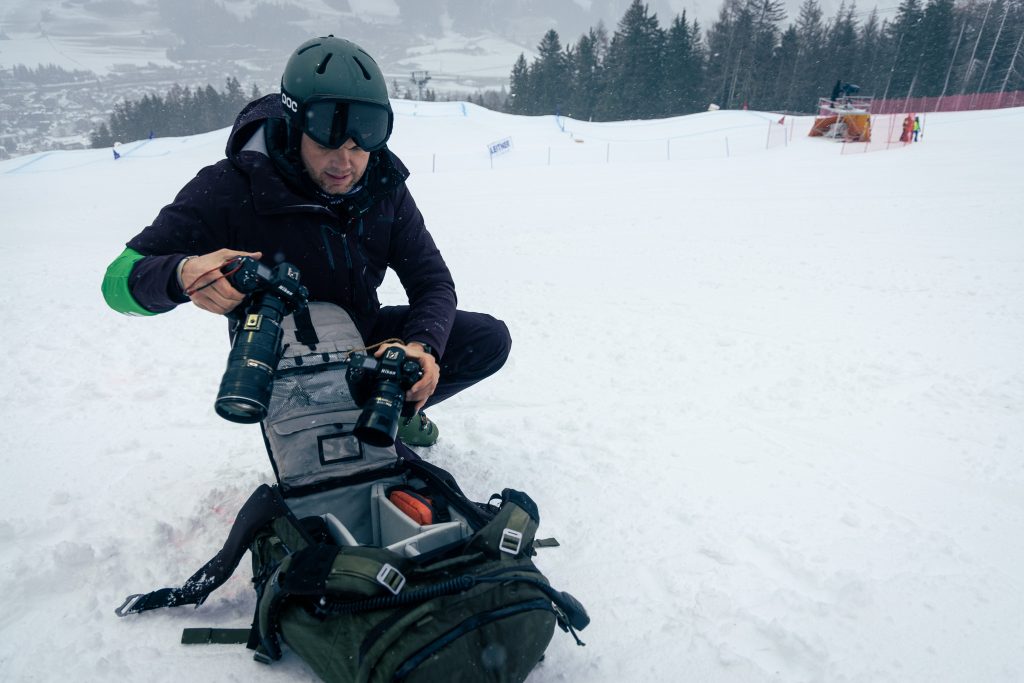
Proper Preparation: Harald told us that his number 1 tip is to not only make yourself familiar with your camera and lenses but also get to know the features of your bags. Look at all pockets and ask yourself why these are there and for what scenario you can use them for yourself! Make the gear yours and really get to know the equipment you're working with. This will help you work smarter and faster in almost every aspect when you're in the field and will make dealing with issues and obstacles a breeze.
OV German - Turn on the Captions for English translation
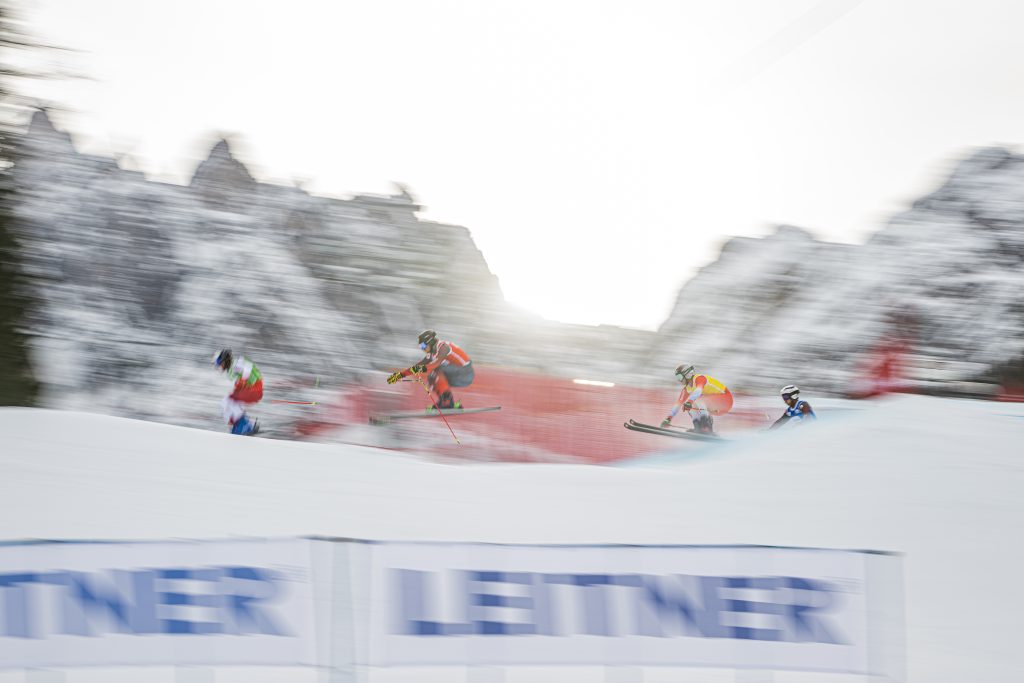
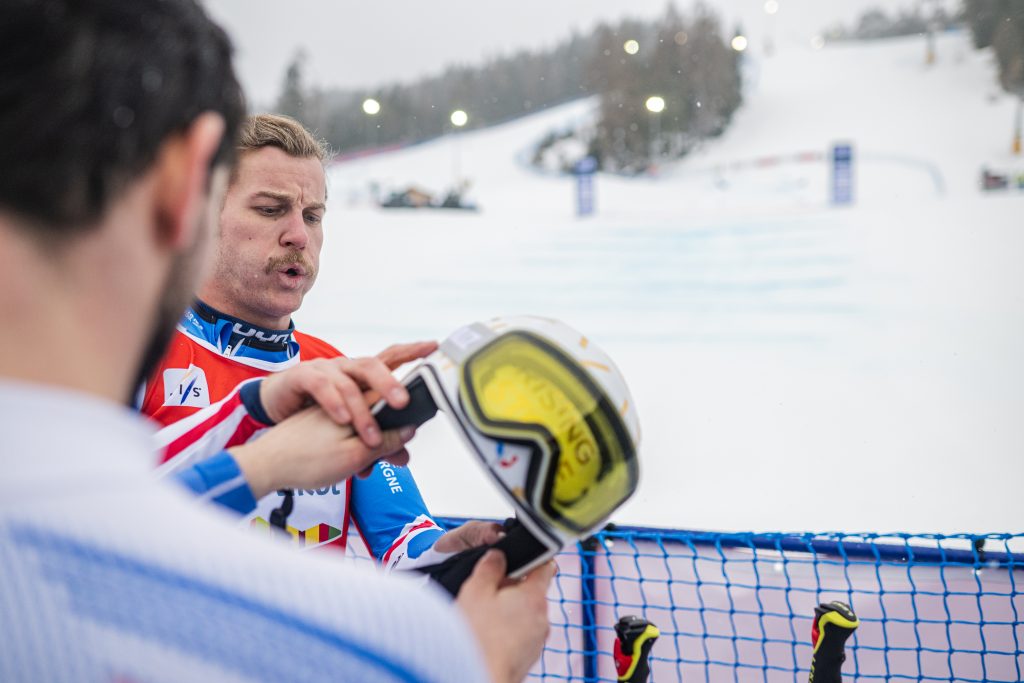
In the fast-paced world of sports photography, being prepared and flexible is just as important as having a keen eye for the shot. At the Ski-Cross World-cup, Harald faces unique challenges. His Office is situated just next to the ski slope, which for him has its pros and cons: He is always right in the middle of everything, no matter what.
To shoot an event like this effectively, you must always be ready to go, constantly aware of the schedules and factoring in the time you need to get up and down the slopes; and of course, adjust to the weather. When the race starts, everything is finished in 50 minutes. Choosing the right spot to bed in is crucial. Getting the shots you need requires strategic planning and sometimes a bit of luck. You need to be aware that moving positions during races is often not feasible and you cannot cross the race areas, so choose your position based on your goals.
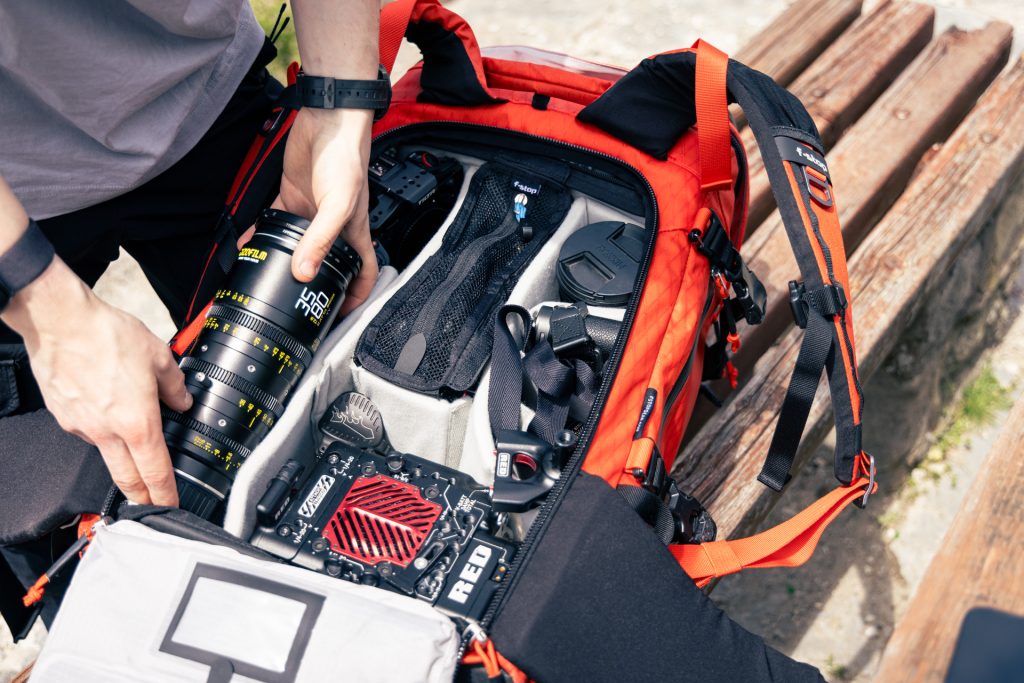
Harald's passion for photography stems from far more than simply clicking the shutter. The journey to each shoot is just as important to him. Whether it's World Cup events or serene mountain vistas, Harald knows that each adventure starts with a well-packed bag. Harald swears by his f-stop Tilopa DuraDiamond® 50l pack, a reliable companion on all his escapades.
The key, he says, is consistency and preparedness. He packs the same way every time depending on the situation, ensuring he can find everything in a flash - be it his trusty 50mm lens or a crucial first aid kit. By keeping his pack consistently organized, ensuring he can quickly grab the right lens for the shot without a second thought. His advice? Keep your setup routine and familiar, so you're always ready, regardless of the conditions or the rush.
A Strategy for Every Shoot: Whether travelling by car or tackling unpredictable terrain on foot, Harald appreciates the versatility of his f-stop Camera Inserts. They allow him to switch lenses, gear and setups quickly, adapting to changing scenes and moments. This flexibility is crucial, especially when pre-event scouting isn't an option. He usually brings a second Camera Insert with him in the car filled with potential other lenses he might need. Depending on what the location offers, he has the option to adapt and get the best outcomes.
Harald utilizes a variety of equipment when he is out in the field. On this shoot he brought following gear with him:
Learned Wisdom: The devil is in the details – or in this case, in the packing. Harald keeps his bag organized the same way regardless of the shoot, which makes adapting on the go a breeze. His approach is to make every slot and pocket useful to him! He also has a few more tricks up his sleeve. Also, he’s a firm believer in packing the little extras that you might not need. You never know when that ‘just in case’ item becomes a lifesaver.
On the final day, the weather closed in. Ineichen offers a stunning mountainous backdrop, but with snow coming in, Harald had to adjust his approach. Instead of isolating individual participants with his telephoto lenses, he adapted to shooting on a wider field of view. He then incorporated long exposure to highlight the dumping of snow and the speed of the race. Finding a darker background and panning his camera with the subject helped Harald make the most of the situation and produce his usual exceptional standard of work.
Harald Wisthaler
Stay flexible, stay responsive, and prepared to adapt at a moment's notice.

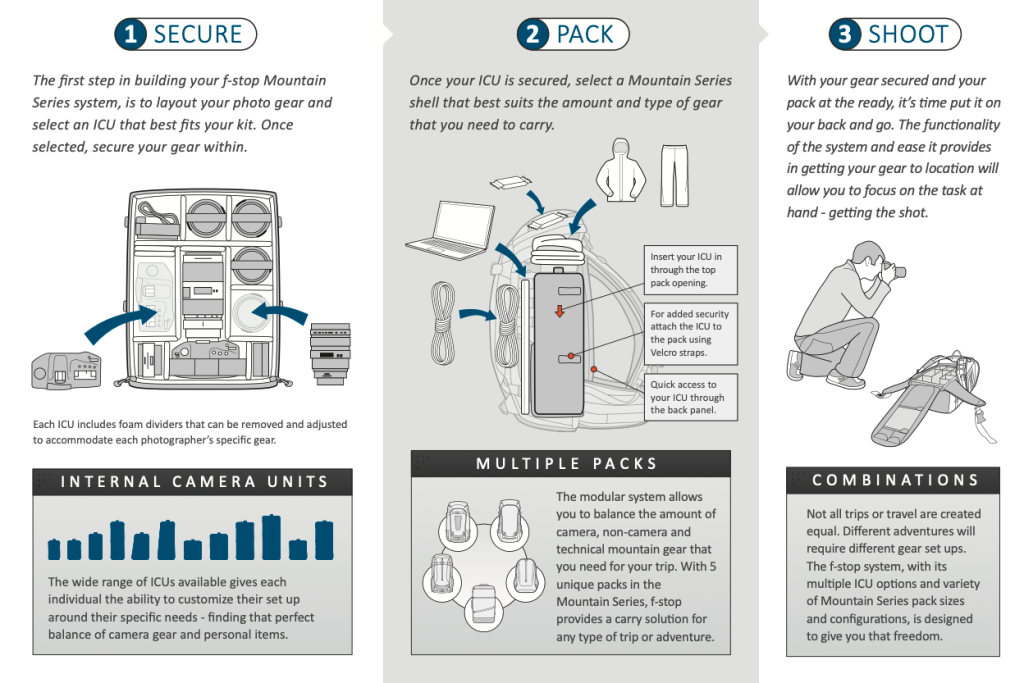
This is what you need to know about our camera packs! We give you an overview of what really matters in the Design or Functionality of the f-stop System. Furthermore, we give an outline of what thoughts go into building this f-stop System, designing our packs, the build, the carrying system, and most importantly, the modular design of f-stop Packs. This article focuses on providing an Overview to better understand

A camera backpack needs to be tailored to the needs of photographers. Everyone has different gear, scenarios and where they bring the gear.
Photographers are no strangers to the ever-evolving world of camera gear. The need to carry various lenses, camera bodies, accessories, and sometimes even drones has led to a demand for camera bags that offer both protection and organization. Since its founding, f-stop has specialized in providing technical camera bags for serious visual storytellers with flexible camera insert arrangements. f-stop is known for its rugged build, comfortable carrying system, and, most importantly, the modular system. As a result, the f-stop System allows users to customize their packs to their exact specifications.
We have more articles diving into the Camera Inserts or also the Differences between the packs so make sure to check out our blog for more.
It really comes down to understanding your needs first and the purpose your pack needs to fulfill. As an outline, the f-stop System consists of the pack itself and then furthermore the Camera Insert which is actually the heart of the Setup. The main purpose the pack needs to fulfill is to carry and protect your camera of course! After all, we have a range of sizes and styles of packs and Inserts to cater to different preferences and gear requirements. Whether you need a compact daypack for a short hike, a big backpack for an extended photo expedition, or Cine gear.
When you answer these questions you are on the best track to finding your perfect setup.
Since f-stop Camera Packs and Bags are technical Camera Carry solutions they are designed with high durability and rugged construction to last for years. Following this mindset, we design and develop all of the packs packed with practical features that make it a highly advanced tool for your equipment to withstand the demands of outdoor photography. All the following points make the packs ideal for photographers who venture into challenging environments


Whether you're a landscape photographer, a wildlife enthusiast, or a documentary filmmaker, f-stop's modular system allows you to protect and organize your gear efficiently. As the world of photography continues to evolve, we offer you a trusted companion for visual storytellers and photographers who demand flexibility and functionality from their camera bags.
If you need advice or have questions please do not hesitate to reach out! We are here to help

Need further help or assistance?

Although many Camera Insert options are available, users are not limited to a single option per bag. This is something we address in this f-stop Tips & Tricks about different options for arranging your gear which we call: Camera Insert stacking and hatch-backing.
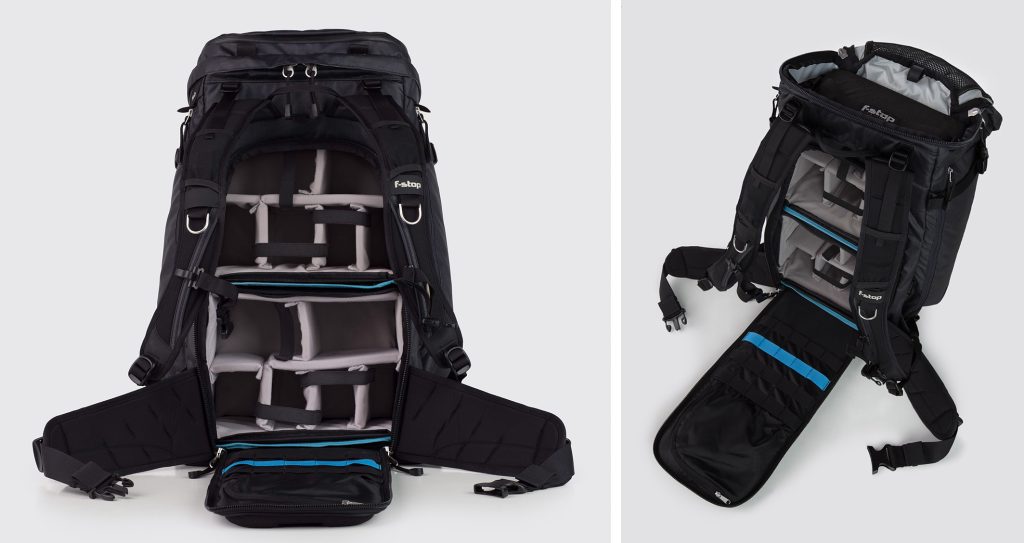
Our Mountain Series systems have become widely recognized for their comfort and modularity. A feature our hardware people always speak highly about has been the compatibility with our Camera Insert system ( also known as the Internal Camera Unit (ICU). It enables users the ability to balance their load and compartmentalize their gear. Aside from this, there are different arrangements
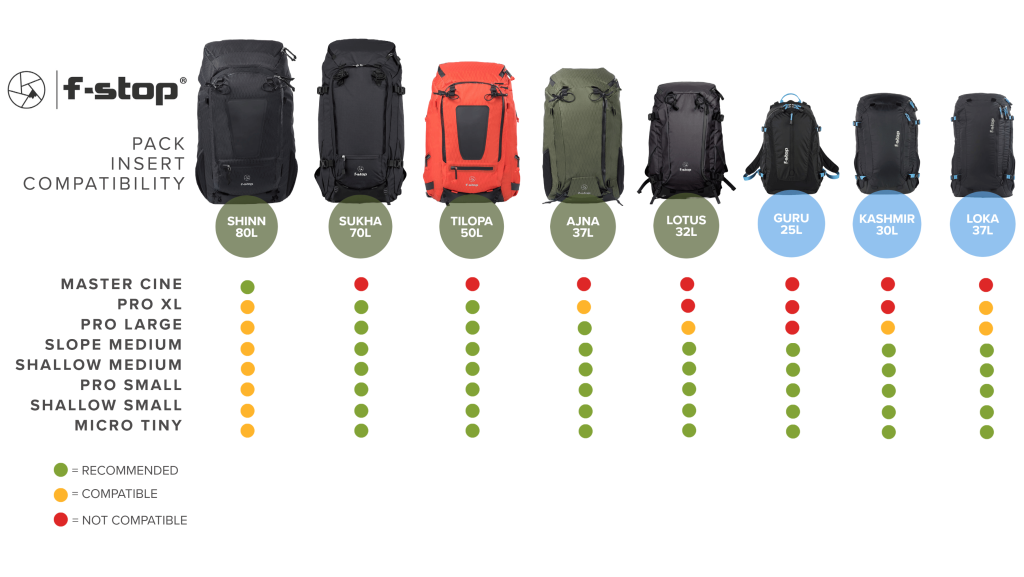
Camera Insert stacking is simply placing one Camera Insert on another. Position the camera units to both be accessible through the rear.
Camera Insert hatch-backing is stacking and rotating a small-sized camera insert for access from the top. One thing to be aware of when stacking the Insert is the size of the opening of your f-stop pack.
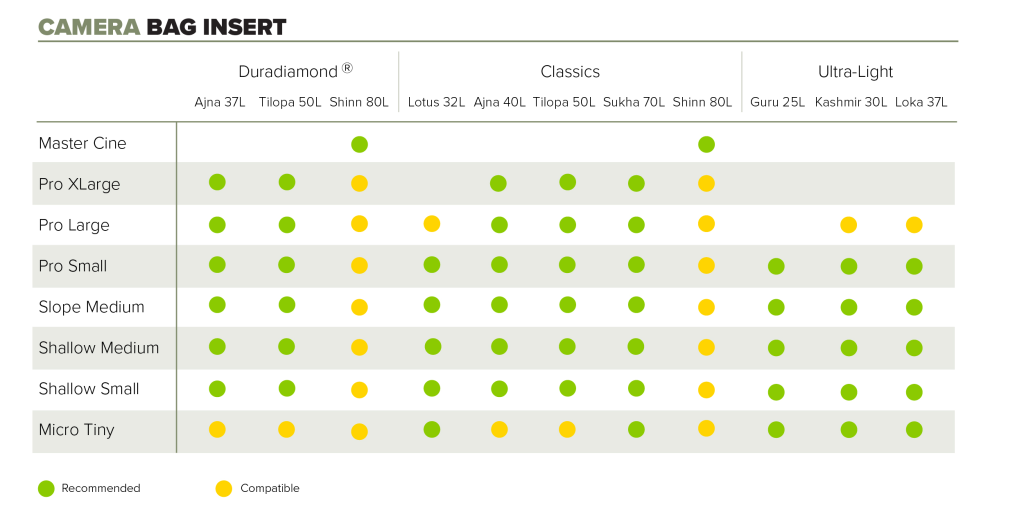
For example, a Lotus has a rear access opening the size of a large Camera Insert.
The rear panel opening on the Lotus and Kashmir is 16” ( 40.6cm ) while the opening on all of the larger bags is 17” ( 43.2cm ). The depth will vary, but all of the packs are at least 7” in max depth. When choosing a Camera Insert-compatible bag, note that larger bags provide extra volume but also have higher empty weights to support heavier loads.
Please reference the compatibility chart to see what combinations work best with each of our current Mountain Series bags.

For those needing to utilize the entire main compartment for strictly camera gear that potentially varies, Camera Insert stacking is one of the most efficient methods of doing so. There are countless configurations possible.
The ability to stack and separate different kits could be the optimal setup for your workflow. With different arrangement options, you can choose to bring what you need and adapt it to your specific kit.

Discount Applied Successfully!
Your savings have been added to the cart.