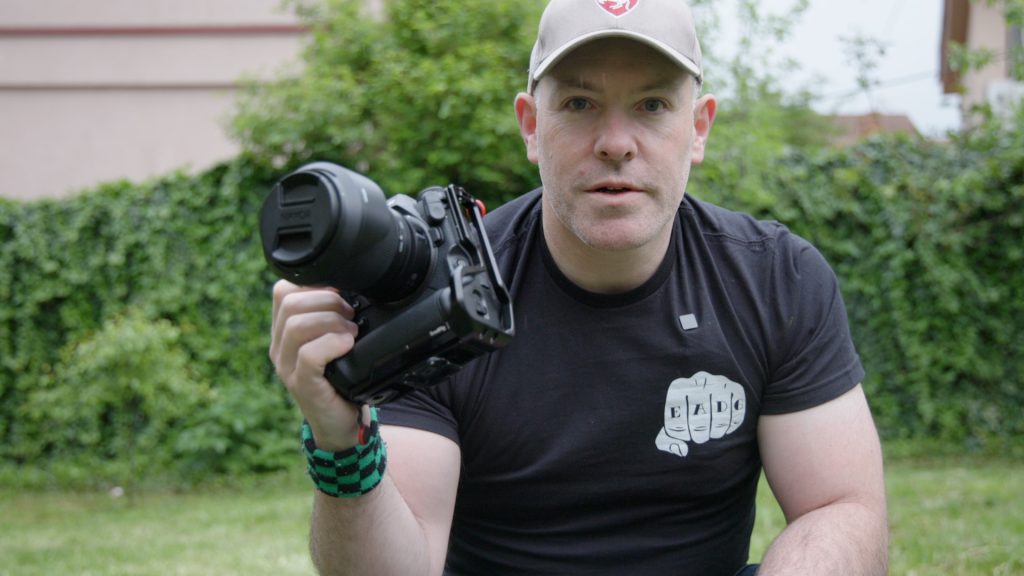
Conor MacNeill, also known as the Fella, is a travel & landscape photographer. His biggest passions always was traveling and exploring which actually brought him to photography. Now he does both with a focus on landscapes, cityscapes, and sometimes astrophotography or even Deep Space.
Conor's philosophy extends beyond photography; he's also on a mission to greet every street dog he encounters, adding a heartwarming touch to his travels. Filmed at the Pro Hangout in North Macedonia, Conor reveals his minimalist approach to travel photography, showcasing how he navigates the globe with a compact, yet powerful photography kit.
After a trip in Kosovo Conor visited us at the Pro Hangout in North Macedonia and walked us through his travel kit


"I am not just here because of the photography and meeting everyone, I am also here to say hi to all the street dogs! "
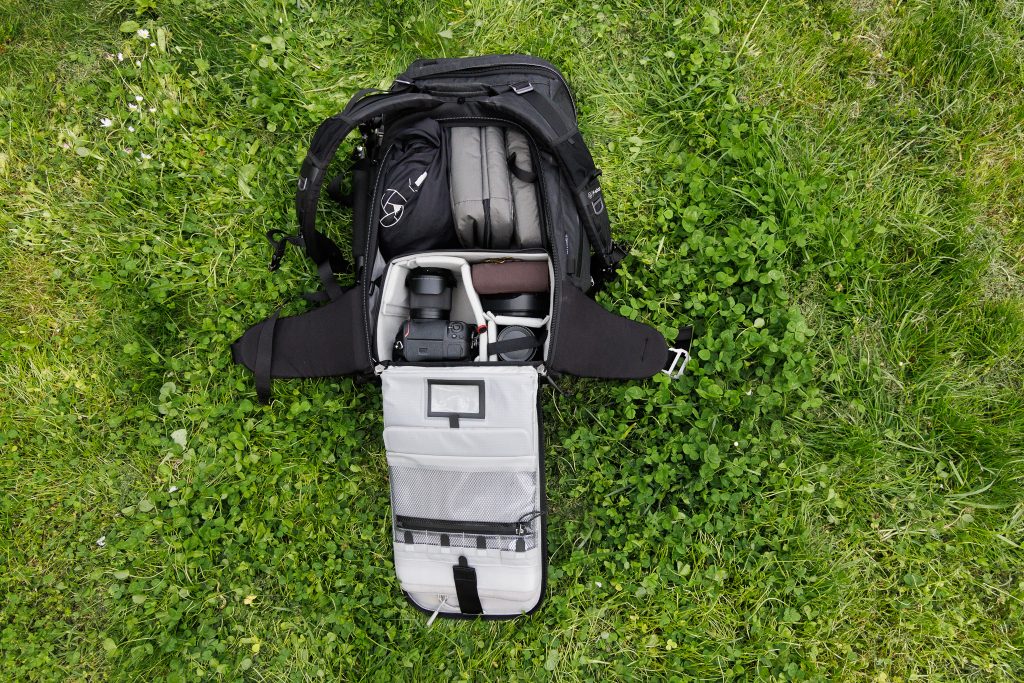
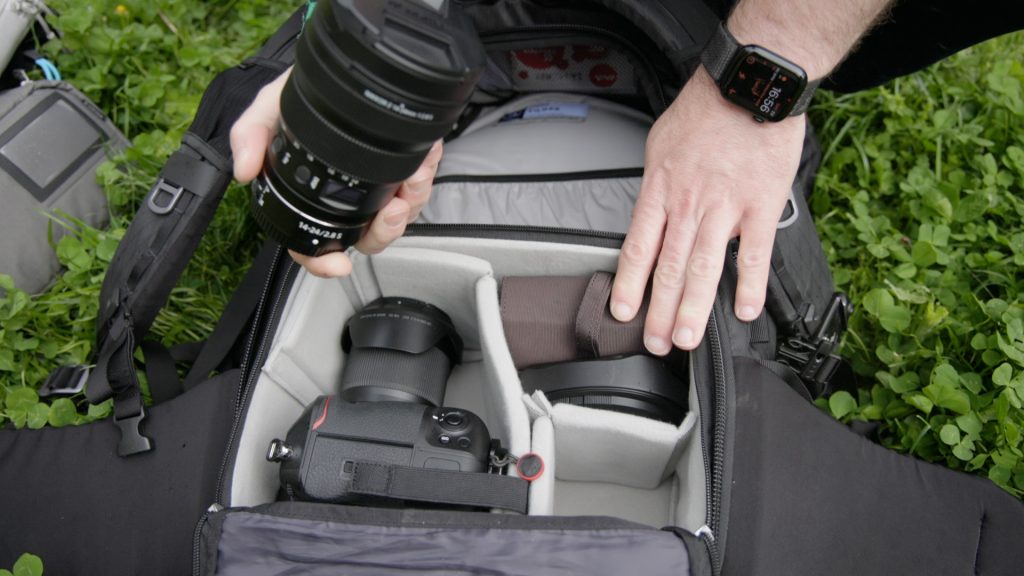
His Tilopa houses only his Small Pro Insert with one Nikon Z9Body with a Battery grip and 2 Lenses, a Lens Hood, a Filter case, a Tripod, a few receipts, a memory card case, and clothes. Throughout his traveling and multiple packing occasions, he learned packing light tailored for him without compromising. Conscious decisions about what to bring is his blueprint. Think about what you really need.
Which one is more important to you specifically – weight or variety of gear?
In the past, Conor had multiple Batteries with him for his Camera. For these, he had also different compartments in his pack arranged so he could know which Batteries were full or which were used. By now he is only using his Camera with the Built-in Battery Grip which gives him enough Power supply throughout the day. At night he just plugs the Camera in with USB C and charges it like this.
This Workflow also allows him to save weight and space on Batteries, chargers, etc. He reduced it to the most needed items.
A look in his pack shows 4 parts of Cubes/pouches. Conor also repurposes some accessories like the dust cover as laundry bags in which the f-stop packs come shipped in, minimizing waste, and maximizing utility. He also gives the Accessory Pouches Large a different function to transport his clothing and keep it organized. Everyday items like socks, shirts, and undergarments are neatly packed away. The rest of his pack is very straightforward as well. Mesh pouches hold receipts and SIM cards or other items he needs when traveling for business while larger compartments hold his Gym Kit or a Jacket.
Heavier items, such as camera gear, at the bottom for optimal weight distribution. His laptop stays in the Laptop sleeve with an additional protective Case as well so he can take it out at airports and carry it around.


A well-padded laptop sleeve keeps my device secure, while a custom camera insert houses my essential photography equipment. Conor is selecting a compact kit tailored to my travel needs, including a large camera with a built-in grip and a versatile lens selection. USB-C charging capability further benefits my setup, reducing the need for multiple batteries. Having his items in different Compartments allows him to change, swap, and rearrange or similar quickly.

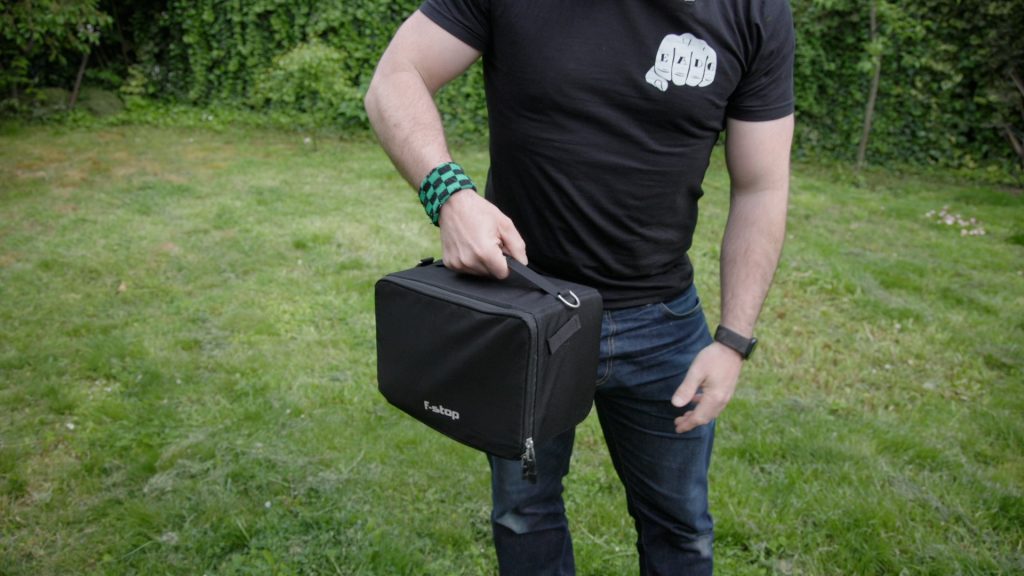
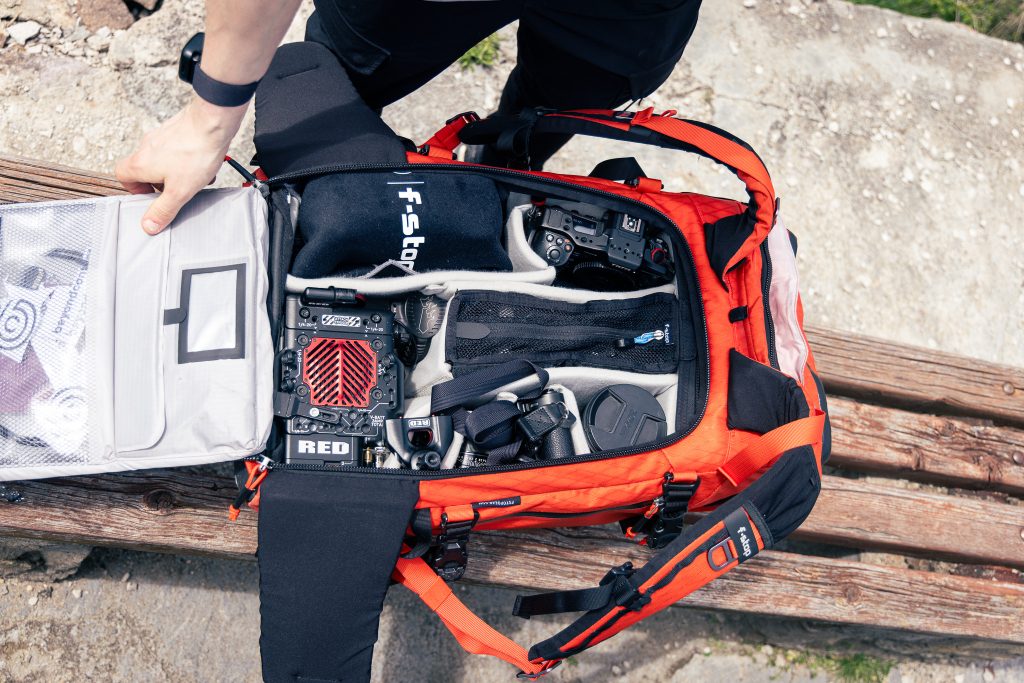
If Conor needs to take out the Camera Insert due to having to check in the Camera pack or he just needs to change it over in a different pack he folds up the flap of the insert, zips it up, and can carry it easily through the airport. Photos below show Conor with the Small Pro Camera Insert closed up - as he jokes with a camera Suitcase

Handling tripods can be cumbersome, especially during travel. With Gatekeeper straps, he fastens the tripod to the outside of the bag. The Bottom Gatekeeper strap over all three keeps the legs secure and the Top strap through two legs to secure it from slipping down.


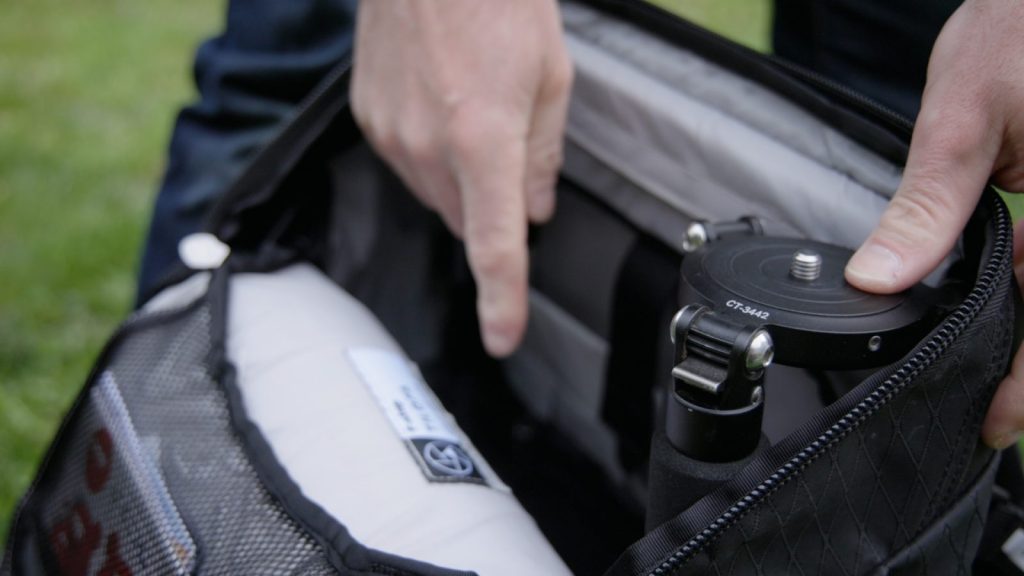
In case Conor is planning to travel with small planes he makes his packs look more compact by removing the ball head and placing both the Head and the Tripod in his Camera bag next to the Insert. The Tripod without the Ball head perfectly fits in his Tilopa from the Height still, so a conscious decision on a tripod height or being able to remove a ball head is part of his strategy. For him, this is ideal for navigating through airports or tight spaces.
“As a conscious traveler, I strive to minimize waste and maximize utility. Making conscious choices that can enhance my travel experience!”
Connect with Conor : https://thefella.com
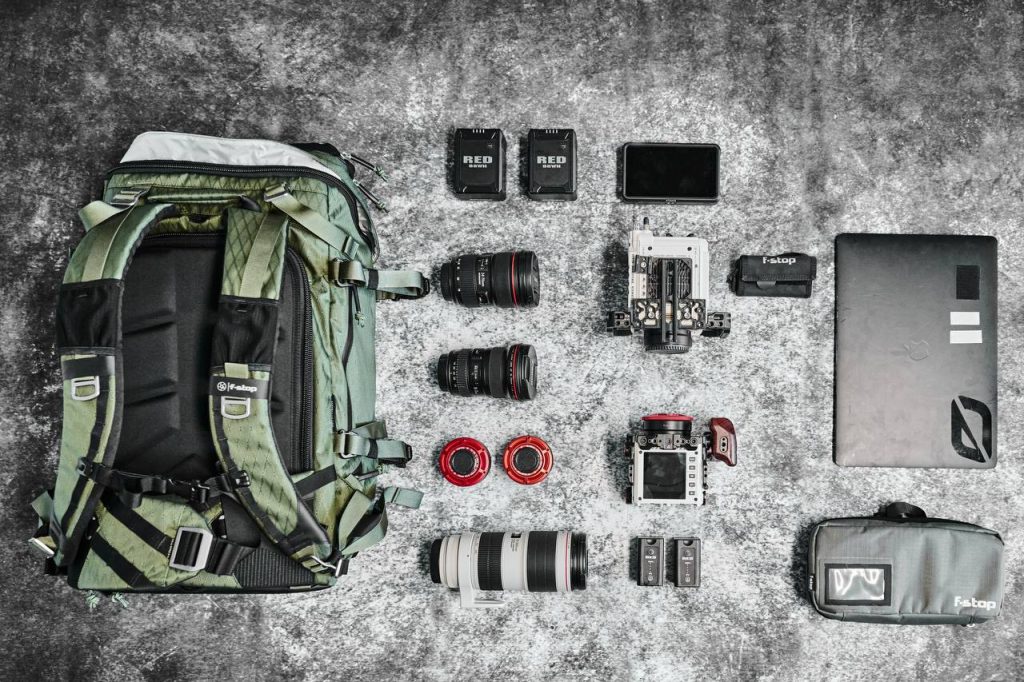
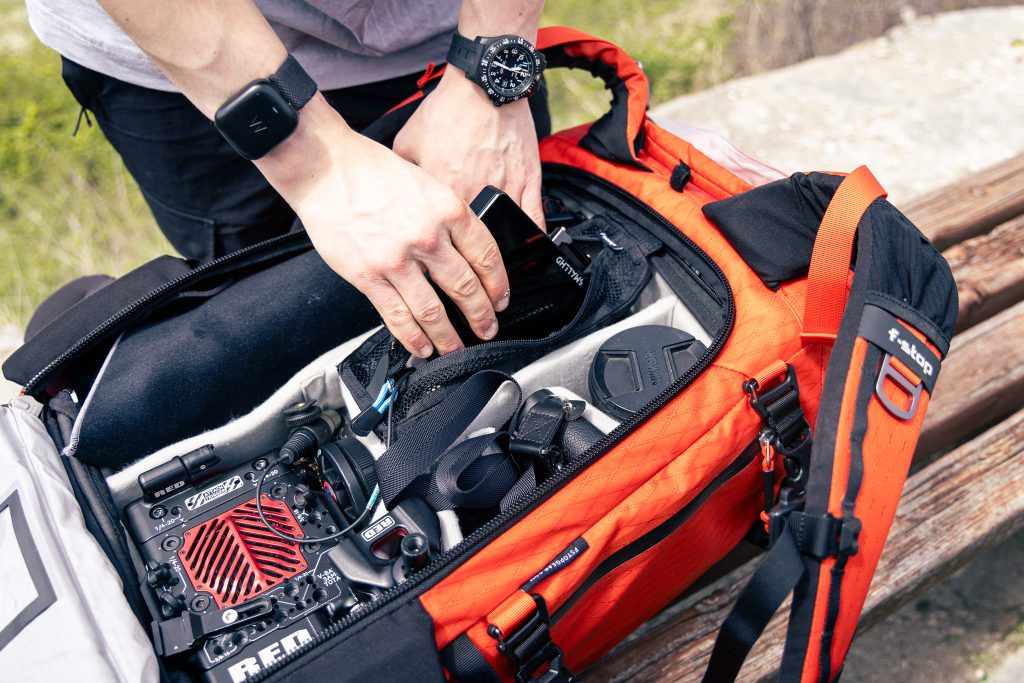
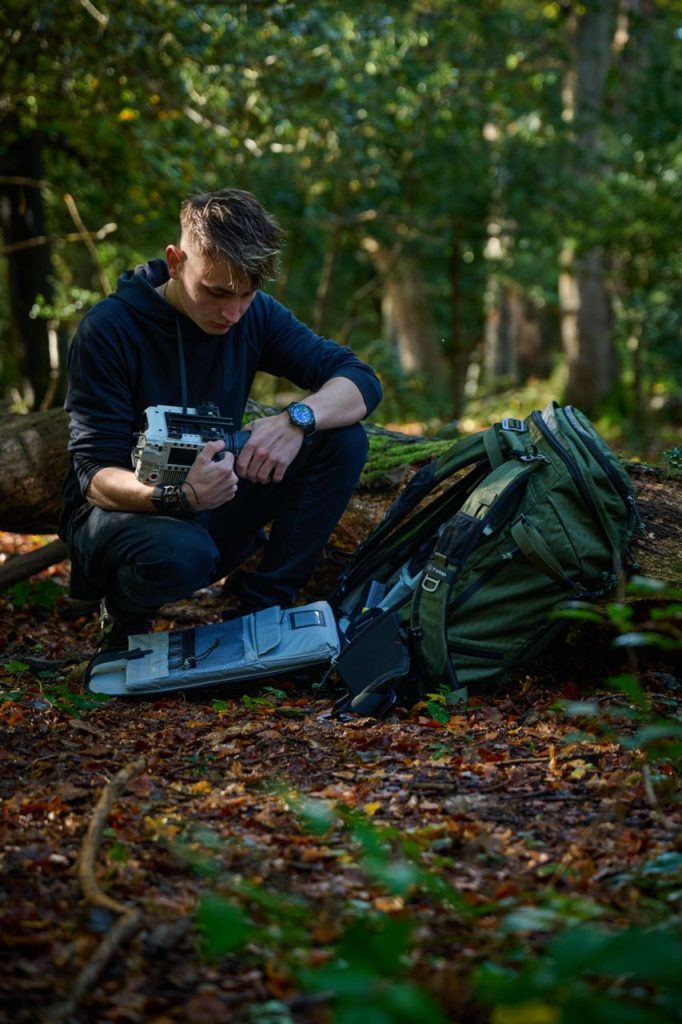
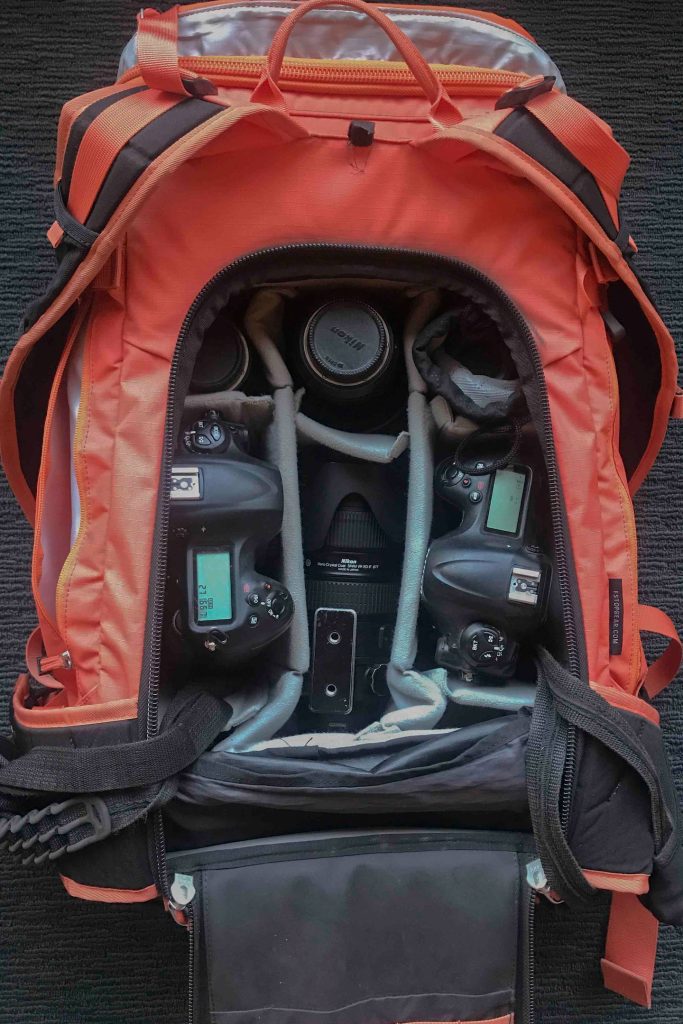
Nick's gear bag opens to reveal the main compartment, carefully organized to accommodate his primary camera system. His packing reflect Nick's commitment to professionalism and preparedness, vital qualities for any serious photographer or filmmaker.
...but as a vital component of a professional workflow.
With a nod to the unpredictability of industry Nick’s bag is not just a collection of gear; it is his safety net, ensuring that no matter the circumstances, he can always deliver.
Nick relies on a range of gear depending on the project at hand. For smaller jobs, he opts for Nikon gear, keeping the load light and efficient. However, for larger shoots, he needs to utilize a mix of equipment, including drones, gimbals, and multiple camera bodies, such as RED cameras.
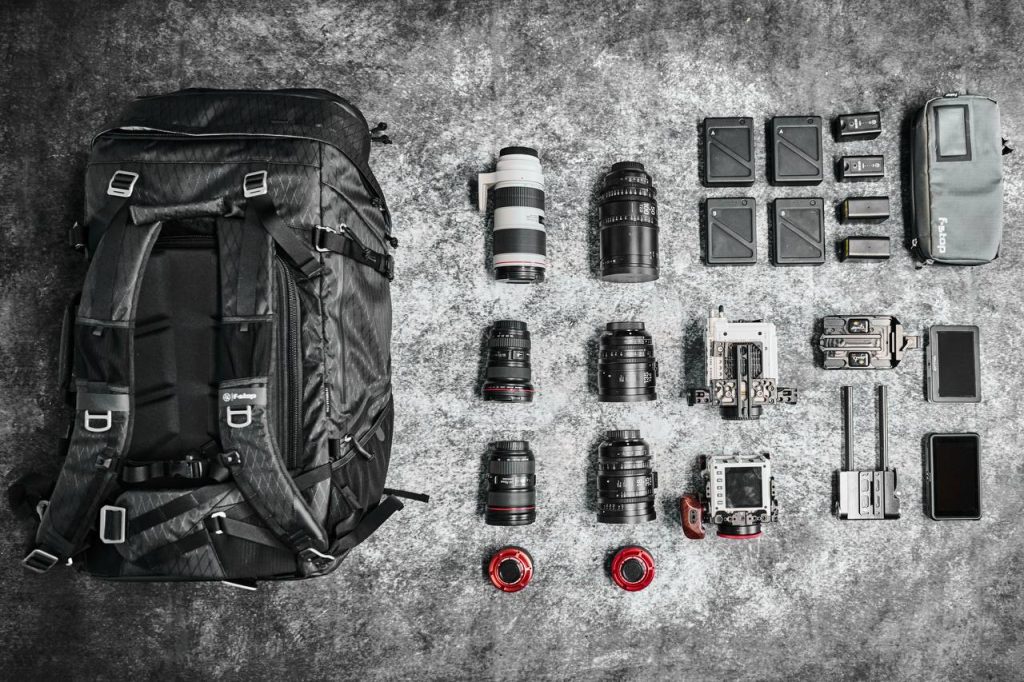
He takes advantage of the modular setup, utilizing interchangeable camera inserts (ICUs) often also pre-packed for specific applications. This allows for quick transitions between different types of shoots in between different packs. On the other side, he also stores the gear in the Camera insert at home in the Camera Units and just shoves in the pack what he needs.
"For me, it is the best way of keeping my gear organized when I'm not traveling. I just have things stored in Inserts at home like this, also ready to be put in a pack."
One of the most draining tasks next to shooting is to carry all you need with you from place to place. Arriving tired on set or just getting worn out throughout the day are two things Nick tries to prevent as best he can.
All the f-stop packs have a "comfort weight" as we call it and recommendations for carrying gear safely and comfortably, but what if you just need more?
Weight from not only the camera gear but also batteries, cables, hard drives, computer, and accessories quickly adds up. Nick has a high tolerance for the weight he can carry – so his comfort weight may not be the same as for someone else of the same build. A lot of factors come in here like condition, muscles, resilience, etc. Some say Nick is a packhorse when it comes to carrying gear - We call that dedication!
The first thing he does is to make sure he selects the right pack for the right needs. Every pack is purpose-built, and the f-stop pack up from 50 L has thicker padding to provide more carry comfort for heavier packs, longer trips, etc. His go-to pack is the Tilopa 50 L due to the compact weight distribution which allows him to carry everything as close to his weight center as possible. If he would need more room, he takes the Shinn 80 L.
Central to Nick’s workflow is the organization of his gear.
When packing, he rather takes the time he needs than pack in a rush. It needs to fit and fulfill his needs so smart arrangements will save him time, having to repack, and avoid any frustrations. When packing the Inserts for specific jobs, he just takes all dividers out and rearranges gear how it fits best.
Another big focus when arranging his gear is distributing the weight as evenly as possible and ensuring easy and fast access to essential items.
"I've always taken the approach that I can work harder and carry more as long as it's going to give me the best results. But I need to balance that with not being tired and wearing myself out or being slow. I need to be able to be agile. I need to have the gear that I need and not take too much whilst also having enough that I'm not left lacking."
Be creative Arrange the gear in how it works best for you specifically.
“I've been packing these bags for some time, and I find that the more creative I am and the more I allow myself to experiment and take my time instead of rushing, the better the outcome. Having redundancy in gear, even if it makes the pack slightly heavier, is far more important to me than the weight of my pack alone. Obviously, carrying weight safely is crucial, which is why I ensure everything is secured at the bottom. But as long as I'm packing safely and taking care of myself, avoiding arriving on set tired, I find it to be incredibly valuable.”
Nick Leavesley
At the center lies his workhorse camera, a state-of-the-art RED model paired with two more Camera Bodies and lenses alongside a drone in this setup. He makes sure he is equipped to tackle any photographic challenge and be flexible and versatile for whatever he gets his teeth hooked in. To complement his RED setup, Nick also includes a compact DSLR as a backup camera, ensuring redundancy in case of equipment failure or unexpected contingencies.
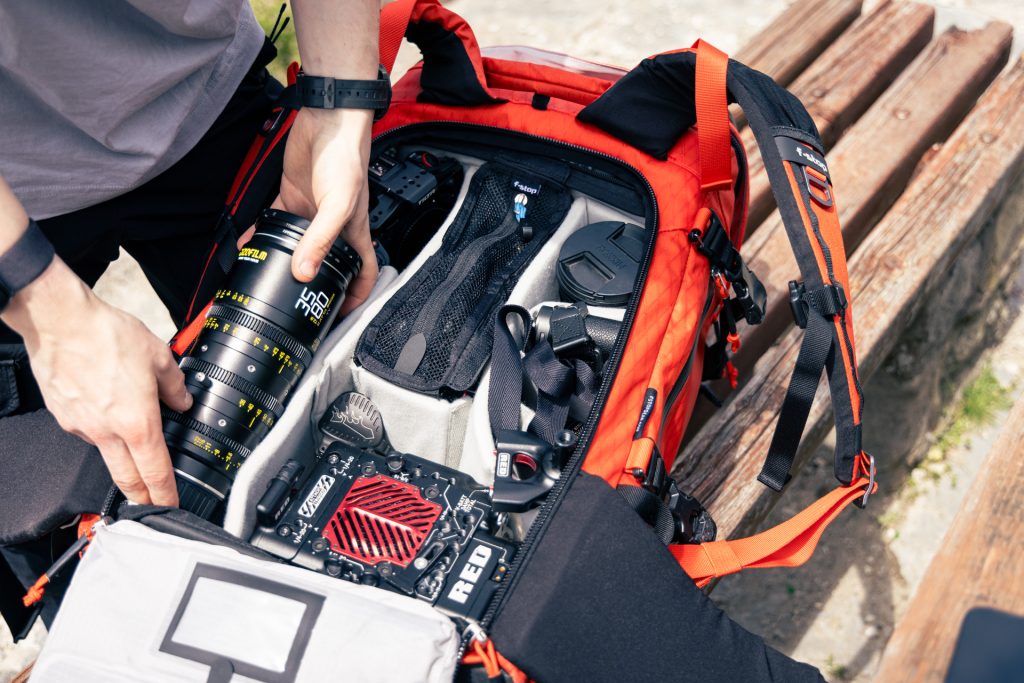
Heavy equipment like the RED Brain camera, together with the V-Log and also the monitor adaptor for the RED 7-inch touch screen, is placed at the bottom to prevent any long-term warping of the camera insert and maintain balance during transport. He finds it's nice to be able to just put it pre-assembled straight in the bag. It saves me from having to assemble everything.
Nick is all about adaptability and preparedness. Through investment in versatile gear and a flexible organizational system, he avoids stress and saves time, so he can handle a broad spectrum of projects. Every aspect of his setup is designed to maximize efficiency and creativity in the field. Not needing to worry about where things are or having to repack his pack to stay organized is highly valuable for him and keeps him focused on what in front of him.
Items such as a drone (DJI Mavic 3 Pro or DJI Air 2), lenses, sound equipment, and accessories are strategically positioned for convenience and efficiency. He carries the Drone in a Protective wrap and due to the depth of the Insert can place another Lens stacked on top (in this case a 200 mm)
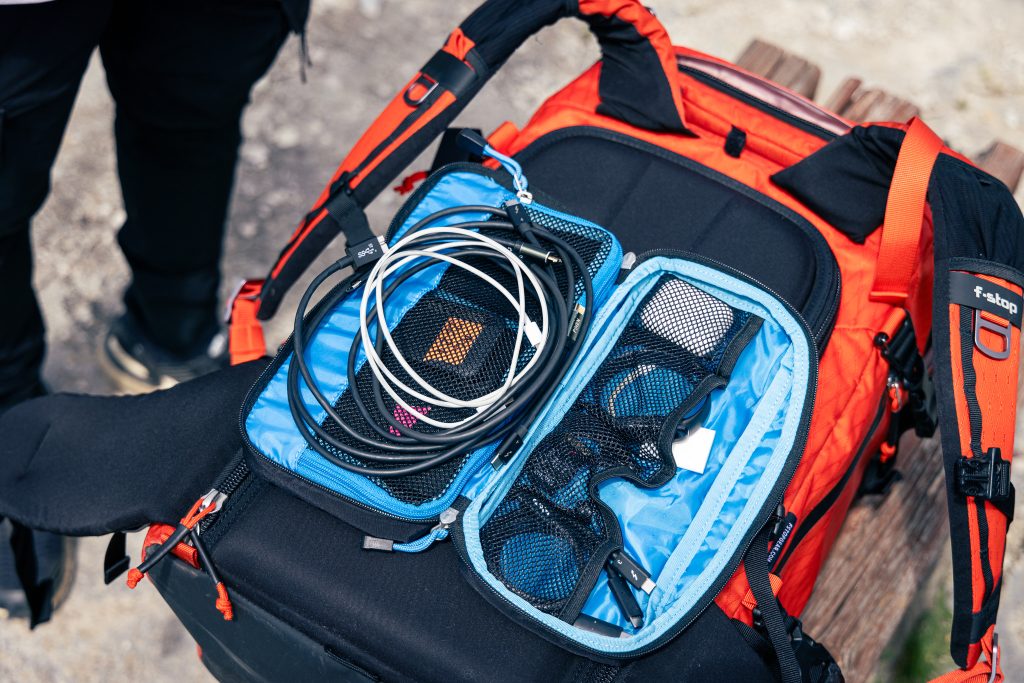
Adjacent to the main camera setup, Nick's gear bag houses an array of essential accessories He brings small accessories and cables in dedicated pouches and compartments to prevent loss and ensure easy access.
A robust V-lock battery pack ensures uninterrupted power supply throughout long shooting sessions, while a specially designed adaptor allows seamless integration of a seven-inch touchscreen monitor, enhancing monitoring and playback capabilities on set. Nick's dedication to detail extends to the placement of smaller accessories such as backup cables, chargers, and adapter plates for quick retrieval when needed. This organization not only maximizes efficiency during shoots but also minimizes the risk of misplacing or losing valuable equipment in the field.
He also always carries a variety of Gatekeeper Straps, allowing him to attach miscellaneous items outside the pack. Sometimes, he attaches a lens (in a case), a tripod, ropes, etc. One or two small carabiners are always found hooked in the gatekeeper attachment points.
"You never know when you're going to want to clip something to your bag, whether that's a water bottle or just a random kind of bag or something that needs to be carried. Sometimes I also use these gatekeepers to carry longer lenses, so if I'm doing any telephoto stuff, these will be perfect. I always go overkill on how many gatekeepers I need because on shoots, I often change this setup live. It's nice to be able to have the flexibility and plenty of gatekeepers to do that.
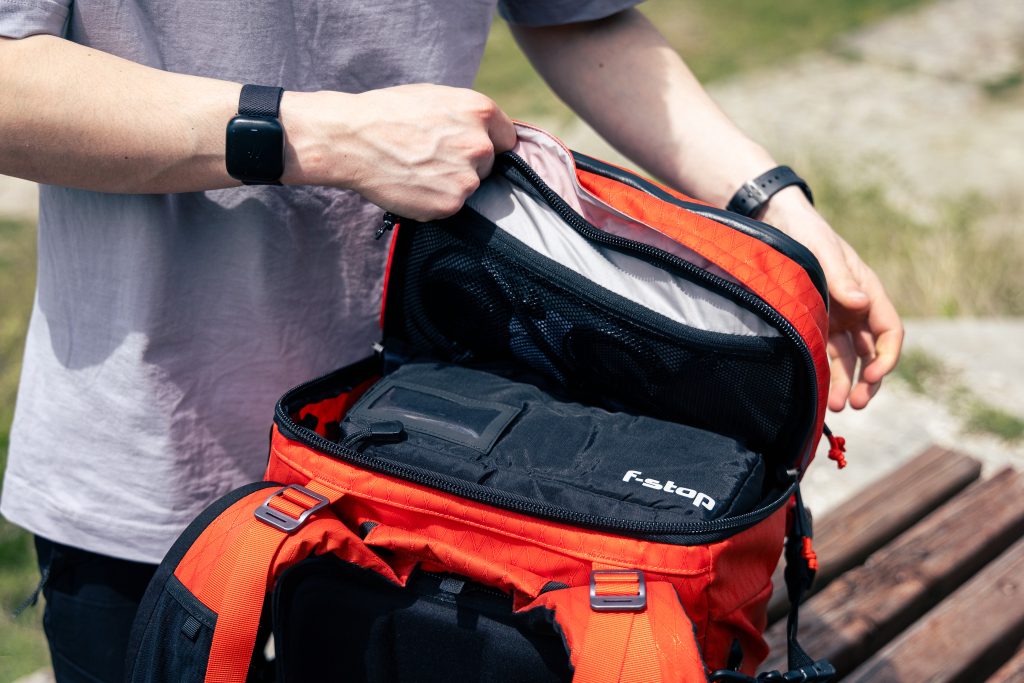
At the top of Nick's gear bag lies his mobile editing workstation. Nick always tries to bring a powerful laptop at all times. Currently, he is using the 16-inch M1 MacBook Pro.
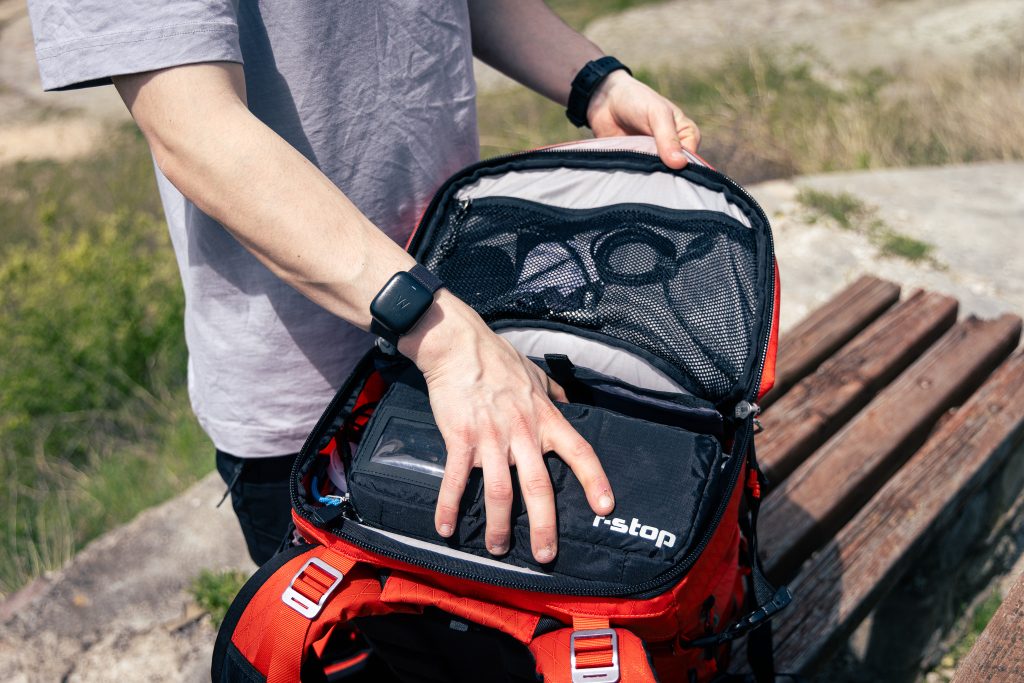
In a dedicated compartment within his gear bag, Nick stores a variety of hard drives and memory cards essential for data management and backup. Portable SSDs provide redundant storage solutions, safeguarding project files against loss or corruption. Spare cables are readily available for connectivity and data transfer. Data management remains a top priority, with redundant storage solutions and backup drives ensuring critical files are consistently safeguarded.

“I try and tailor my workflow around USB-C. I think it's a great format and allows a lot of flexibility and all of the computers I use can take USB-C. But I do need to make sure that I have cables in place so that if a client doesn't, I can give them a USB cable.
To store data securely and have all necessary resources at your disposal. At the end of the day, clients are paying a lot of money. He therefore maintains a few in-progress hard drives and hot spares ready, just in case of failures or the need for backups. When working in a team or with multiple bags Nick makes it a practice to distribute a project across two bags, mitigating the risk of total loss due to damage or if someone loses a bag. In challenging shooting environments stress levels can be high and distractions frequent. So you need to calculate this in.
“Given my frequent juggling of multiple projects, the ability to store five or six projects simultaneously is essential. This is particularly vital when working with RED cameras. TB quickly add up!”
In addition to video, Nick also captures stills, organizing hard drives by year or project. These drives contain not only the images but also the Lightroom catalogs. He maintains a separate directory for RAW files from Capture One at the top of each drive. Additionally, Nick always packs a few backup micro SD cards, which are easy to overlook but essential. For instances where a client needs a quick photo directly from the camera or a device, I ensure an SD card to lightning cable is on hand for immediate file transfer, facilitating instant sharing of quality images.
The importance of having all data backed up and securely stored can not be overstated. Losing data is not an option; thus, whether through cloud backups or multiple hard drives, safeguarding data is imperative.
The front pocket! This is one of my favorite parts of the Tilopa because it allows me to store my batteries in a very efficient way, especially the V-mounts. It's deep enough that I can store two of them stacked sideways, effectively fitting almost double the number of batteries in this space. At home, I might even have up to eight V-mounts neatly packed in this top section.
Connect with Nick . https://www.instagram.com/beyondnick/

News of Nikon acquiring RED certainly sent a few shock waves through the photography and cinematography circles last week. Nikon posted a press release on their website. Red President Jarred Land shared the following in a press release on his Facebook page:
This acquisition marks a significant milestone for Nikon, melding its rich heritage in professional and consumer imaging with RED’s innovative prowess. Together, Nikon and RED are poised to redefine the professional digital cinema camera market, promising an exciting future of product development that will continue to push the boundaries of what is possible in film and video production.
Who knows what the future holds for both of these giants of the visual storyteller world. But rest assured that whether you use Nikon or RED camera systems to capture your visual stories, our camera bags carry both!
Our Mountain Series camera bags and backpacks are used by countless visual storytellers around the world. They have been used by various production crews to carry their valuable storytelling tools from location to location while working for major outlets such as Netflix, Disney+, National Geographic and much more!
Whether you are a Nikon shooter or a RED user, we have you covered. Our Tilopa 50L DuraDiamond® and our Shinn 80L DuraDiamond® outdoor adventure camera backpacks are the perfect tool to keep your Nikon and Red systems safe and protected.
We caught up with f-stop Ambassador and friend Nick Leavesley to get his take on the news of Nikon acquiring Red. We also get into his insights into his hybrid Nikon and Red camera setups and why he trusts the Tilopa and Shinn camera bags to keep his gear safe.
Nick had this to say:
Having shot with both Nikon and RED for over 12 years, I’m stoked to see what the two brands can create together. No matter where I go I can guarantee that one or both a Nikon and RED come with me. The Shinn 80 liter is my chosen pack as it allows me to take not only a RED V-Raptor and my RED Monstro in a Master Cine Camera Insert with my chosen lenses, accessories and batteries. However now with DSMC 3 I can compress a stills and video kit in to a single f-stop Tilopa 50 liter and Pro XL Camera Insert.
My rig usually consists of a ‘trinity’ set of lenses for both Nikon Z mount and Canon RF, a Nikon Z9 and a RED V-Raptor, 7” touch screen and GDU accessories and handles for the RED alongside a gimbal and between 4-8 V-Lock mini batteries. Now with the amazing capabilities of N-RAW and RED Code RAW, the Z9 acts as the perfect B-Cam when I have to pack light as the image can be matched perfectly between both cameras. When it comes to shoots that require multiple REDs I reach for my f-stop Shinn as it allows me to pack not only a RED V-Raptor and my RED Monstro but a RED Komodo and RED Komodo-X too, not to mention all the lenses and batteries needed.

Nick Leavesley is a visual storyteller and an f-stop Ambassador. He is the Director of Photography for Beyond Content.
You can check out more of his work and connect with him at the following places:
IG - https://www.instagram.com/beyondnick
IG - https://www.instagram.com/beyondcontent
Website - https://www.beyondcontent.com
This is what you need to know about our camera packs! We give you an overview of what really matters in the Design or Functionality of the f-stop System. Furthermore, we give an outline of what thoughts go into building this f-stop System, designing our packs, the build, the carrying system, and most importantly, the modular design of f-stop Packs. This article focuses on providing an Overview to better understand

A camera backpack needs to be tailored to the needs of photographers. Everyone has different gear, scenarios and where they bring the gear.
Photographers are no strangers to the ever-evolving world of camera gear. The need to carry various lenses, camera bodies, accessories, and sometimes even drones has led to a demand for camera bags that offer both protection and organization. Since its founding, f-stop has specialized in providing technical camera bags for serious visual storytellers with flexible camera insert arrangements. f-stop is known for its rugged build, comfortable carrying system, and, most importantly, the modular system. As a result, the f-stop System allows users to customize their packs to their exact specifications.
We have more articles diving into the Camera Inserts or also the Differences between the packs so make sure to check out our blog for more.
It really comes down to understanding your needs first and the purpose your pack needs to fulfill. As an outline, the f-stop System consists of the pack itself and then furthermore the Camera Insert which is actually the heart of the Setup. The main purpose the pack needs to fulfill is to carry and protect your camera of course! After all, we have a range of sizes and styles of packs and Inserts to cater to different preferences and gear requirements. Whether you need a compact daypack for a short hike, a big backpack for an extended photo expedition, or Cine gear.
When you answer these questions you are on the best track to finding your perfect setup.
Since f-stop Camera Packs and Bags are technical Camera Carry solutions they are designed with high durability and rugged construction to last for years. Following this mindset, we design and develop all of the packs packed with practical features that make it a highly advanced tool for your equipment to withstand the demands of outdoor photography. All the following points make the packs ideal for photographers who venture into challenging environments


Whether you're a landscape photographer, a wildlife enthusiast, or a documentary filmmaker, f-stop's modular system allows you to protect and organize your gear efficiently. As the world of photography continues to evolve, we offer you a trusted companion for visual storytellers and photographers who demand flexibility and functionality from their camera bags.
If you need advice or have questions please do not hesitate to reach out! We are here to help
Need further help or assistance?
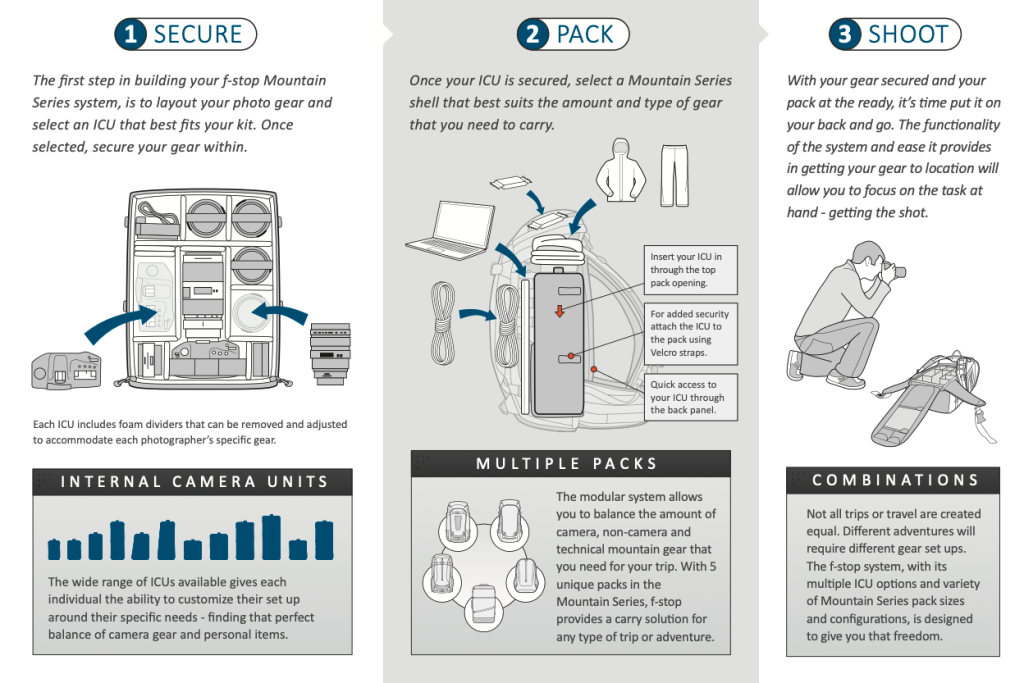
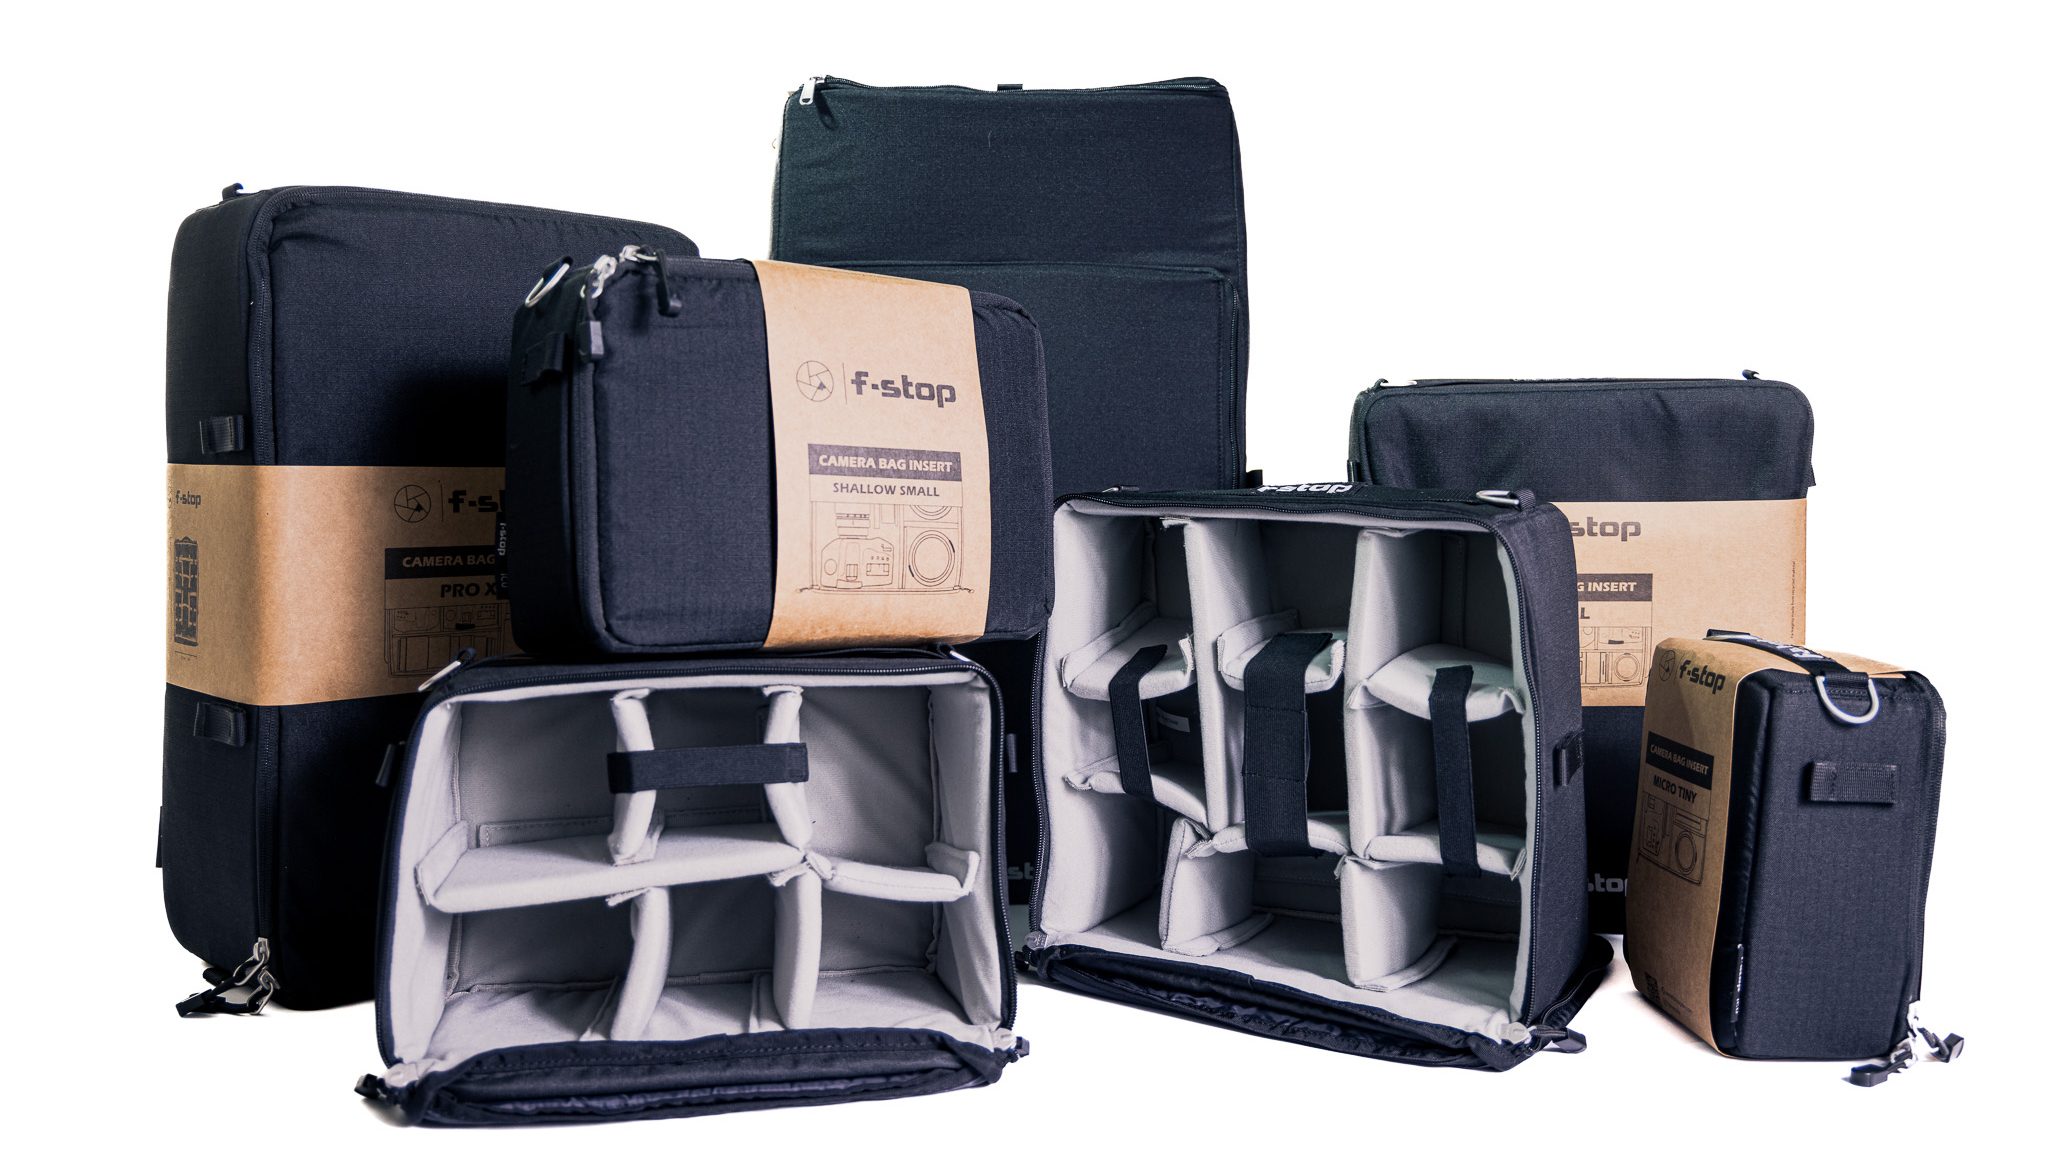
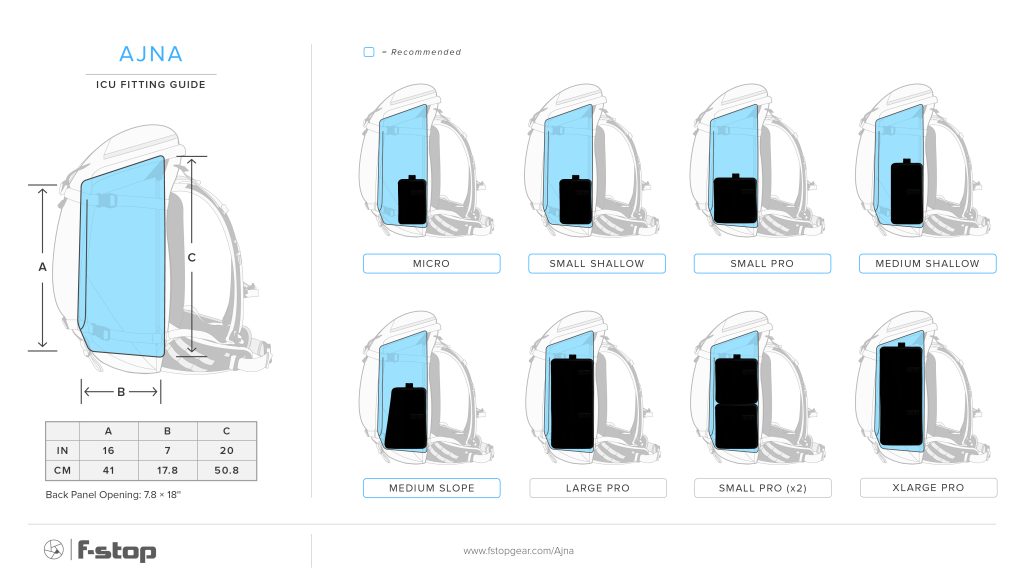
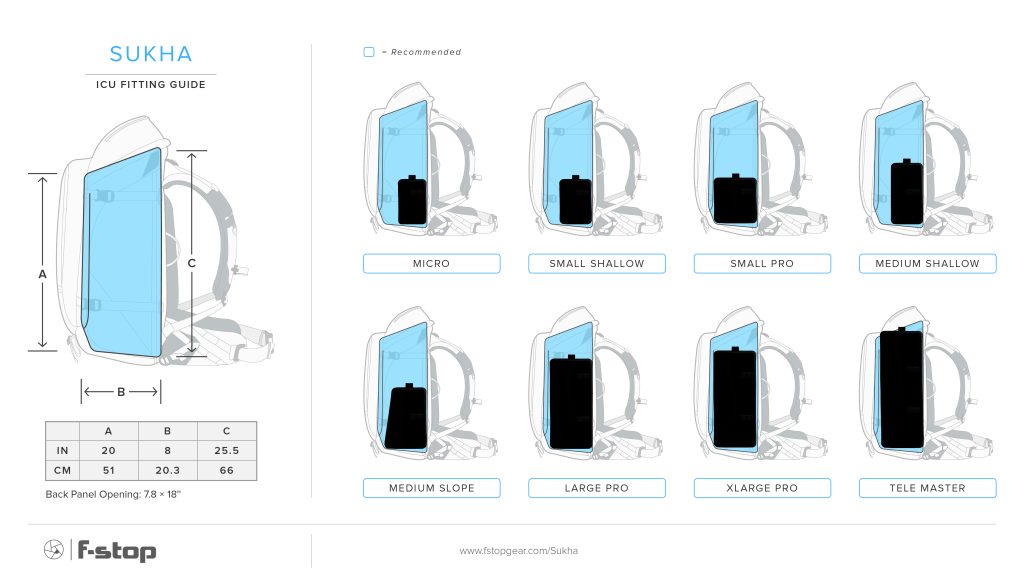
At the heart of each f-stop backpack is the Internal Camera Unit (ICU). Designed to give you ultimate flexibility and ease when packing your camera kit, our range of ICUs (camera inserts) let you mix and match different ICUs to different packs for every adventure. This ICU size guide shows you which ICUs fit each backpack, so you can get the right one for your needs.
Click on the backpack name to see how each ICU fits!
Mountain Series | Ultra Light Series | |||||||
Lotus 32L | Lotus 4 CORE 28L | |||||||
Ideal | No | No | No | No | No | No | No | |
Yes | Ideal | Yes | No | No | Yes | No | No | |
Yes | Ideal | Ideal | Yes | Yes | Yes | Yes | No | |
Yes | Ideal | Ideal | Ideal | Ideal | Ideal | Ideal | Ideal | |
Yes | Ideal | Ideal | Ideal | Ideal | Ideal | Ideal | Ideal | |
Yes | Ideal | Ideal | Ideal | Ideal | Ideal | Ideal | Ideal | |
Yes | Ideal | Ideal | Ideal | Ideal | Ideal | Ideal | Ideal | |
Yes | Ideal | Ideal | Ideal | Ideal | Ideal | Ideal | Ideal | |


(Coming soon)


As you can see, each f-stop backpack can hold a variety of ICUs as well as drone/tech pouches, packing cells, and more. When choosing your backpack/ICU combinations, you'll want to consider the following:
Not every pack is compatible or recommended to go with each Camera Insert. For instance, the Shinn 80 L is designed to accommodate large camera/video equipment. To fulfill this purpose, both the pack as well as the Cine Master insert have greater depth compared to other packs. The Master Cine ICU is significantly deeper than the Pro XL ICU. Therefore, when you are using an XL Camera insert it will not fill out the pack fully.
To avoid any movement of the camera insert in the pack, you should attach it to the side attachment loops inside each backpack (next to the aluminium frame). Learn how to insert and adjust your ICU in your pack (video guide).
Want to make the most of the space in your f-stop backpack? Check out our guide to stacking and hatch-backing.
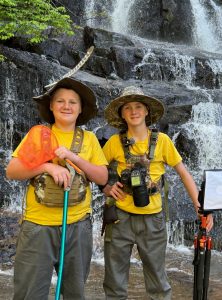
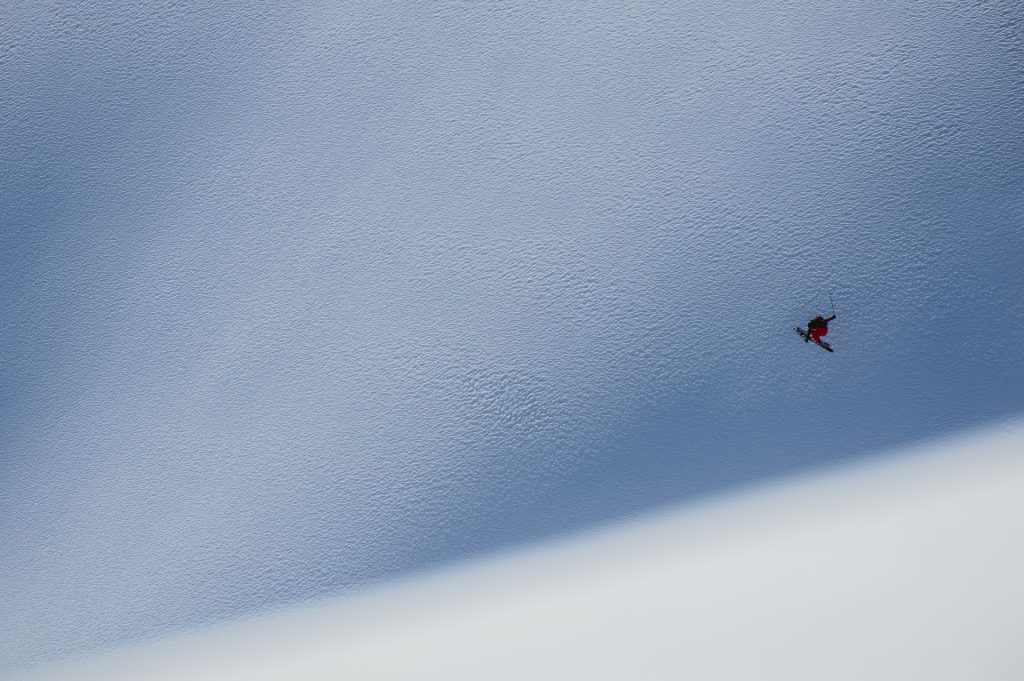
Nic Alegre grew up in East Hampton, New York and is an award-winning photographer for Teton Gravity Research. After graduating from Villanova University in 2008, Nic lived and worked in Manhattan for a few years before he followed his instincts west and spent a number of years in both Whistler, British Columbia, and North Lake Tahoe, California before landing in Jackson Hole Wyoming as the first lead photographer in TGR's 25-year history. In December 2018, he won Powder Magazine's Photo of the Year at the 19th annual Powder Awards in Breckenridge, Colorado and has been nominated four times since 2015. Last year, he was a finalist twice for the 2019 Red Bull Illume Photo Competition - RAW Category.
Nic Alegre 
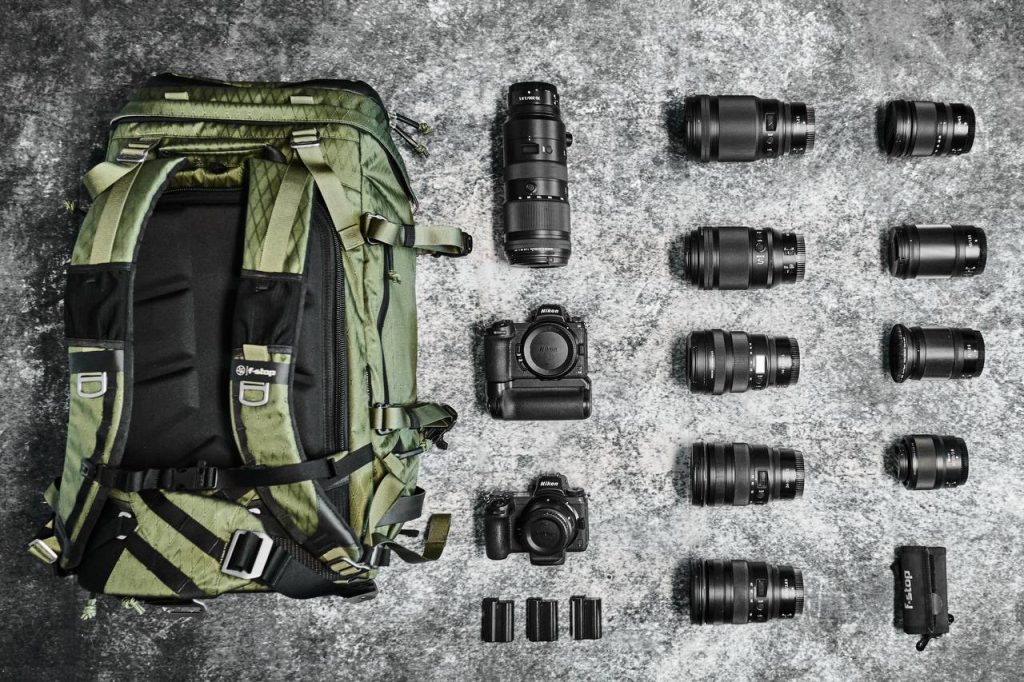
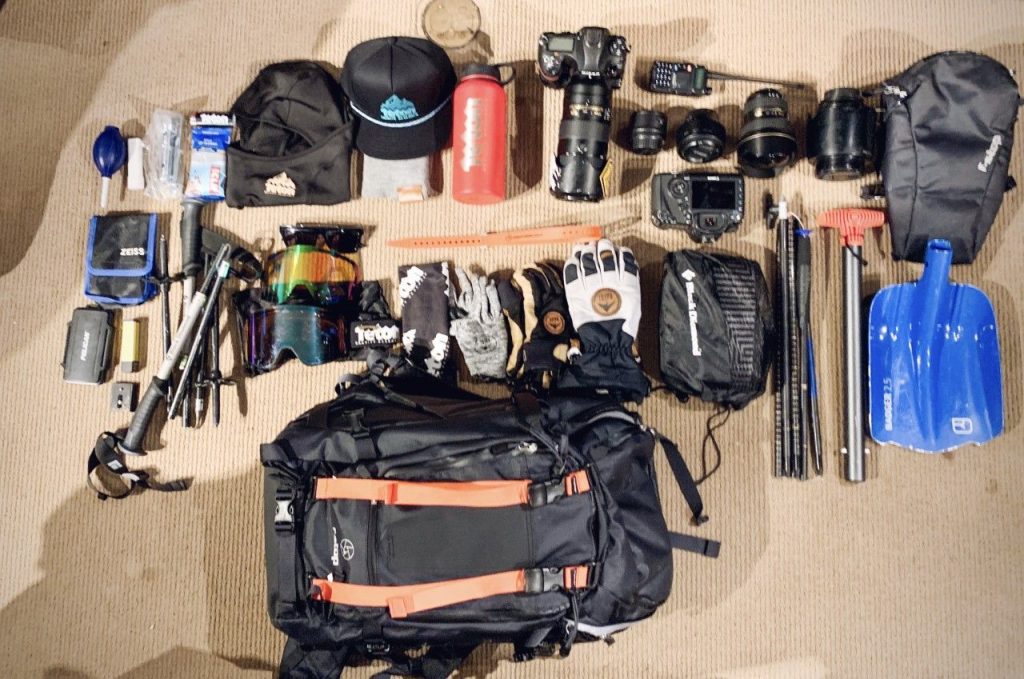
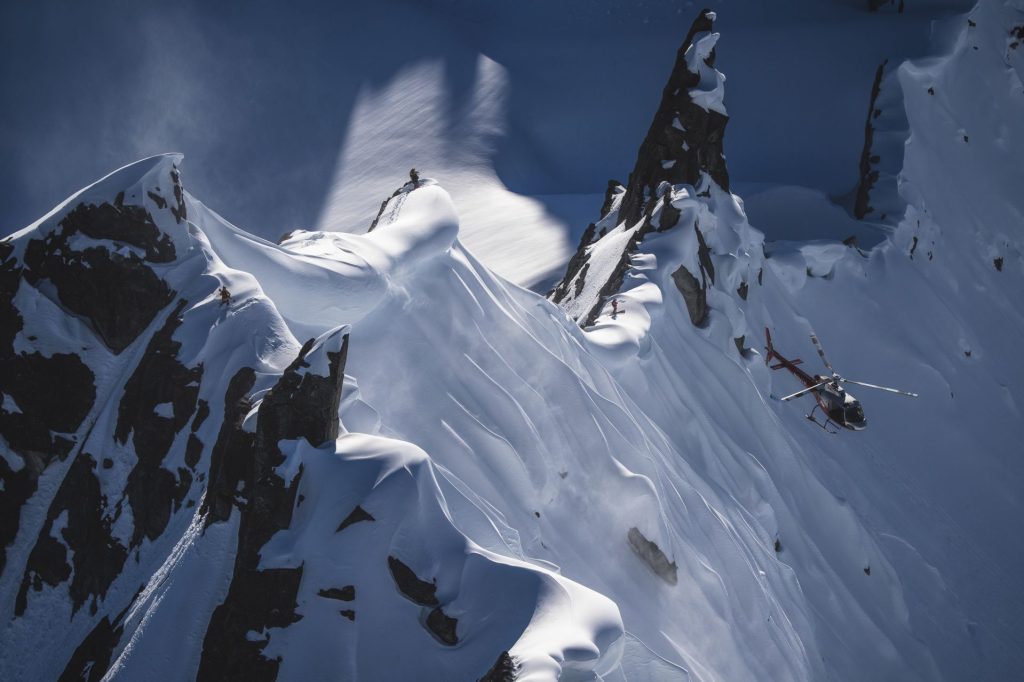
I shoot Nikon D5, D4, and D850 bodies and Nikon lenses. I generally carry a single body in my Tilopa pack with a combination of between 4-6 lenses. When on assignment in Alaska and shooting dynamic and quickly changing action scenes hanging from a helicopter, I will carry two bodies at the same time that are usually mounted with 70-200mm f2.8 and a 24-70mm 2.8 Nikon lens. In some instances, I will switch out the 24-70mm for a 14-24mm 2.8 wide and keep a 2x teleconverter on me to attach to the long lens if the situation calls for it.The other lenses usually in my quiver are 50mm 1.4, 85mm 1.4 and a 300mm 2.8. I never use a tripod to shoot because of how much I move.
Nic Alegre
I learned from pro's using Nikon and began shooting with their second-hand gear and never looked back. Nikon glass is the best in my opinion and the camera bodies have been battle axes for me. The environments I typically work in are harsh, wet, cold and dramatic and the Nikon gear, much like my f-stop bag, have proven that they can weather the storm in my expedition oriented shooting assignments.
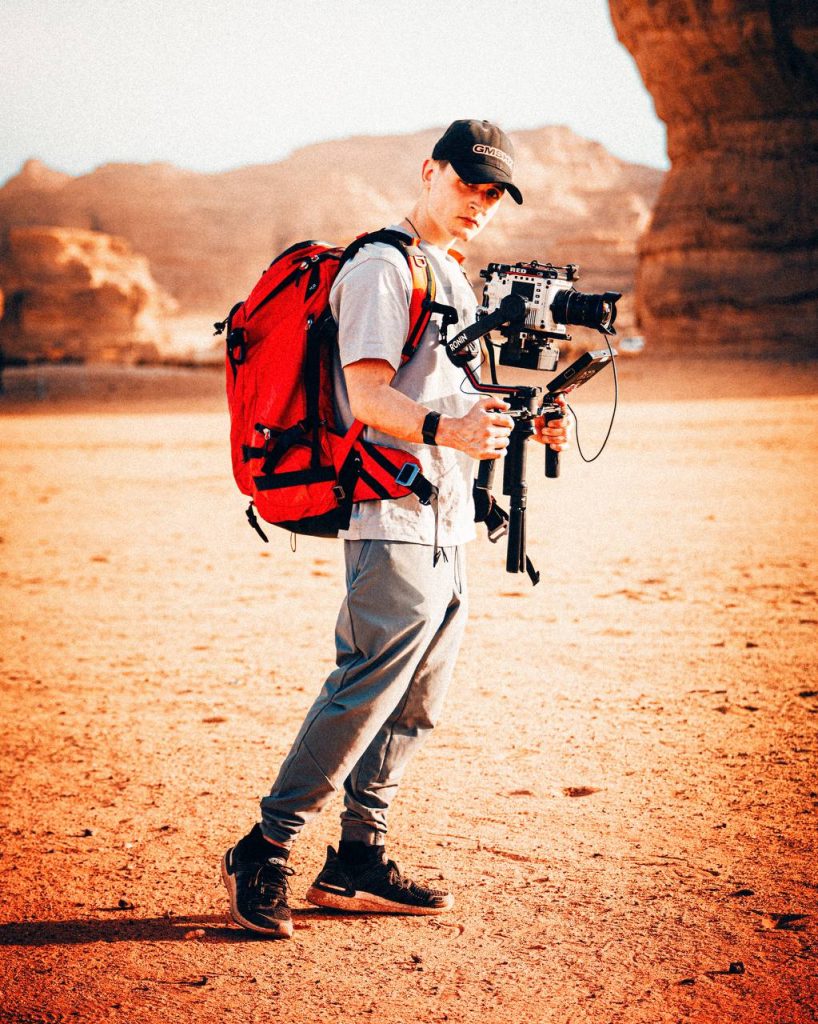
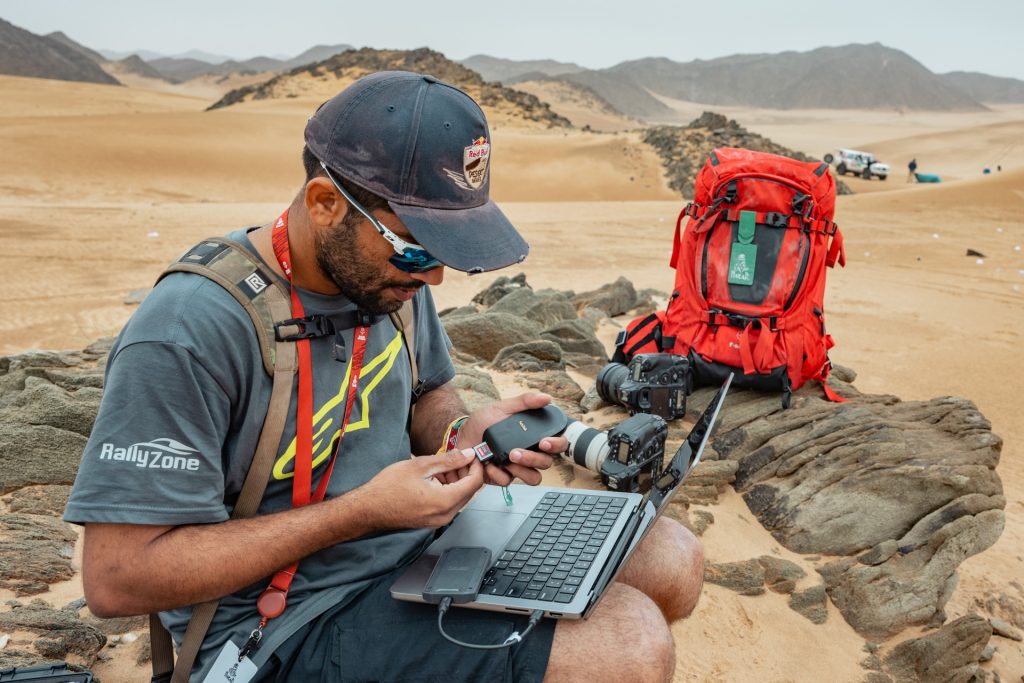
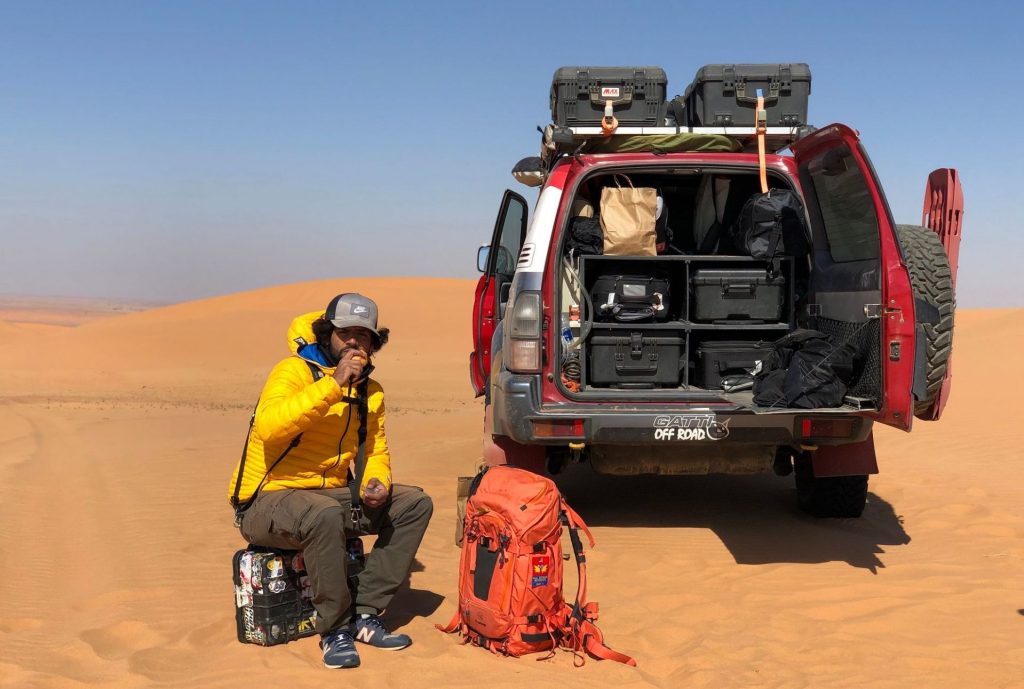
f-stop Ambassador Ishaan Bhataiya recently came back from the 2020 Dakar Rally which was the 42nd edition of the event and the first edition held in Saudi Arabia. The event started in Jeddah on 5 January and finished in Al-Qiddiya on 17 January after 12 stages of the competition. He was the first Indian photographer to shoot the grueling Dakar Rally in 2019 and also various rounds of the FIM Cross Country Rally Championship. He has worked with every automobile publication in the country, creating various editorial features and has finally made a foray into the world of advertising. We had the chance to catch up with him after the 2020 Dakar Rally, and talk more about how he prepared for this amazing event.
f-stop: This is not your first time shooting the Dakar Rally, can you tell us more about what do you usually take with you for this kind of assignment?
Ishaan Bhataiya
I’d carry 3 camera bodies, with 3 lenses ranging from super-telephoto to telephoto to an extreme wide-angle one. Three memory card cases with identical Sandisk 32GB Extreme Pro CF cards for each body. Batteries would generally all be charged the night before, so you don’t really need to carry one with you, unless you’ve had a hard night of partying and you know you have 4 spare batteries fully charged, so you’ll swap them out in the morning when you leave the car. That sorts out all your shooting needs. Apart from this, I'd have a Camelbak with about 2-3litres of water, energy bars, some candies, sunglasses, a few layers and a jacket depending on the weather conditions and a few buff’s and such stuff to wrap around your neck and then later to cover your nose when one of the mammoth trucks pass by blowing tons of dust in the air (thankfully though, not in the dunes).

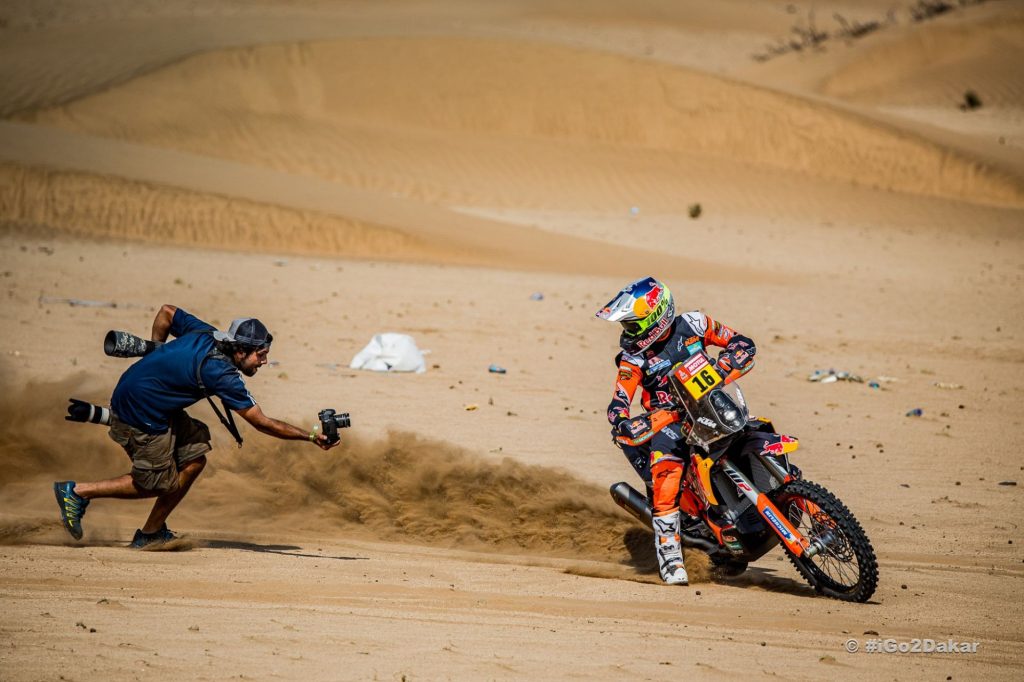
f-stop: What are the challenges that you faced during this event?
Ishaan Bhataiya
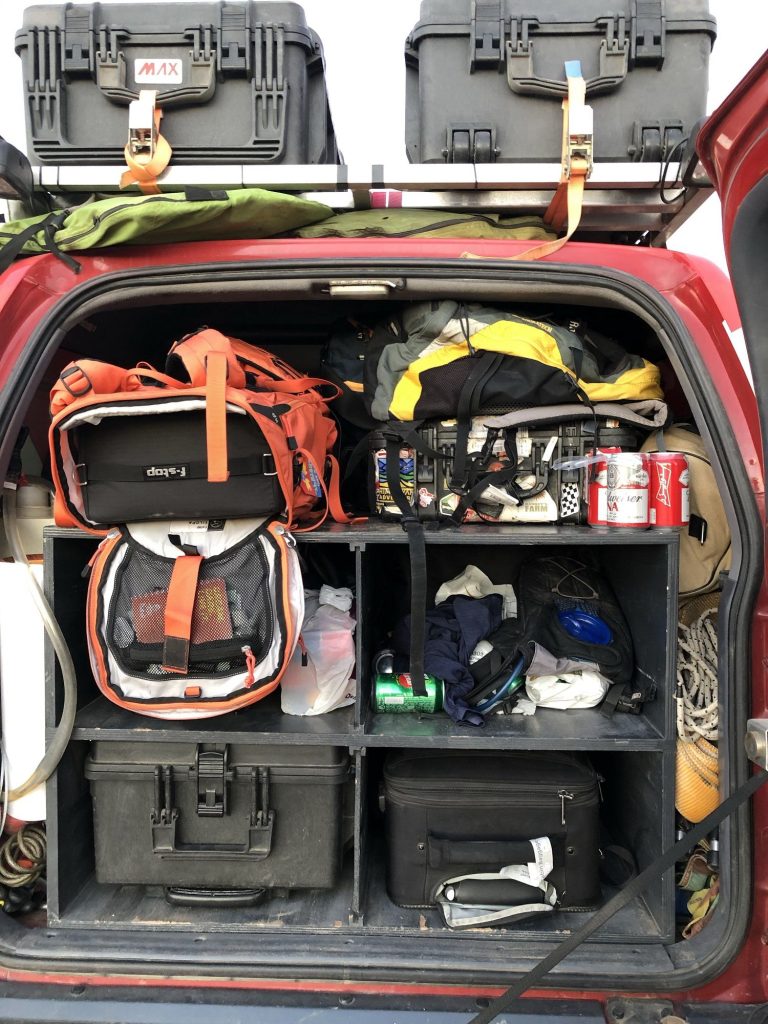
Action Sports, specifically shooting a rally out in the desert does not give you the comfort of having a marked place for all your gear in close proximity. Yes, there is the car that you come in, but it also has 2 other photographers. The main aim is for all three of us to move in different directions, to get different images and not end up with the same shots/composition as the other. Once the stage is live and the first rider crosses you, it’s going to be a continuous chain of bikes, quads, ssv’s, cars and trucks one after the other, and the only significant break you’d get would be between the bikes and the cars, or between the fast and the really slow competitors. In such a case, it's definitely not feasible to leave your place of shooting, to go back to the car to pick up those extra memory cards, or water or even an extra battery/lens. So, it all has to be on you at all times.
f-stop: You mentioned that you carry 3 bodies and 3 lenses with you at all times, can you tell us why?
Ishaan Bhataiya
Typically a rider/driver stays within shooting range for some seconds on an average, with 3 bodies with 3 different lenses, you maximize your possibility of making different shots of that rider and you normally choose places to shoot accordingly.
f-stop: Can you walk us through your gear and tell us what did you carry inside of your Tilopa, and also tell us why did you pick this specific set of gear? What else do you carry in the pockets?
Ishaan Bhataiya
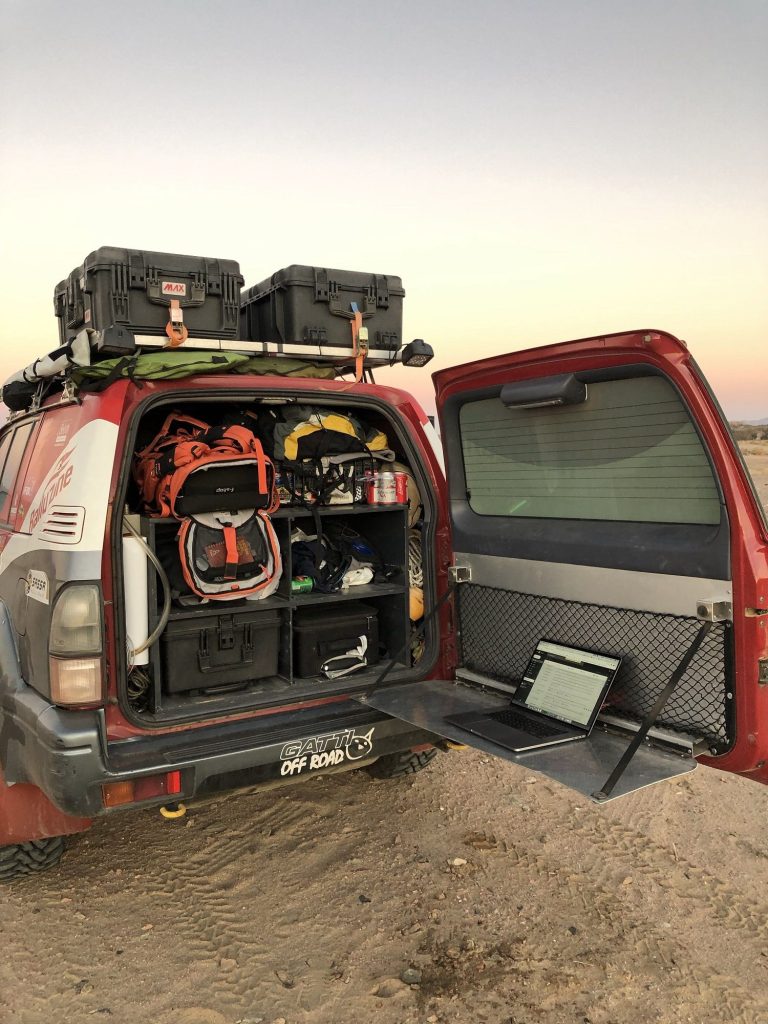
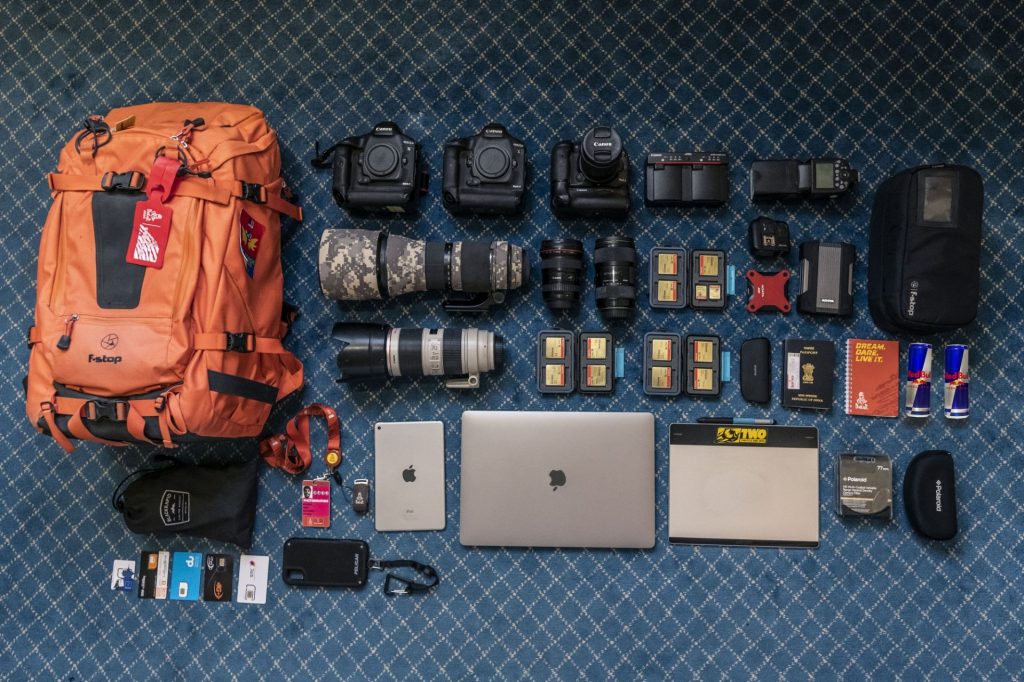
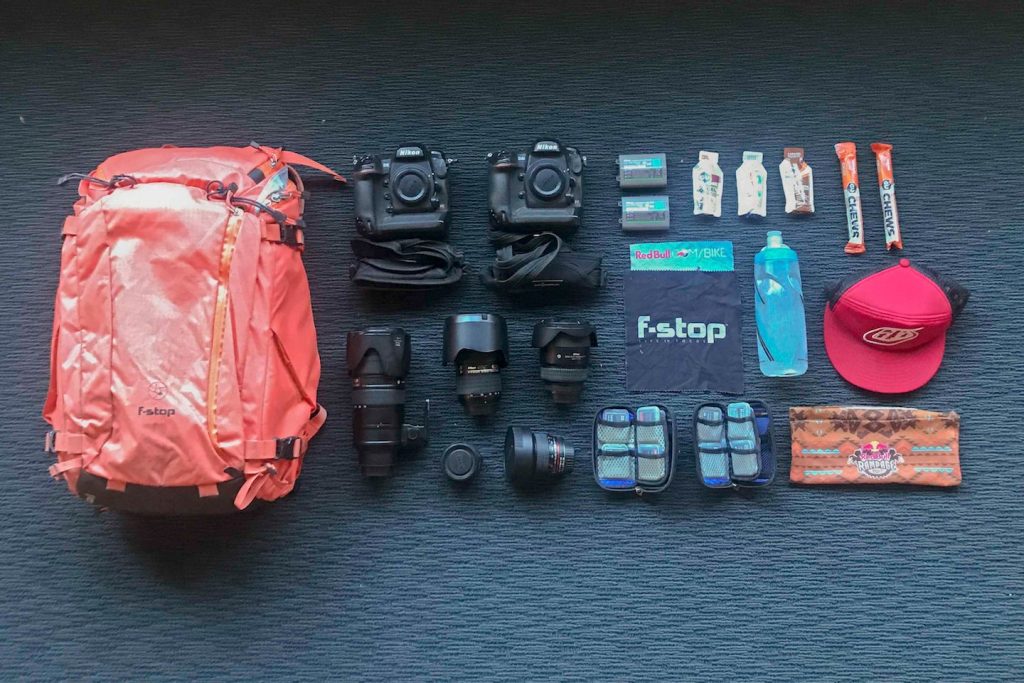
I had 2xCanon 1Dx Mark2, Canon 7D Mark2, Canon 10-18mm, LP-E19 Battery Charger, External Flash and Trigger, Tamron 150-600mm Sport G2, Canon 17-40mm, Sigma 18-35mm, Sandisk Extreme Pro CF Cards, ADATA SSD, ADATA External HDD, Large Accessory Pouch, Canon 70-200mm, Sandisk Extreme Pro CF Cards x2, Sandisk Memory Card Reader, Passport, Notepad, Red Bull, Blackrapid Sport Breathe, Dakar 2020 Accreditation, Pen Drive, iPad, MacBook Pro, Wacom Intuos, Polaroid Filters, Polaroid Sunglasses, SIM cards, iPhone X Pelican Case. Almost all of the camera equipment goes into the XL ICU inside my Tilopa, accessories like filters, camera straps, hoods, lights would go into the Large ICU inside a hard-case. The side pockets normally are pretty empty, I’d stock an extra Ortholite sole for my shoes and some extra buffs, scarves in the other pocket. But usually, I keep them quite empty, cause the car has only limited space for all the bags, and you’d like a tall bag, not a fat one.
I selected this gear cause typical to shooting action sports are really challenging environments and locations which could take a toll on the cameras. With top-of-the-line camera bodies, you negate that risk cause they’re sturdily built with super-strong magnesium alloy bodies and weather-sealed lenses. Multiple bodies so that changing lenses would not be a thing I’d be concerned with, cause in such sandy and dusty conditions changing lenses is just a nightmare and you’d end up with more damage than Good sometimes. The top (outside) pocket would have an extra phone, a notepad, pen, earphones, microfibre cloth, keys, zip ties, and maybe some batteries or things I need to store for the time being and also an iPad. The inside pocket would normally have more important things like my passport, documents, Identifications cards, SIM cards, pen drives, another note pad, dog tags, lens cleaning solution and cloth, stickers.
f-stop: Now when the Dakar Rally is finished, what's next for you?
Ishaan Bhataiya
India is going through an interesting phase with all the politics and laws being passed in the country. Jammu and Kashmir have always been at the top of the list of states being affected by these actions, so much so, that there was a 145 days+ internet shutdown in J&K. Amidst all of this the Kashmiri youth are finding their solace, 'mental peace' and spending their time productively by going out and skiing on the pristine slopes of the Himalayas in Gulmarg, and I've been told that they're rather good at it, so I'm heading down to Kashmir to shoot this Skiing story in about a week. Post that would be some more supercross, track racing and digital campaigns leading up to the Auto Expo in March.
Follow Ishaan's adventures on Instagram and Facebook.
Every year Red Bull Rampage produces some of the most jaw-dropping images of mountain biking. f-stop Icon Scott Markewitz breaks down his gear and talks us through what is going in his bag for the Red Bull Rampage, along with some shots taken with that setup over the years.
Words and photos: Scott Markewitz
In 2018 f-stop Icon Scott Markewitz documented the Red Bull Rampage as the Event also moved to a new zone with riders building entirely new features and lines. Just like the riders, the photographers have to navigate the vertigo-inducing terrain to find their angles on these new features. In order to navigate the Rampage course and still carry a two-body setup, Scott grabs the slimmest of the Mountain Series packs for this.
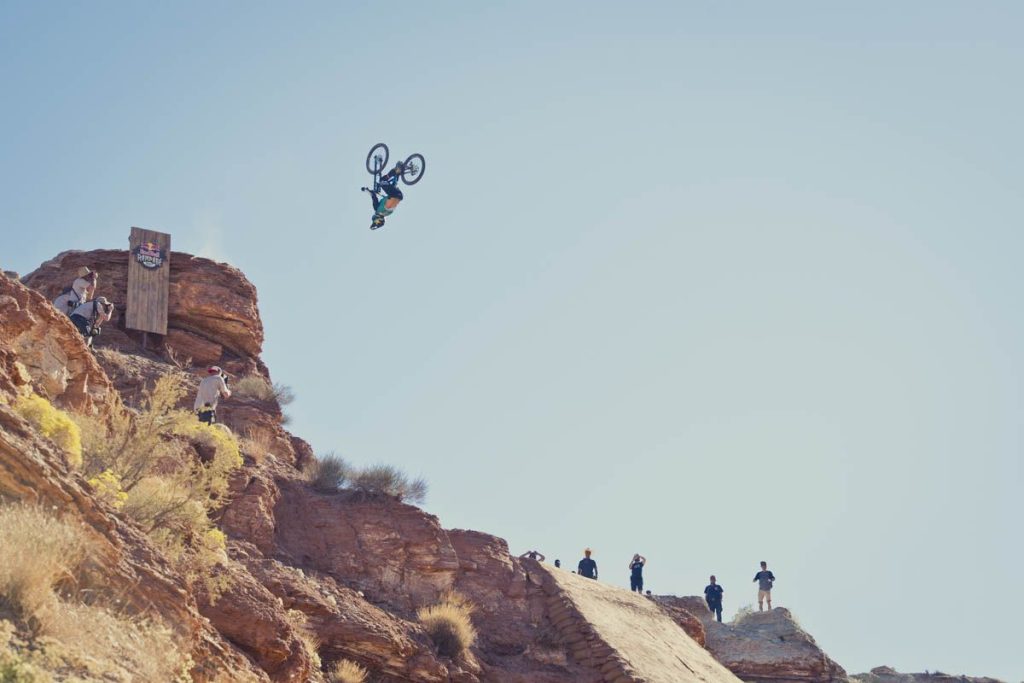
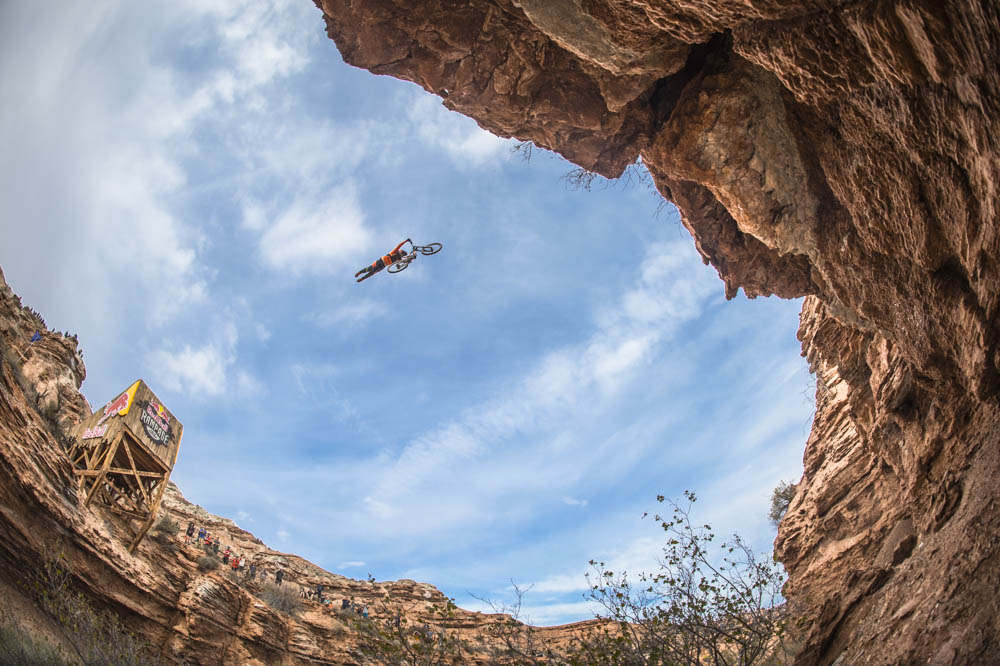
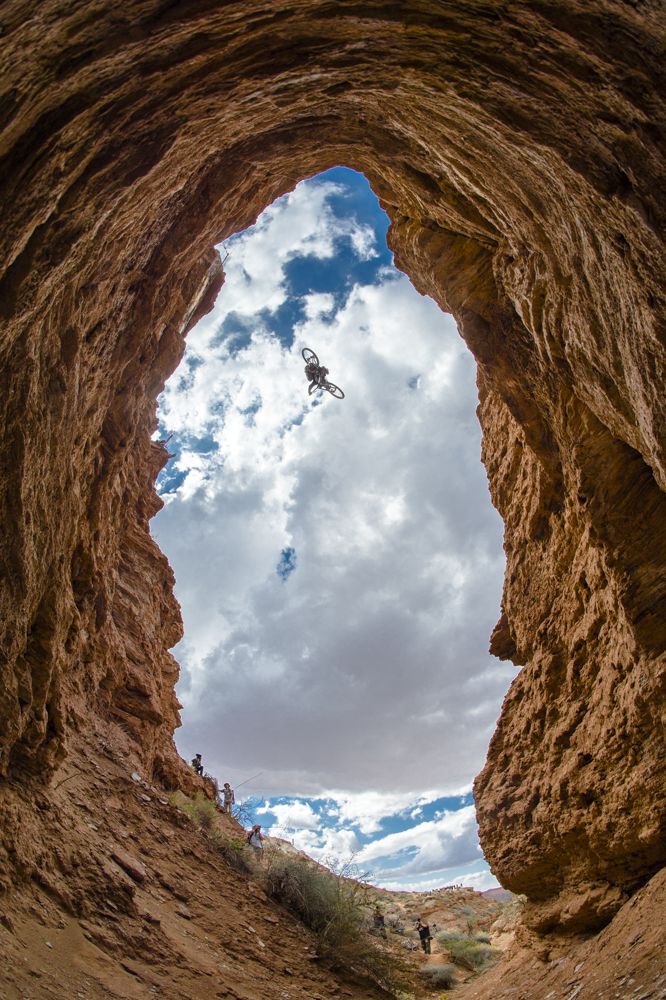
Kurt Sorge sends a backflip over the media pack at last year's Rampage, shot with the trusty 70-200.
The Rampage is one of the most incredible events in action sports. It brings together the world’s best freeride mountain bikers for a contest and a show of massive jumps and insane riding skills on the rugged terrain around Virgin, Utah. I’ve been to every Rampage since the beginning and it’s definitely one of the shoots I look forward to every year
On the road to Rampage 2018: Packing two full frame pro body DSLRs, 4 lenses, and daily essentials in the 32L Lotus camera bag to stay agile working shooting among the Utah cliffs of the Red Bull Rampage course.
One of the challenges of photographing the Red Bull Rampage is moving around and getting set up to shoot the riders during the event. The venue is spread out and every athlete takes a different line down the mountain. There’s not much time between runs, so you have to have to know where you’re going to shoot and move fast between each run to get in place. I like to have a pack that is large enough to carry everything I need for the event but light and agile when I’m running up and down the mountain between shots. For this year’s Rampage, I’m taking a Lotus.
The Lotus is a great mid-size camera pack that still fits a Large Pro Camera Insert but is lightweight and most importantly easy to move around with. This is especially important on an Event like the Red Bull Rampage.
I always have two full-size DSLR bodies in my camera backpack, a Nikon D5 for the majority of my work with a Nikon D4S as a backup just in case the D5 fails. For lenses, I bring a 70-200mm 1:2.8 GII, 24-70mm 1:2.8G, 17-35mm 1:2.8D, 12mm 2.8 Fisheye, a 1.4x converter to extend the range of my 70-200, as well as extra camera batteries, lens cloths and more than enough CF cards for any day of shooting.

Cam Zink doing what most of us would want a parachute for, on his way to 2nd place at Rampage 2017, shot with the 12mm fisheye giving a sense of the wide open space the athlete is launching into.
The Southern Utah desert is hot, dry, and dusty and the sun beats down on you when you’re out there all day. A water bottle is obviously important to stay hydrated, but I also bring a hat, a buff for extra cover, and sunblock (not shown), as well as a few GU energy gels and chews for a quick energy boost when I need it.
It doesn’t seem possible that the riders can go any bigger or do anything wilder, but at every Rampage the athletes continue to push the realm of what’s possible to new levels. I’m really excited to see what they are going to pull off in the future.
It’s going to be another incredible event!
Scott Markewitz is recognized as one of the most influential outdoor photographers in the industry. His passion for photography and the outdoors comes through in everything that he shoots, whether it’s action sports, active lifestyle, or environmental portraits. His images have appeared in advertising and promotional campaigns for many well-known outdoor and consumer brands
Words and photos by Alex Grymanis
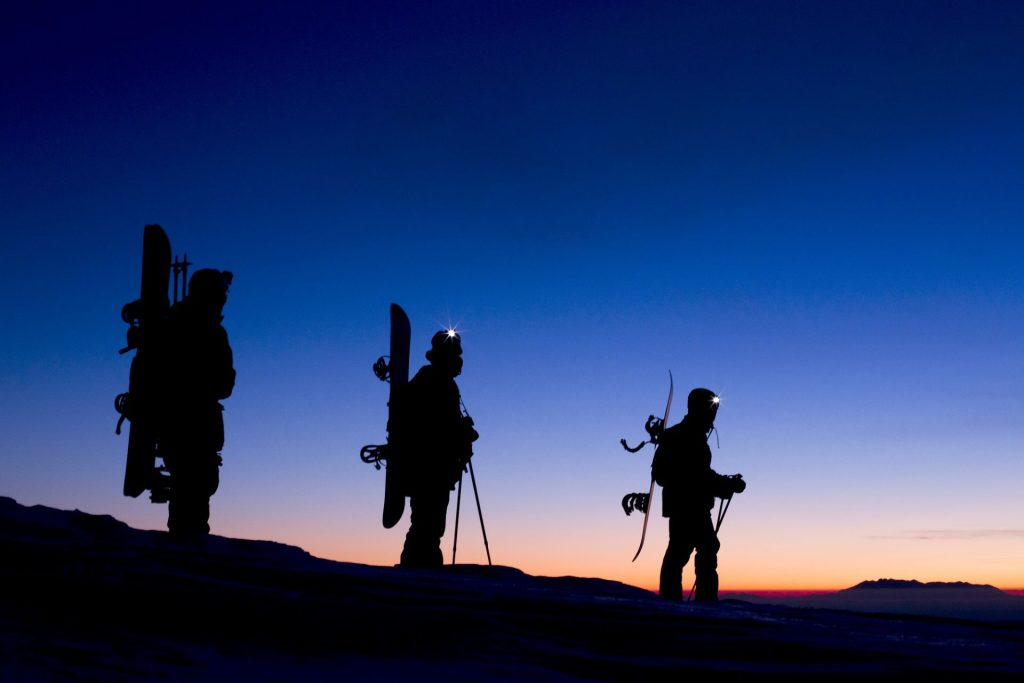
Snowboard photographers traverse the globe following the best riders and searching for the most epic snow conditions in far-flung locations. However, sometimes the most meaningful experiences can be found closer to home, as f-stop Ambassador Alex Grymanis found. He explored the beautiful landscapes of Northern Greece through snowboarding.
Greece might not be the first place that springs to mind for snowboarding, but for Alex, the trip gave him the chance to hit the road with close friends and re-experience what made them fall in love with snowboarding and adventure.
This trip taught us that we can achieve anything as long as we have the will and the aspiration to do our thing and we do hope that it will inspire you to do the same.
Alex Grymanis
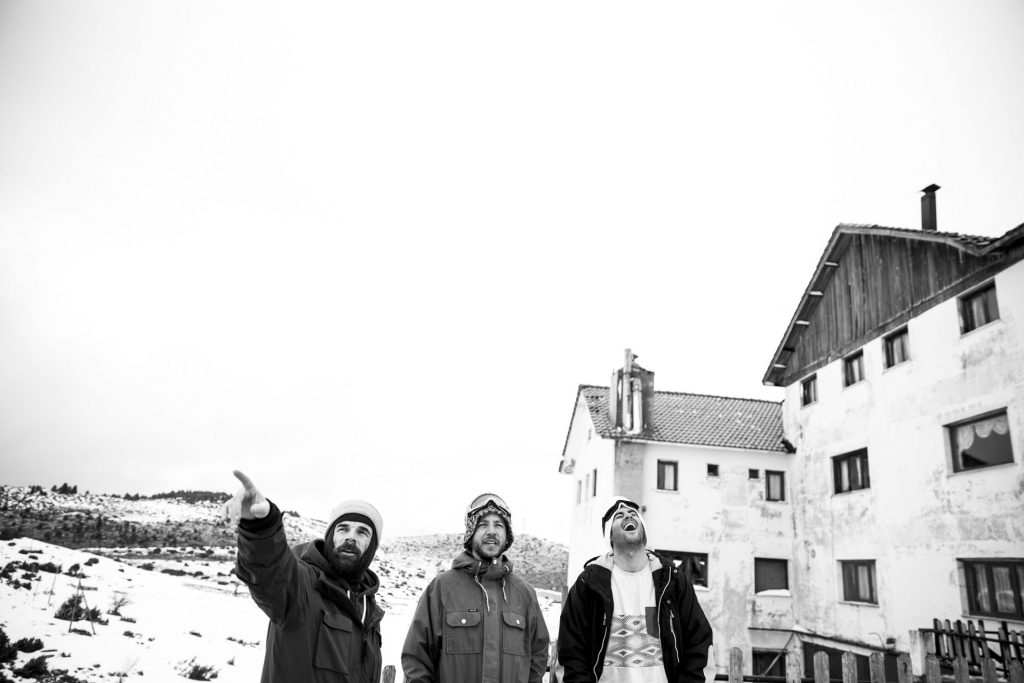
Last February, almost a year ago, I traveled through northern Greece. This trip started with a few friends, in an RV, for 10 days in search of snow and new places in our country, Greece, where we could snowboard. The fact is that it came to be a trip about creativity, relaxing, and being once again carefree. During these 10 days not only did we become children again and remember the feeling of being away from the concrete and loud city, but we also learned how to coexist in a small, confined space and we reconnected with nature.
Now that a year has passed by, a book, a video, and these photographs keep that trip alive in our memory and make it possible to share this experience with you.
Everything seems fun and normal until you wake up the first morning surrounded by snow and by your friends all in a tiny four-wheeled house. The sweet lullaby from the wind and the sound of the trees at night become your guide and sooner or later you realize that you need to adapt to this new environment along with all of your gear, cameras, and wardrobe along with its frustrations. You learn to respect other people’s privacy, needs, and weirdness and start working together as a team. In places without electricity and no internet, the real connection between you, your friends, and the people you meet happens.
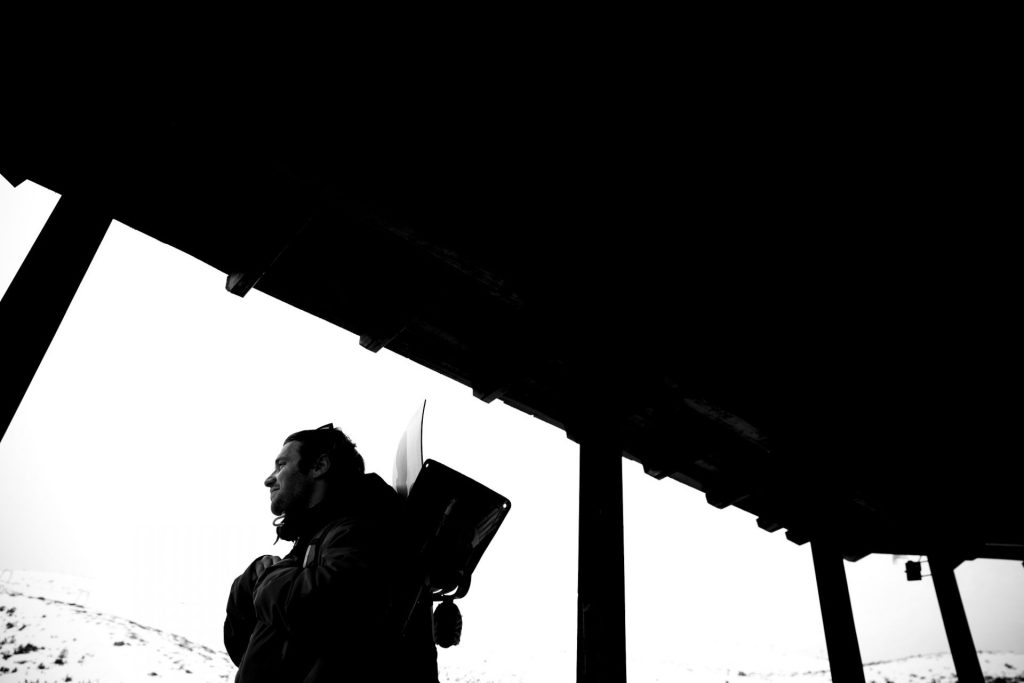

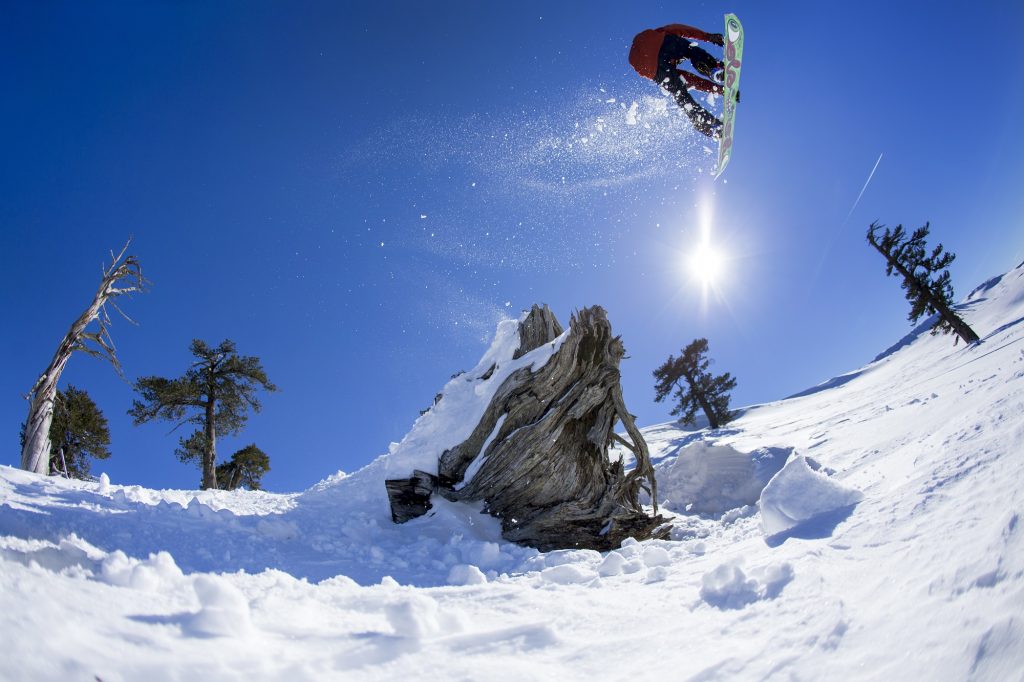
Growing up and having to work more to make your living, tends to shift your mind away from the things that you really love and make you feel happy and free. The deeper search in locations already known wakes up that feeling of rebirth and connection with the mountain. We got blessed with a heavy snowfall in Vasilitsa in the middle of the trip and decided to explore the “already known” slopes but from a different angle.

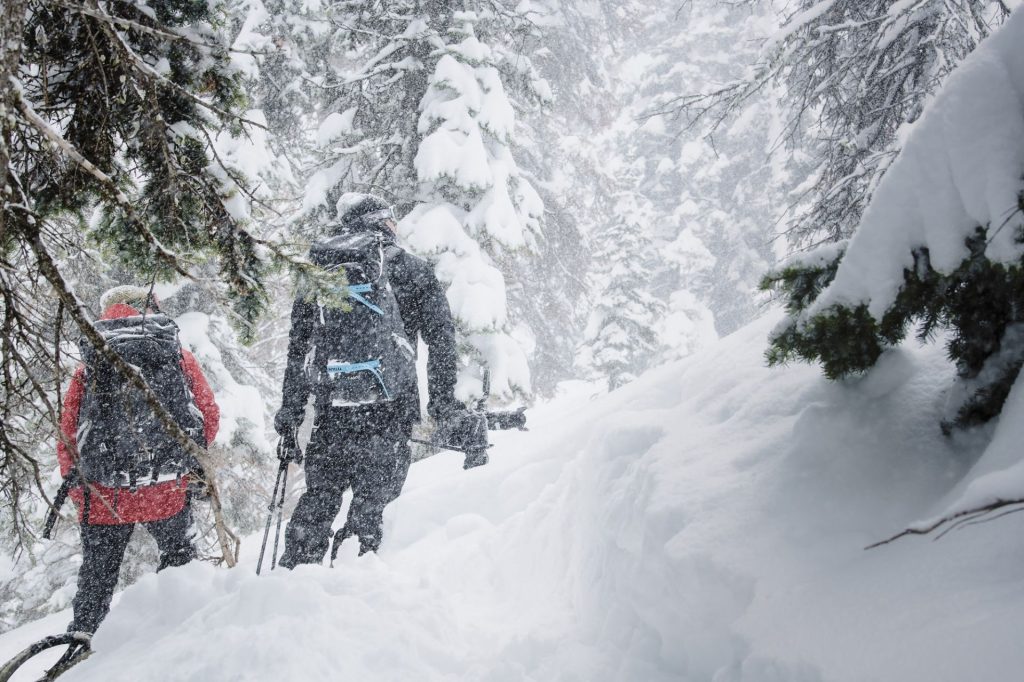
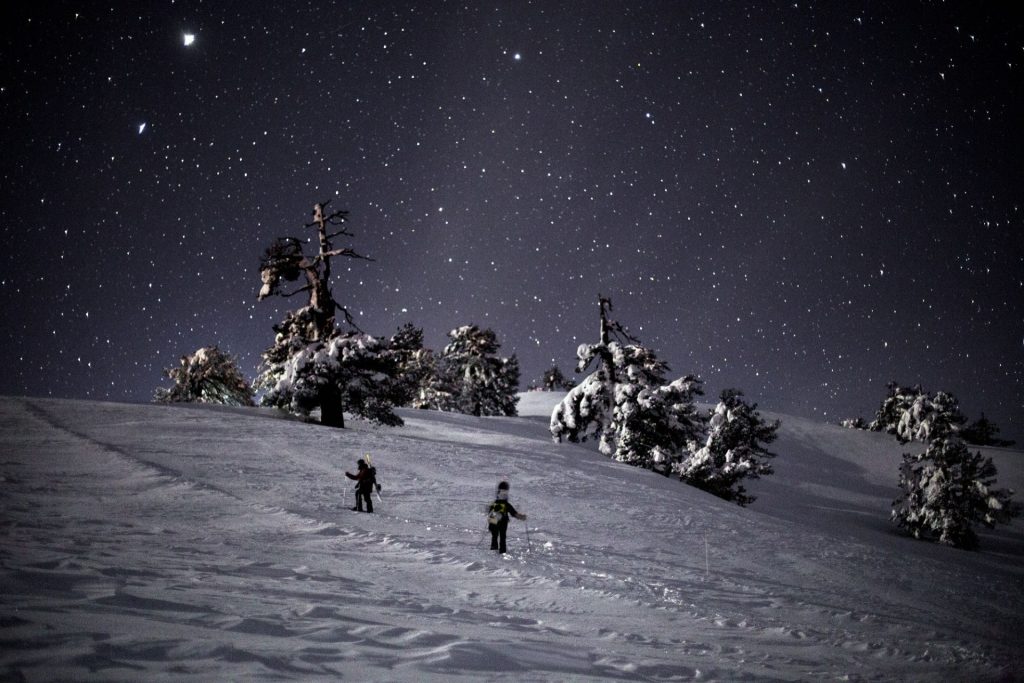
Snoozing the alarm was our biggest fear for that night’s mission. It was the coldest night of the trip but at the same time the most beautiful of them all. The sky was clear and full of stars so bright that it seemed we were walking on the moon. Our motivation for the hike soon became stronger and we made it to the peak slightly earlier than expected. After a short rest, we strapped in our boards on the backpacks with Gatekeeper Straps and when the first sun ray hit the slope we dropped into the line that would shift our perspectives of snowboarding forever.
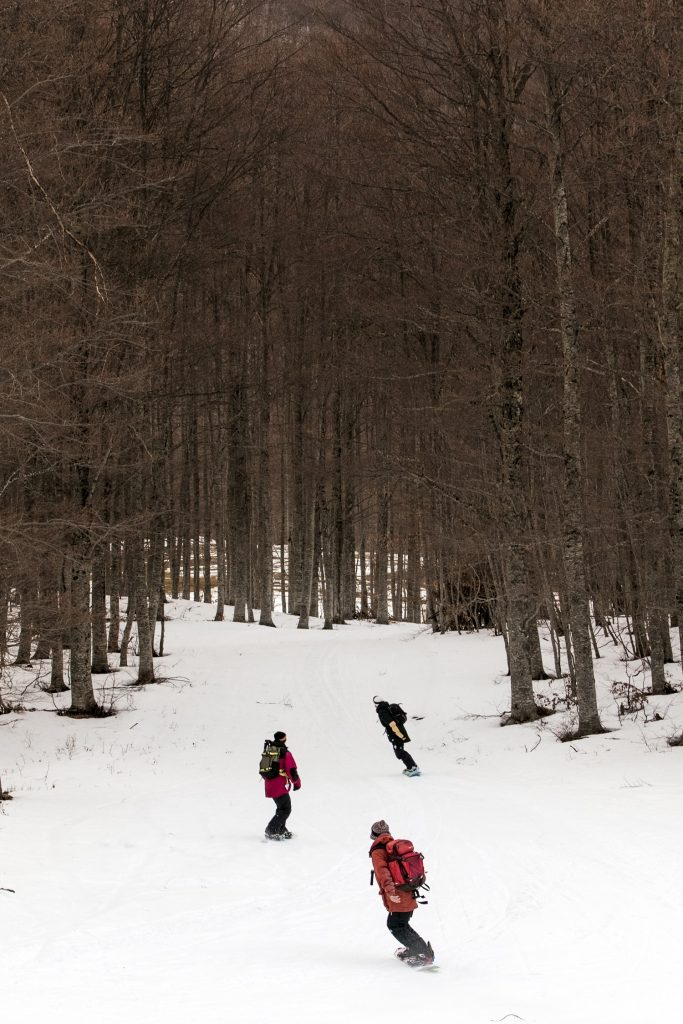
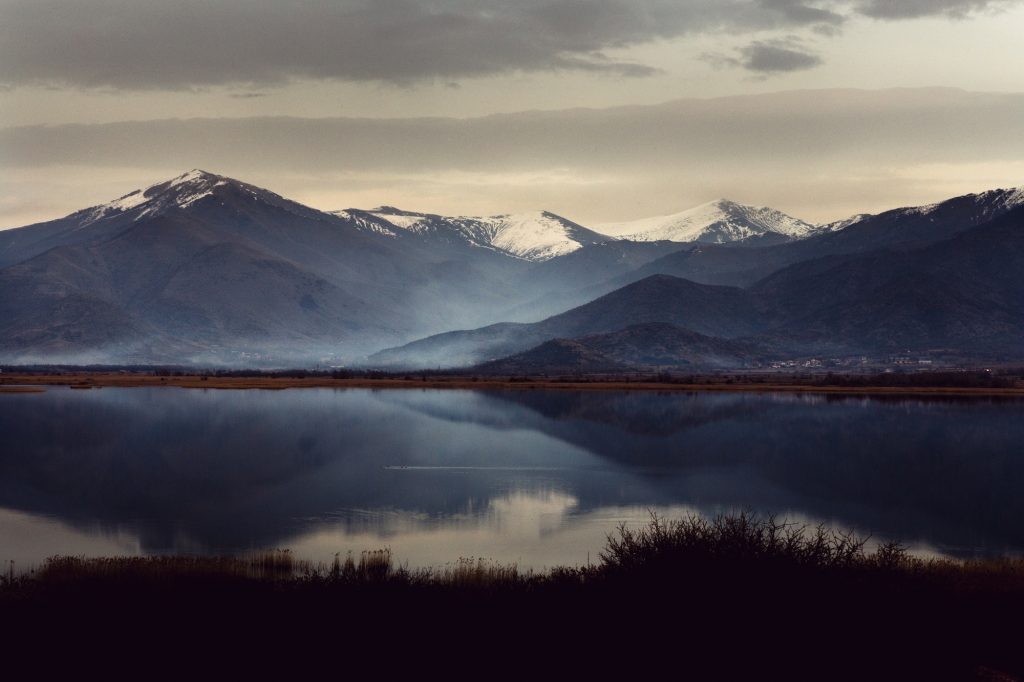
Making every day count was the main idea since day one. Downdays came with heavy rain on the mountains and it was time for us to hit the road. On the way to Metsovo, we made a 180-degree turn and drove even further north to the Prespese Lakes. We got to experience the life of local fishermen and saw farmers burning their fields to prepare them for the following season in a place that stood out from the rest of the trip. Needless to say, we had the best feast on the whole trip.


Discount Applied Successfully!
Your savings have been added to the cart.

