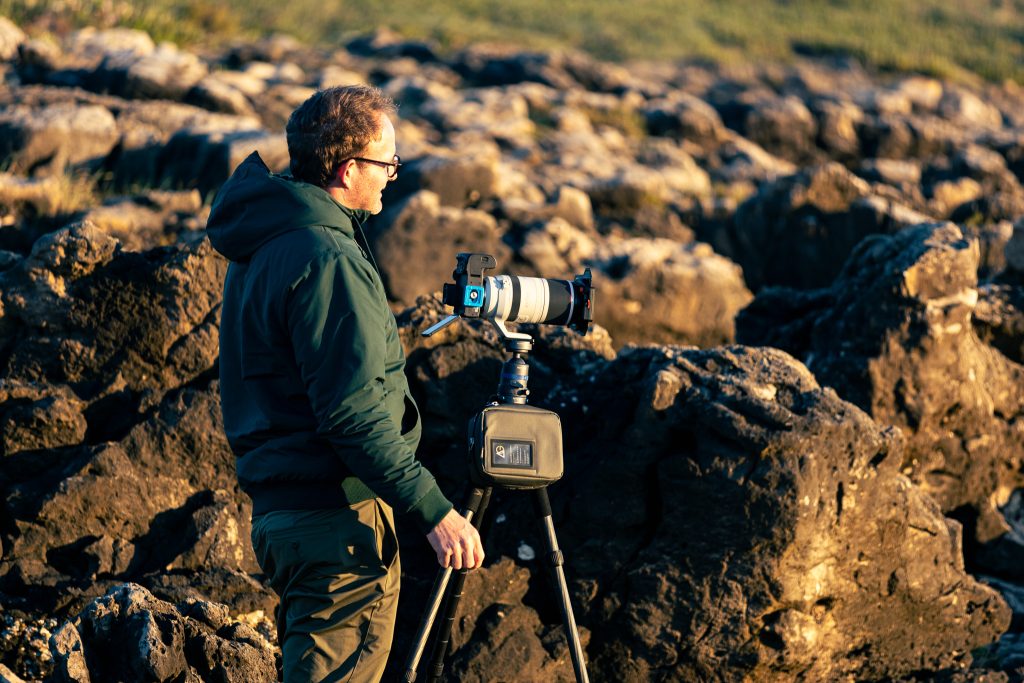
Marcello Cavalcanti is a pro landscape photographer, teacher and tour leader for photography workshop trips.
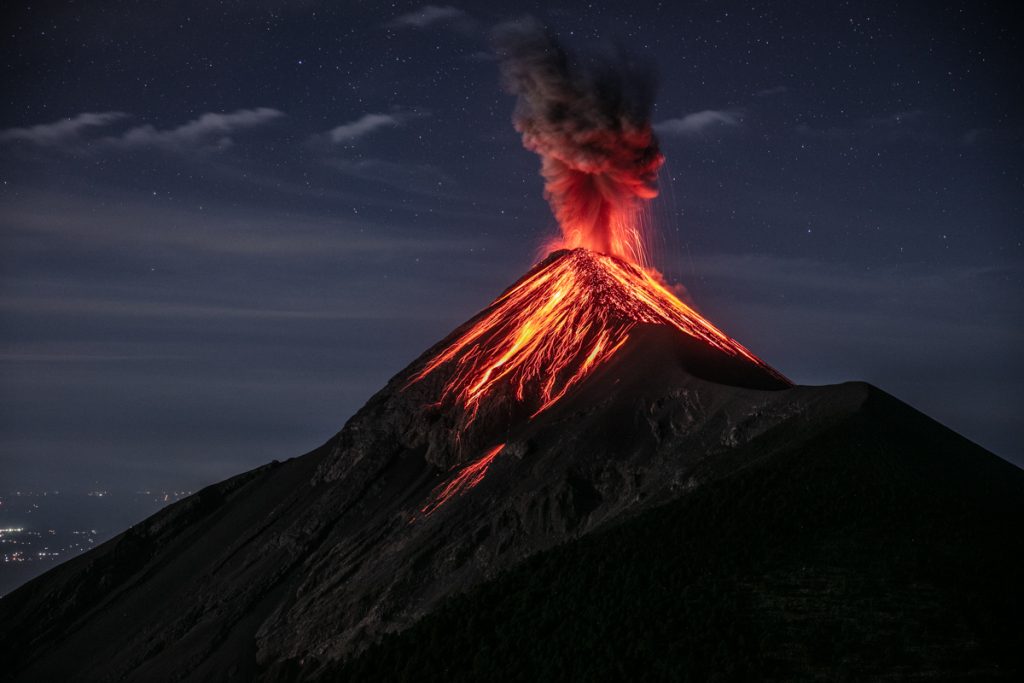
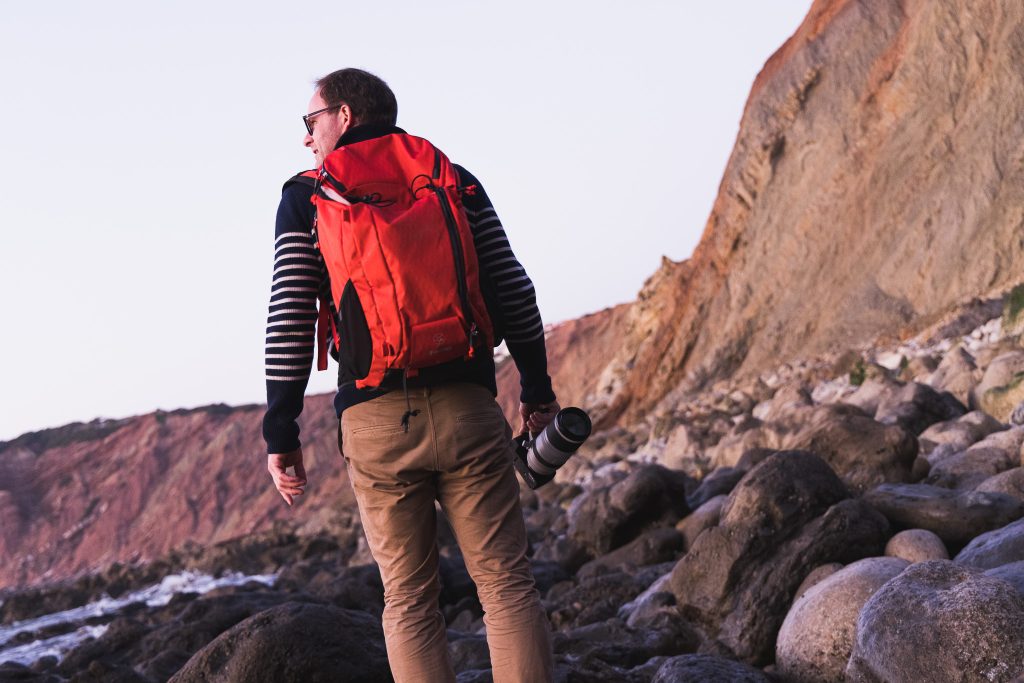
Recently he led a tour with 9 photographers to beautiful Guatemala, where you can get up and close with Fuego’s Volcano (Vulcán de Fuego), a stratovolcano with 3.763 meters high (12,345 ft) that spills ash, plume and lava every 10-15 minutes, sometimes longer, sometimes shorter.
To shoot this volcano with the best possible view, he took his group to hike another volcano (this one, inactive, of course), called Acatenango, that gives you amazing views of Fuego, and in a very close position - they are aparted 2 km (6500 ft) away!
So, one important thing to know about volcanoes is that if they don’t make a lava river (like Fuego) you can’t see much during the day, unless a lot of smoke comes out of its mouth; the pictures of this huge column of plume are cool though.
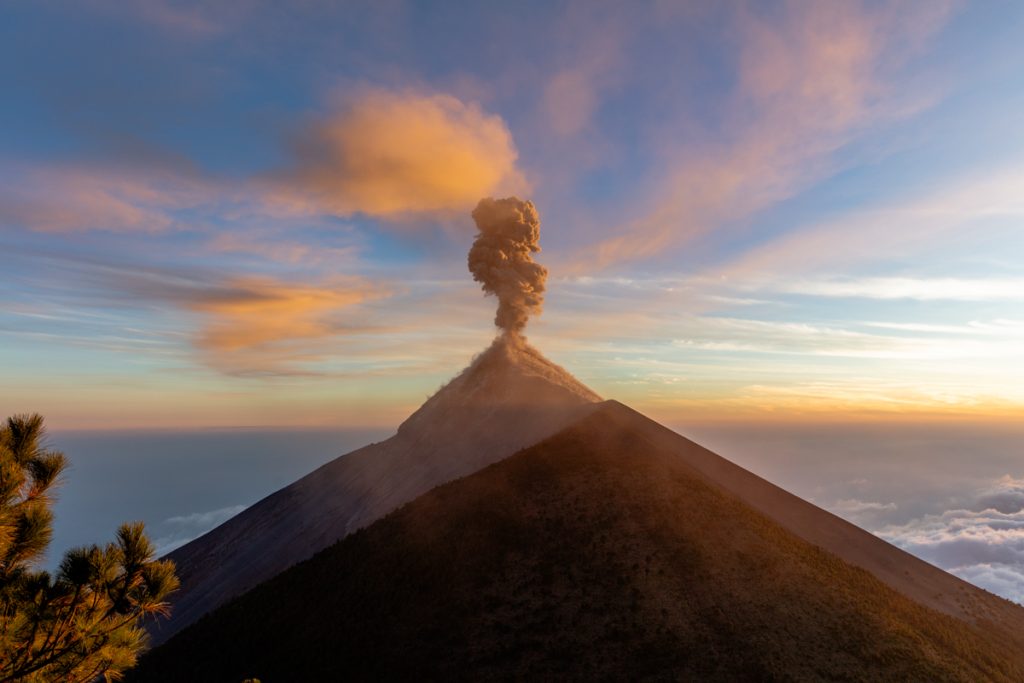
As there’s a lot of light illuminating the whole scene, you can make these pictures with the camera in hands, without a tripod (as long as you use a high shutter speed like 1/500 or more) which gives you more freedom to create different angled shots searching for an interesting foreground.
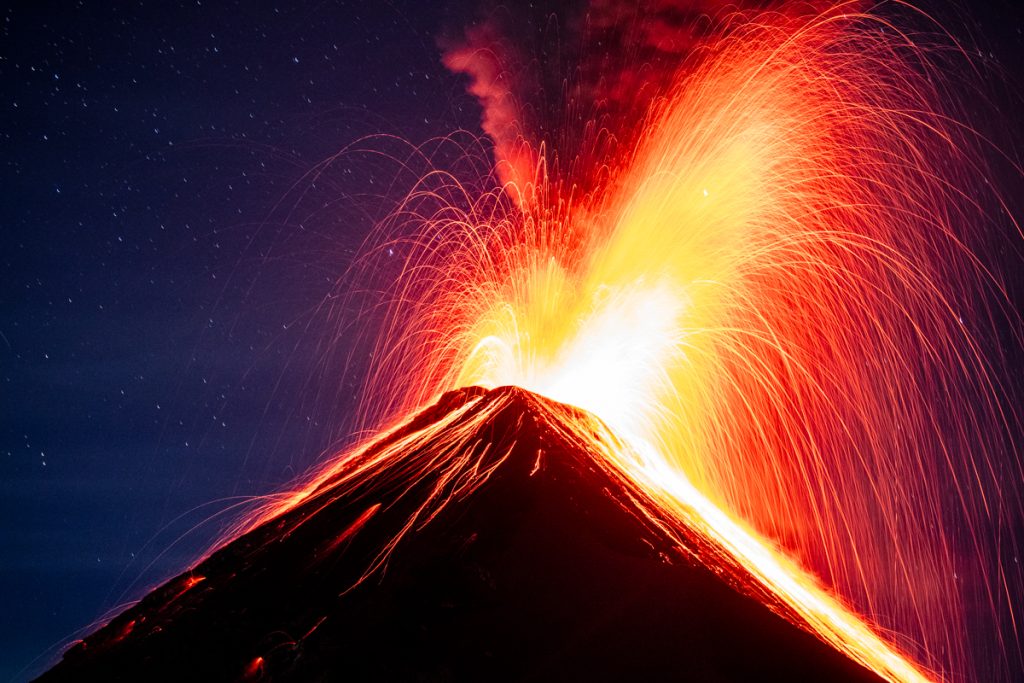
But, it’s at night that the real spectacle begins. Without the sunlight, the explosions of Fuego bring up amazing red lava, rocks flying and smoke. That’s when the really cool images starts to reveal, as long as you follow some basic tips:
It’s really hard for any camera to autofocus in the dark, so rely on the manual focus, make it at any part of the volcano that you will be fine when the explosion occurs. Newer cameras like the mirrorless ones that have the live focus peaking feature are even easier to achieve the perfect manual focus. But, remember, if you change the lens or even change the focal length using the same lens, you will need to redo the manual focus.
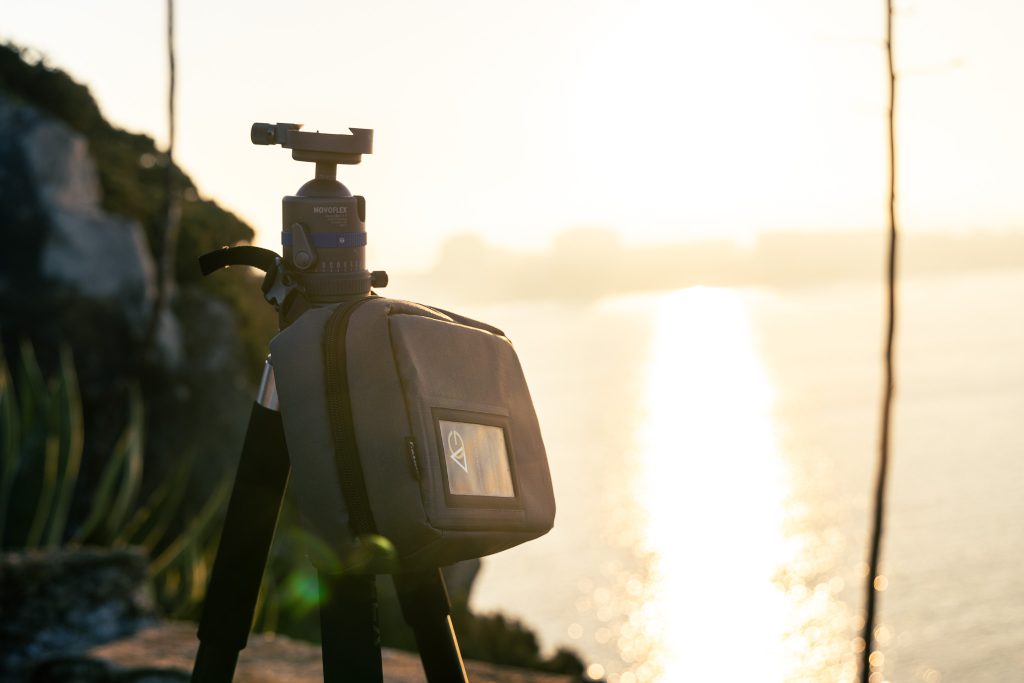
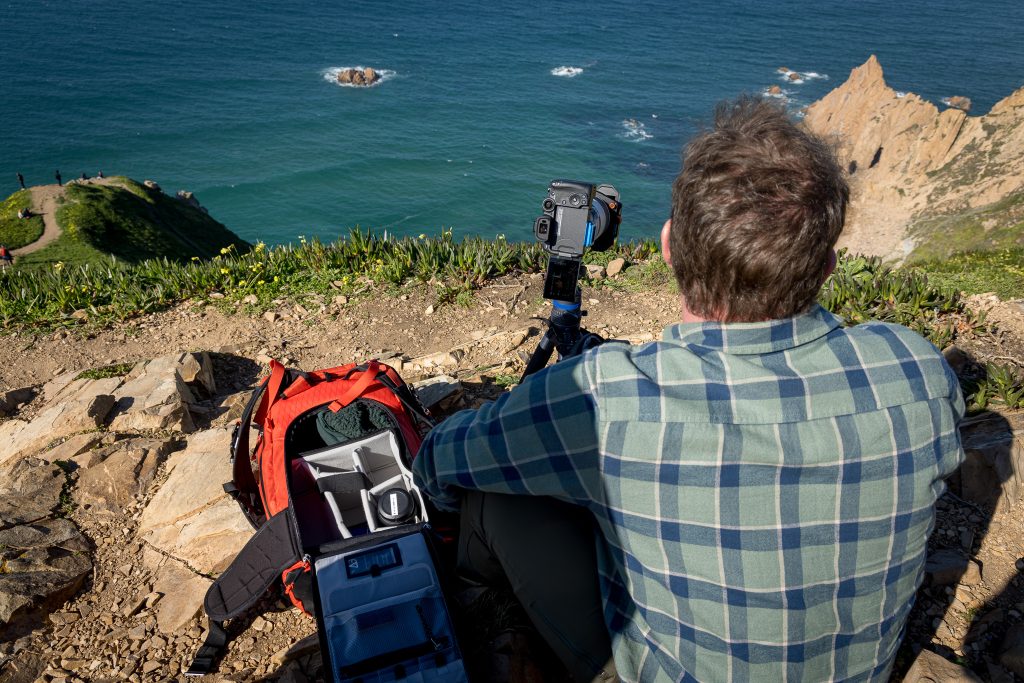
In this experience we tried different focal lengths to have different shots every time Fuego gives his show. As we were really close from it, the longer length i used to frame the whole scene was 135mm, so a 70-200mm lens is more than enough to do the job. The results are impressive! On the other hand, if you want to make an image with the volcano plus the starry night sky (or with the long and tall smoke column) a wide angle focal length between 15 and 24 mm will work perfectly.

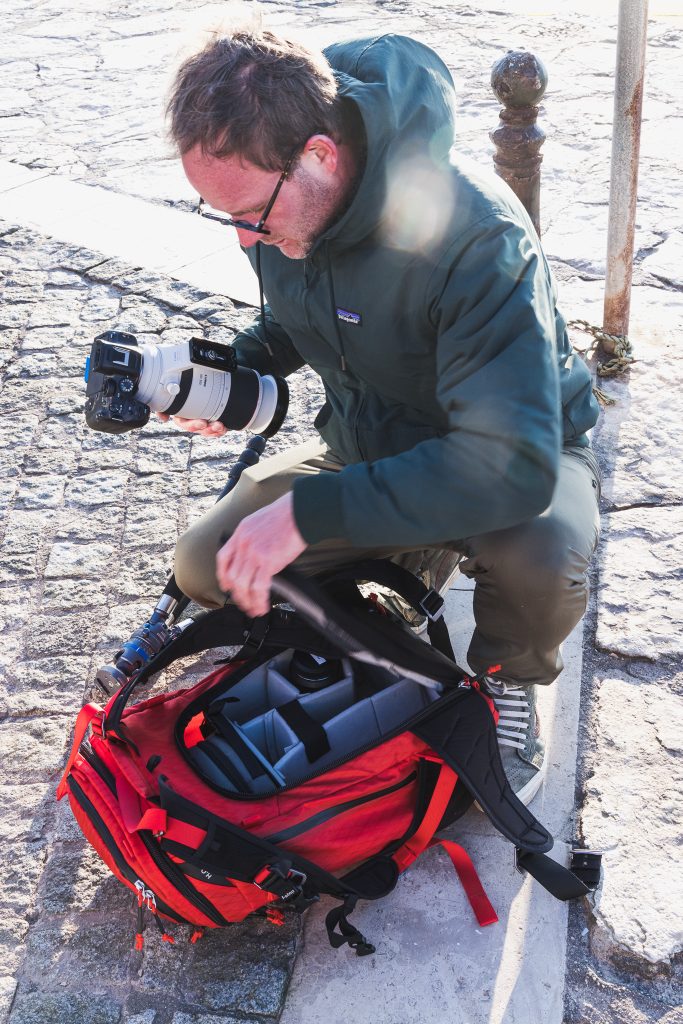
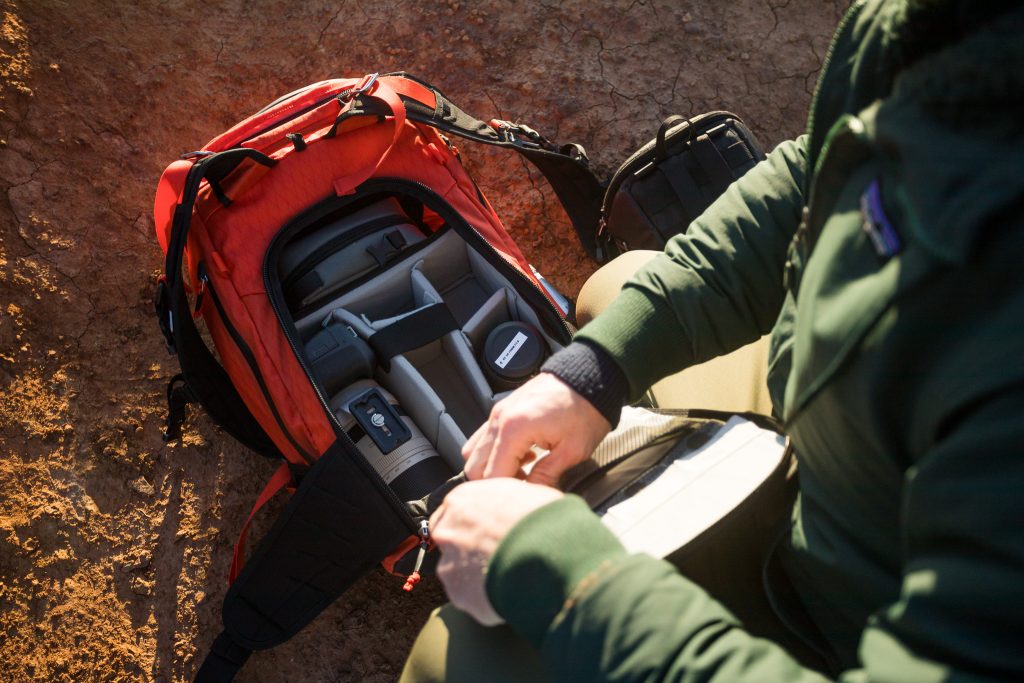
To make any active volcano pictures you will be around a lot of ash. Every explosion releases tons of ashes in the air, that falls within a radius of dozens or even thousands of kilometers. So my pick would be any f-stop with the Duradiamond exterior, to prevent ashes coming inside the backpack.
We spent the night at the base camp of Acatenango shooting Fuego, so you also need to bring warm clothes, gloves, water, some food, so think about a larger backpack than you usually use on your daily photo shoot sessions.
I used the Tilopa 50 during this trip and it was for sure the right choice not only because of its rugged exterior protection but also because it fits everything i needed for this adventure, including a 100-400mm lens that i used for closed shots of the volcano (i had this lens in Guatemala to shoot the quetzal bird, but that’s a story for another post! )
For any further questions, you can find Marcello on his instagram profile: https://www.instagram.com/marcellocavalcanti1/

f-stop Ambassador Alexandre Gendron visited us in Portugal during our Pro Hangout. While he was with us, he walked us through his travel setup, using his AJNA 37L DuraDiamond®. Read more below about the tips and tricks that make his life as a working professional easier!
"When it comes to packing and organizing for any photo shoot, whether it is real estate, adventure, or travel photography, I believe in thorough preparation and attention to detail. Firstly, I have my checklists for all the necessary equipment, depending on what I will be shooting. This ensures I have my key equipment, such as camera body, lenses, tripod, spare batteries, memory cards, and any other specific gear required for the shoot.
I prioritize lightweight and versatile gear for adventure and travel photography that can withstand various weather conditions and rugged environments. In terms of physical organization, I use my f-stop AJNA for shorter trips, or my Tilopa for longer journeys with the Medium Slope - Camera Insert to safely store and transport my gear. This ensures everything is easily accessible and protected from any potential damage." - Alex Gendron

To organize and prep for a shoot, I have three top tips and tricks that could enhance your travel experience.

Alex's equipment consists of the Ajna 37 L DuraDiamond® (Magma Red) along with the Medium Slope Camera Insert.
He shoots with the Canon EOS R5 and R7 bodies, the Canon RF 15-35mm f2.8, Canon RF 24-70mm f2.8, Canon RF 100mm macro f2.8 and the Canon RF 100-500mm f4.5-7.1 lenses.
The additional gear he carries when needed includes his Binoculars for wildlife (vortex 10x42), a Drone (DJI Air 2s and DJI Air 3), and a tripod which is attached to the outside of the pack. For overnight trips, he uses an insulated mattress (thermarest Neoair Xtherm) and a sleeping bag. In our video, Alex has brought his travel kit, consisting of the Canon EOS R5 with the Canon RF 24-70mm and the Canon RF 15-35mm.
He uses the f-stop Filter Case with his K&F Filter kit ( ND and Graduated ND filters) and sees his Navin Pouch DuraDiamond® as a must-have for hiking.
Alex also uses the Tilopa 50L and occasionally the Sukha 70L along with his Pro Large Camera Insert. His main setup is the Pro Small Camera Insert or the Medium Slope - Camera Insert paired with either his Ajna 37L or his Tilopa 50L backpacks.
As a professional photographer for more than ten years, Alexandre has a taste for adventure and the great outdoors. In 2013, he left Paris for Australia, where he honed his skills as a photographer.
Seeking new challenges and adventure, he returned to Europe in 2016 by bicycle. He cycled 14000 km and travelled a further 8000 km, mostly on sailing boats, hitch-hiking from marinas and boat yards, to Vietnam where he ended his bike trip and trained to become a yoga teacher. He then travelled through France, Italy and Switzerland by van, before returning home.
He now teaches photography and explores the natural spaces of the Annecy region. His work has a refined style that often emanates a mystical ambience.


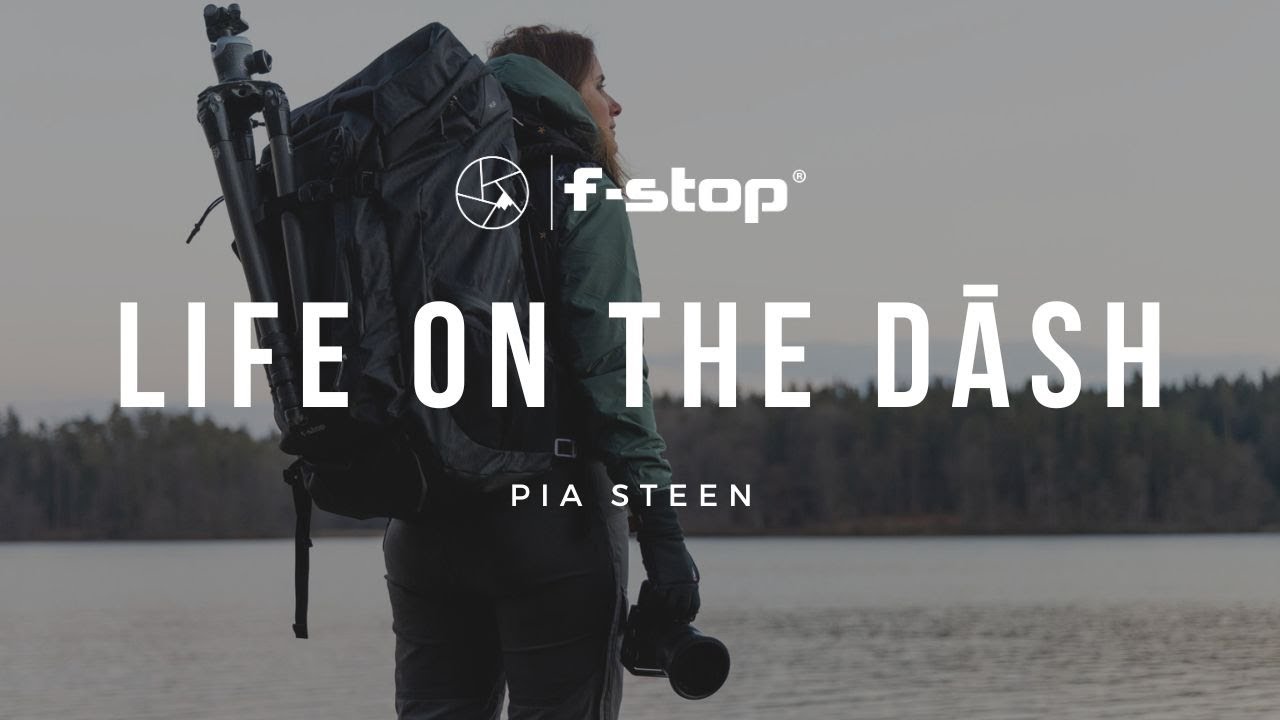
Everything is constantly moving and changing. When you are always transitioning from one assignment to the next, life can be hectic. Saving space, distributing weight, and planning ahead for a day in the field are all essential considerations when you are on the go. Join us as our Ambassadors share tips and tricks they have learned over years of traveling, with Life on the Dāsh.


How would you carry all of your camera gear plus a lot of camping gear? You might do what f-stop Ambassador Pia Steen does when she wants to pack camera gear and camping gear. She loads up her Shinn 80L DuraDiamond® with everything from cine setups to long lenses.
“If I sometimes just need that little extra space I have it and don't need to worry”
One of Pia’s passions is landscape photography which requires a lot of planning, time, and patience. Pia is often on multiple day tours and workshops. So she needs a pack with the capacity to carry EVERYTHING for several days, including clothing, a jacket, a sleeping bag, a camping stove, food, etc. Then, when planning short hikes away from camp and plan, Pia unpacks, reorganizes and just takes the essentials for that day’s hike.
Nature has always been an important and big part of her life. Pia has used f-stop for over a decade and uses multiple Packs - each one for a different purpose! However, the Shinn is a pack she regularly chooses over her Tilopa 50L DuraDiamond® for trips or excursions. .

One of Pia's mottos to get the best light is "Better to be two hours too early than just two minutes late". She has been using f-stop for more than 10 years now and her newest addition is the Shinn 80L DuraDiamond®
Today, she brings all with her that she would need to wait for the perfect light. She pulls out her stove and boils water to make some tea while watching the day’s light develop.


“The emotionality of every moment is like a breath of life. Creating a memory from that ephemeral is a gift.”
The Shinn 80L DuraDiamond® might be designed to accommodate cinema gear, but its biggest strength is its versatility, which Pia takes full advantage of. She utilizes the Shinn’s spacious capacity and all-day comfort on her multi-day hikes and workshops. "Better to be two hours too early, than just two minutes late" she laughs.
Often running multi-day tours and workshops, Pia needs a pack with the capacity to carry everything for several days. This often includes a change of clothing, a jacket, a sleeping bag, a camping stove, and food, all packed alongside her photography gear.


For her multi-day trips or Landscape Photography where she is expecting to carry more than usual, she is using the Shinn 80L Duradiamond® to give her enough space for a sleeping bag, sleeping pad, Bivy Tent, food, etc.
On this occasion she used the Shinn 80 L along with the Slope Medium Camera Insert which gives her additional room to fill with camping Gear from Stove, Gas, and cups in her Packing Cell Kit. Aside from this, she brought a small box of Cookies (or other snacks) Tripod ( attached to the front of the pack with Gatekeepers), Gloves, a Down Jacket, Memory Cards, a Card Reader, a Cleaning Kit, Batteries and an f-stop Accessory Pouch Small and Accessory Pouch Medium.


Whether you pack a Shinn 80L DuraDiamond® like Pia or a smaller Mountain Series backpack, you will find multiple attachment points across the entire Mountain Series range. One of the things that Pia loves about her Shinn and our other Mountain Series packs is the multiple attachment points, which can be used to carry and attach larger items such as sleeping bags and tents to the packs.


Join us as our Ambassadors share tips and tricks they have learned over years of traveling, with Life on the Dāsh, and check out how fellow Ambassadors get organized.
Attending a workshop can be one of the most productive ways to push your photography to new heights. f-stop Ambassador Erin Babnik runs workshops in stunning locations that read like a bucket list of picturesque places to visit for landscape photography. We caught up with Erin to hear about her path into photography, what it takes to run these workshops, and her pick of essential gear to bring to a workshop.

Can you tell us a little about yourself, and how you got into photography?
Immersion in the visual arts has been the one constant in my life, including extensive formal education in various studio arts, graphic design, and in the history of art. Before I decided to pursue my photography career full-time, I was an art historian specializing in ancient Greek art. I needed to produce photographs for my dissertation and also for the classes that I was teaching while I was in graduate school, so it was then that I first began to travel widely with camera equipment. I photographed thousands of artworks inside museums and went to great lengths to photograph archaeological sites all around Europe and in the Middle East, which was expensive and time-consuming. I eventually started funding my trips and equipment upgrades by getting into stock photography and assignment work.
As I began devoting more of my time and resources to improving the quality of my photographs, it became increasingly clear to me that photography was capturing my imagination and my heart. I was still very passionate about art history, but I knew that I had found an even more inspiring calling that needed to be a larger part of my life. Craving more immersive and creative experiences, I began going on photography trips into wilderness areas, far from any of the cultural treasures that had always given me a reason to use my camera. During my college years I had drifted away from the outdoors activities that had been a great source of enjoyment for me earlier, so returning to wilderness areas with photography in mind became a major tipping point in my life. I could not get enough of it, and I finally admitted to myself that I was on course to a career change.
The idea of leaving academia was very difficult for me and only became a serious plan when I realized that I would be able to retain everything that I truly enjoyed about it. As a photographer, I would still be able to teach, to write, to lecture, to travel widely, and to draw upon my formal education in art and art history. Teaching photography workshops brings all of these interests together for me at once, which is why I have made teaching a focus of my career as a full-time landscape photographer.


Your talks and articles have made you one of the most notable voices among the current generation of landscape photographers; can you tell us a bit more about how you bring your ideas about photography to the workshop experience?
The ideas that I express in my writing and public speaking become a part of the workshop experience in a variety of ways. Most directly, they come out in the seminars that I schedule into most of my workshops to supplement the in-field instruction. Depending on the length of the workshop and the location, I include anywhere from one to four creativity seminars in addition to my usual post-processing instruction sessions. The topics vary, but they have included seminars on composition, on the history of landscape photography, on the creative process, and on portfolio development. I first started integrating these seminars into my masterclass series, and they were hugely successful, so now I have made them a regular part of my teaching programs.
The other outlet that I have for sharing these ideas is through impromptu discussions with students during the course of a workshop. Many of my workshop participants have questions about articles that I’ve written or else ask questions that relate to what I’ve written, and the resulting conversations tend to be enormously productive. I really enjoy discussing all aspects of photography and its relation to other arts, and it is always very rewarding to hear that my students have found these discussions helpful and inspirational.

Like all things in life, there must be some challenges while planning a workshop. What do you see as the biggest challenges to delivering a successful workshop?
Logistics probably present the most challenging problems to solve when planning a workshop. In order for everything to run smoothly, I have to consider a huge range of issues that all need to work together: where we go, what conditions to target, how we will get there, when and where people will eat and sleep, how much physical activity the average person can handle in an outing and how they might feel the next day, how much everyone can carry, and how to store what they cannot carry. I invest an enormous amount of time into planning a workshop in order to ensure that everyone has a great time and is able to make the most of the photographic opportunities and instruction.

You've been to some stunning places to shoot. How do you pick your locations for workshops?
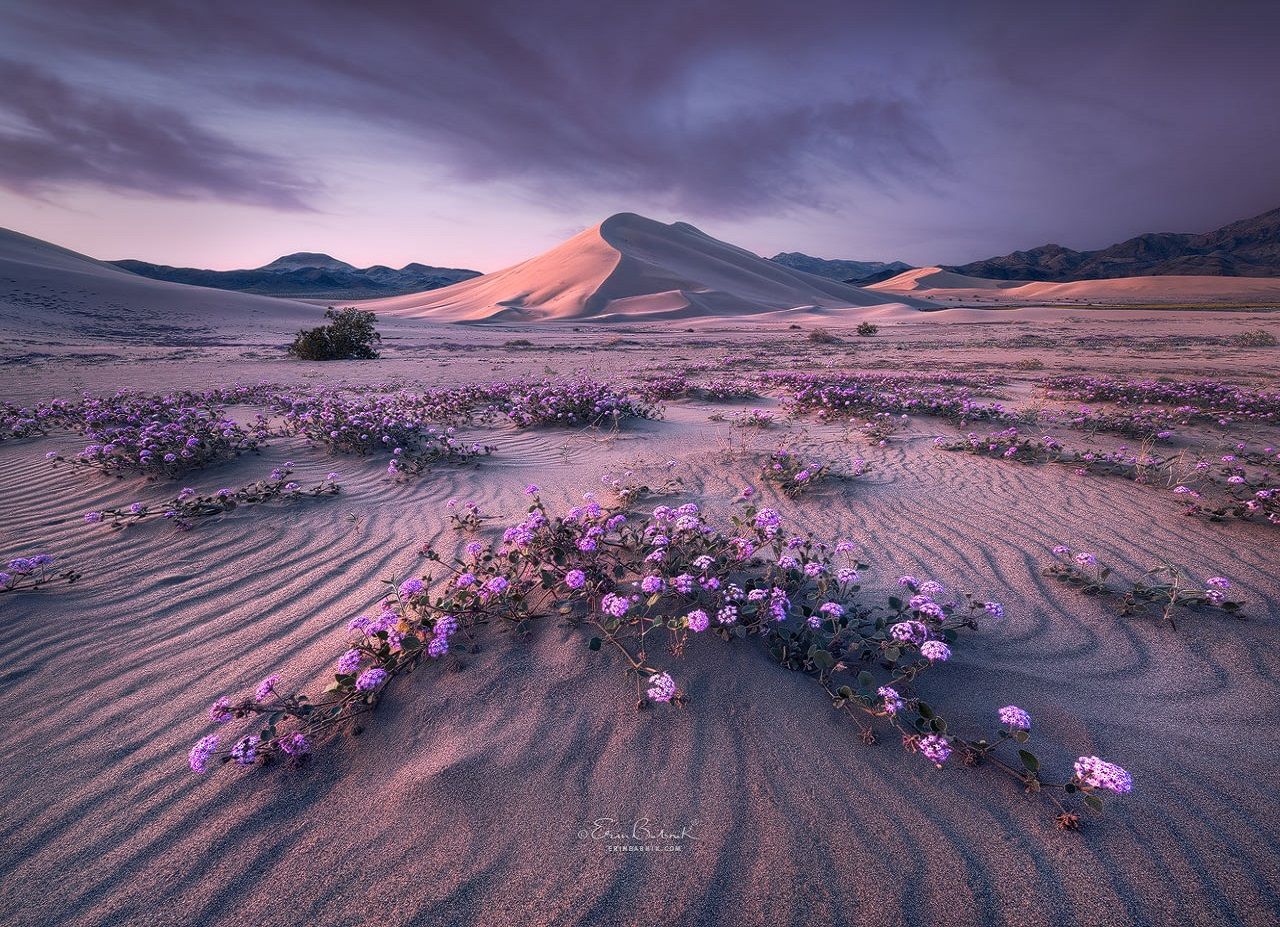
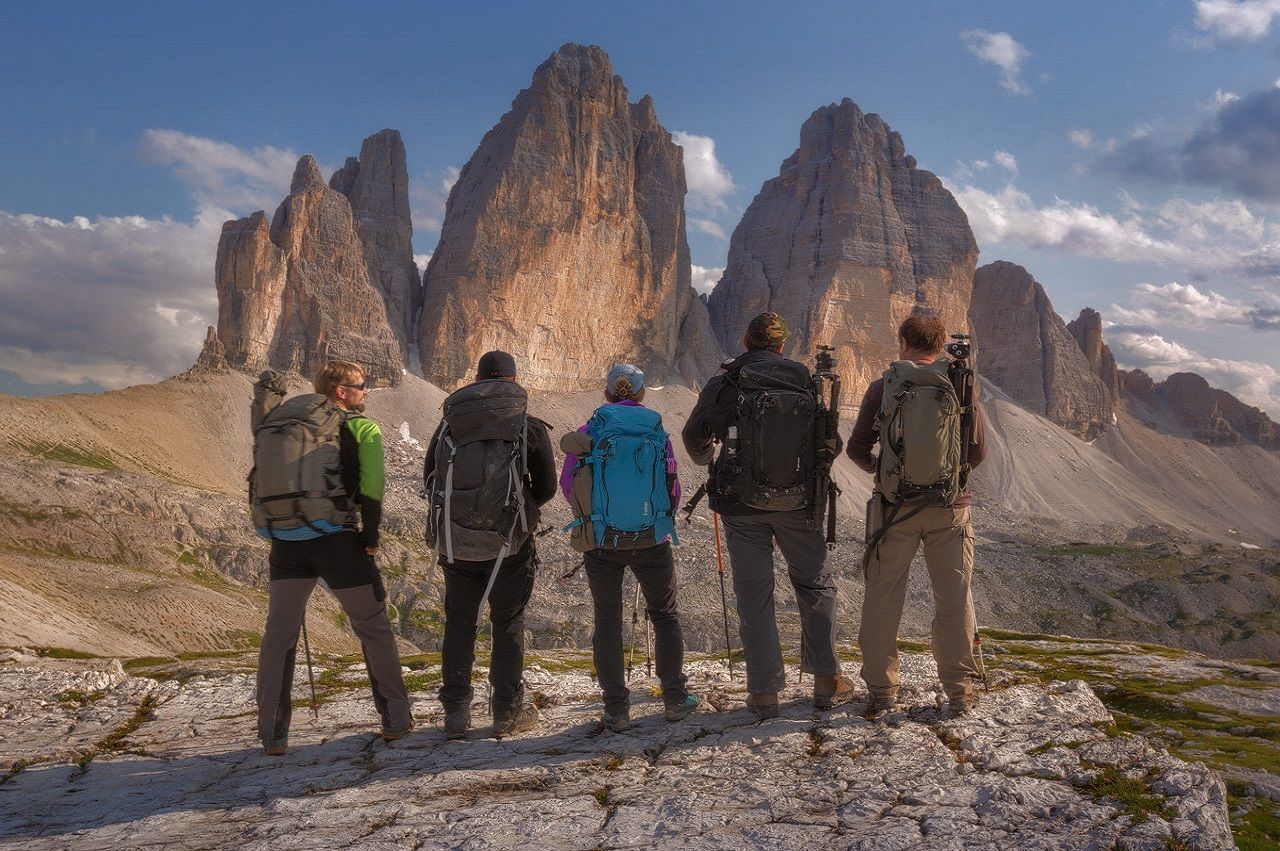
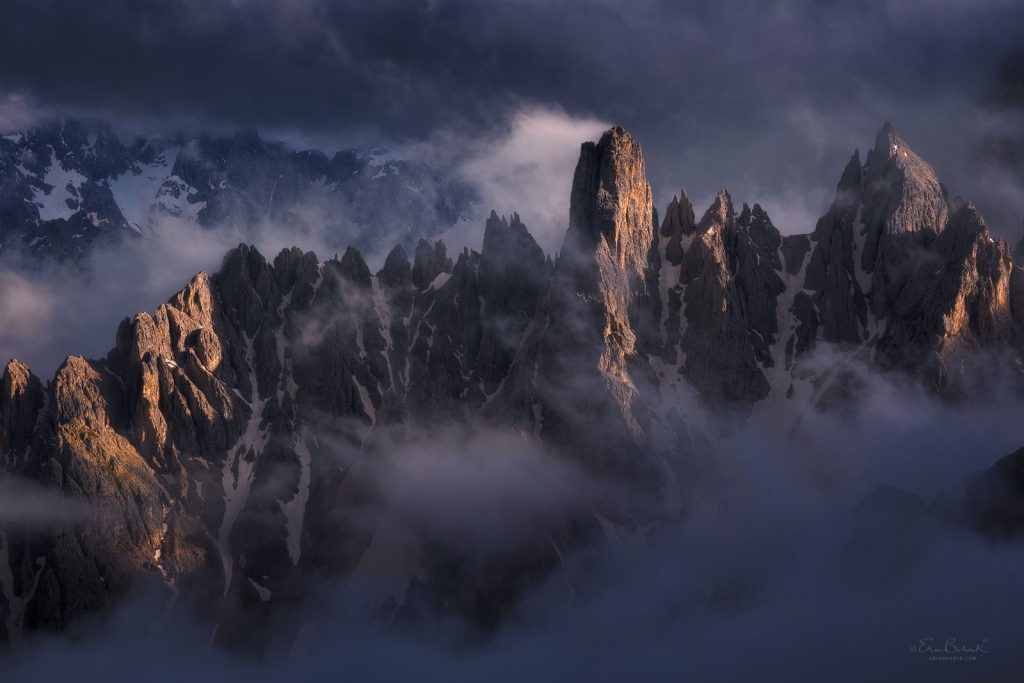
Most of my workshops feature unique locations that I discovered through my own exploration, in combination with locations pioneered by some of my co-leaders, and also with a few classic areas included. I try to choose locations that are not only highly photogenic but that offer a good range of options for being creative. Even the more classic areas that I feature are of this sort, such as the Mesquite Sand Dunes in Death Valley, an area that has been highly photographed for decades and yet provides endless opportunities for photographers to create unique and rewarding photographs. My extensive exploration of the Dolomites has turned up dozens of locations where my students can experiment with a variety of focal lengths and compositional styles all in one spot, making my Dolomites workshop series extremely popular. Not only do my workshop participants appreciate such versatile locations, but I am able to stay inspired myself by returning to these areas that always seem to have something new to offer.
For participants coming to shoot in those locations, what are your top picks of essential items that they should pack or bring?
Because my workshops are based in wilderness areas, we are usually doing some walking or hiking to reach them. A walk might be anywhere from fifteen minutes to two hours long, depending on the workshop, but regardless we are not usually right next to any vehicles or buildings and therefore need to carry whatever we will need to use while we are out in the field. A good photo backpack is therefore an absolutely essential item, and I always recommend that participants bring one that can carry more than just their camera gear and that stands up well to the elements and to whatever rocks or damp surfaces may be beneath a backpack when it is on the ground. For those workshops where we are backpacking to mountain huts or are even just doing longer day hikes, I also consider trekking poles to be essential items because they make the hiking much easier and improve balance on uneven terrain. Of course there are a lot of standard items that I recommend in addition, such as a tripod, a headlamp, and protective clothing, but the choice of a good backpack and trekking poles makes it easier to carry all of those items comfortably and safely. Aside from these essentials, I always advise my participants to bring their spirit of adventure!

Discount Applied Successfully!
Your savings have been added to the cart.

