


LOOK FOR LAYERS
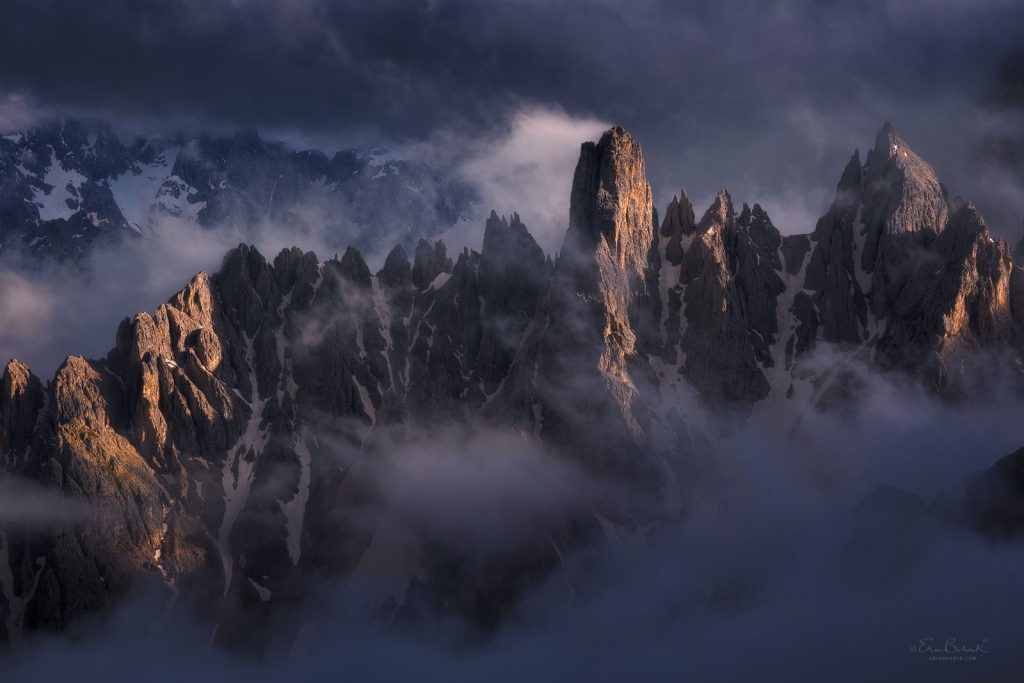
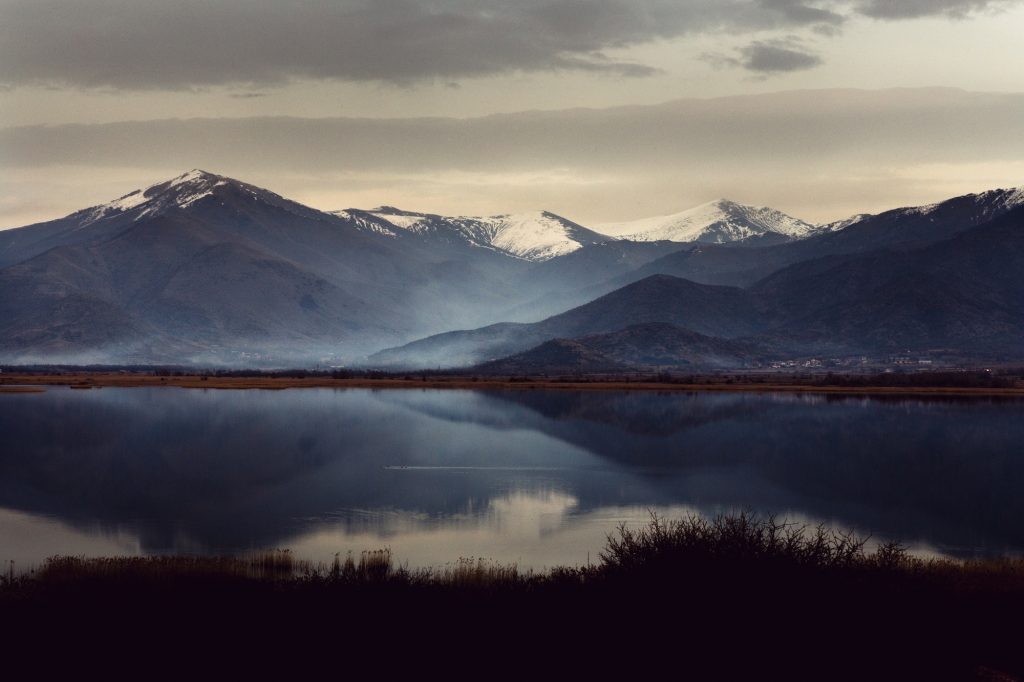
When atmosphere gets down in between the layers of the landscape, it shows off the distances between them and that itself can make for a very compelling image.

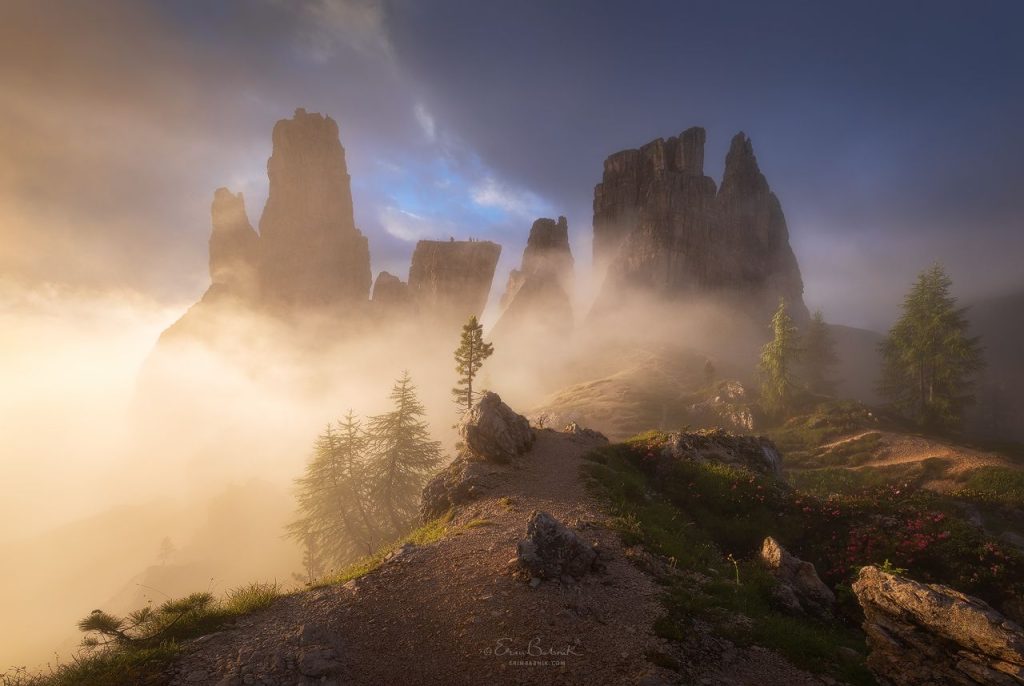
BE PATIENT
Wait it out sometimes! Atmosphere tends to come in waves, and it may well be that if you really like forms of your composition, wait for the next wave. It could bring something even better than you’ve already seen.
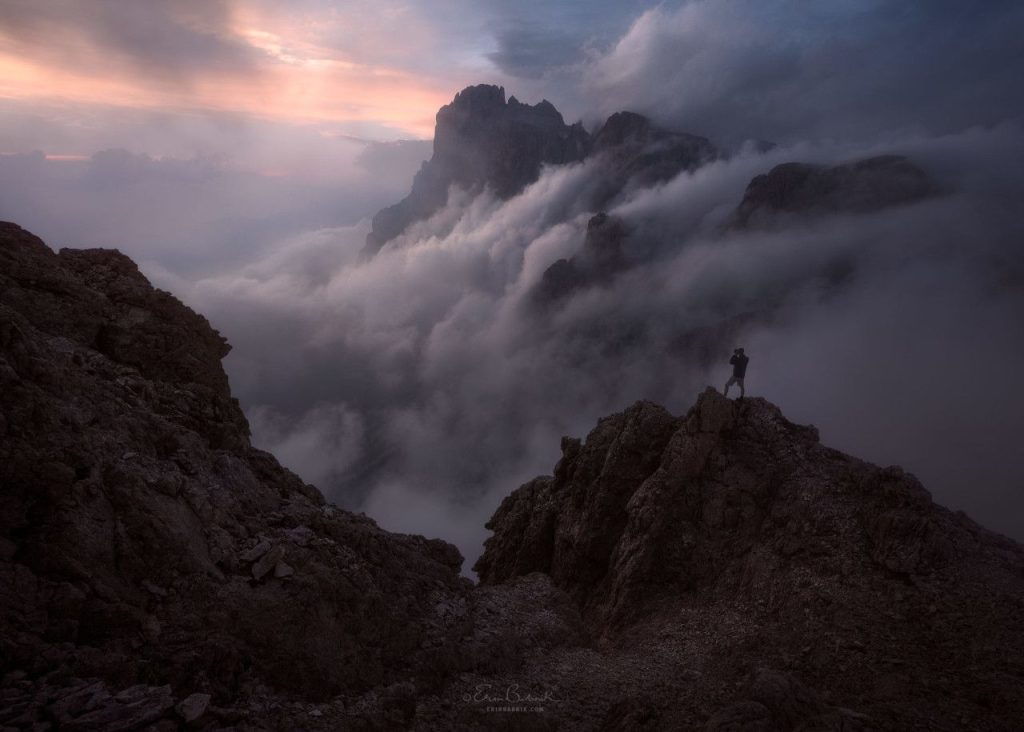
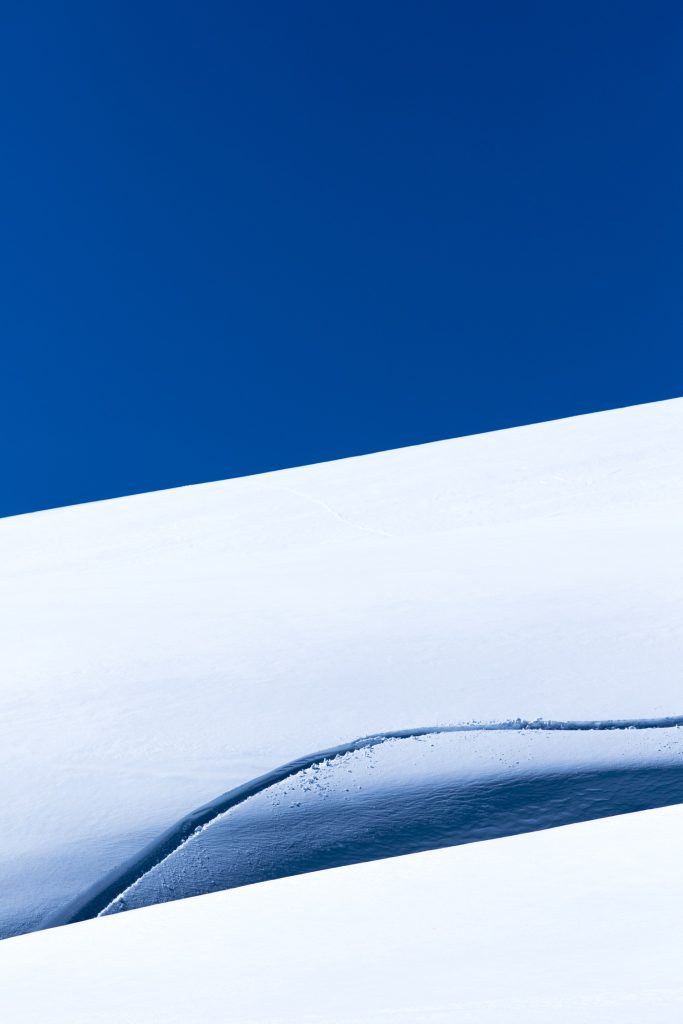
LOOK FOR STRUCTURE
Some types of atmospheres, especially low clouds, can often form into very sculptural elements that add shape to your compositions. Look for those and look out for the ways in which they interact with the rest of the environment.

THINK FAST
Atmosphere can really change an environment as it moves through an area. Sometimes the layers change giving different levels of visibility and sometimes the structure changes. In either case, you may want to adjust the composition, so be ready to think quickly and adjust frequently.
BE PATIENT
Wait it out sometimes! Atmosphere tends to come in waves, and it may well be that if you really like forms of your composition, wait for the next wave. It could bring something even better than you’ve already seen.

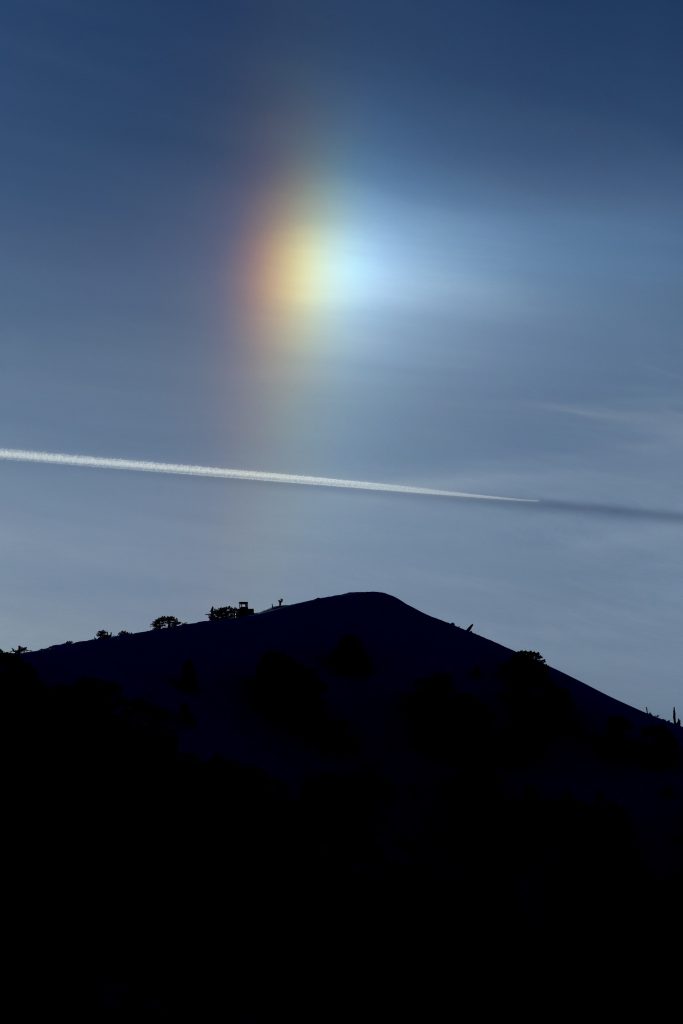
LOOK FOR INTERACTION
Sometimes atmosphere has a way of intermingling with mountain peaks or trees or elements in your frame in a way that tells a story that wouldn’t be there otherwise. Keep your eye open for such opportunities and ask yourself what that interaction means for you. Try to tell a story with your image.

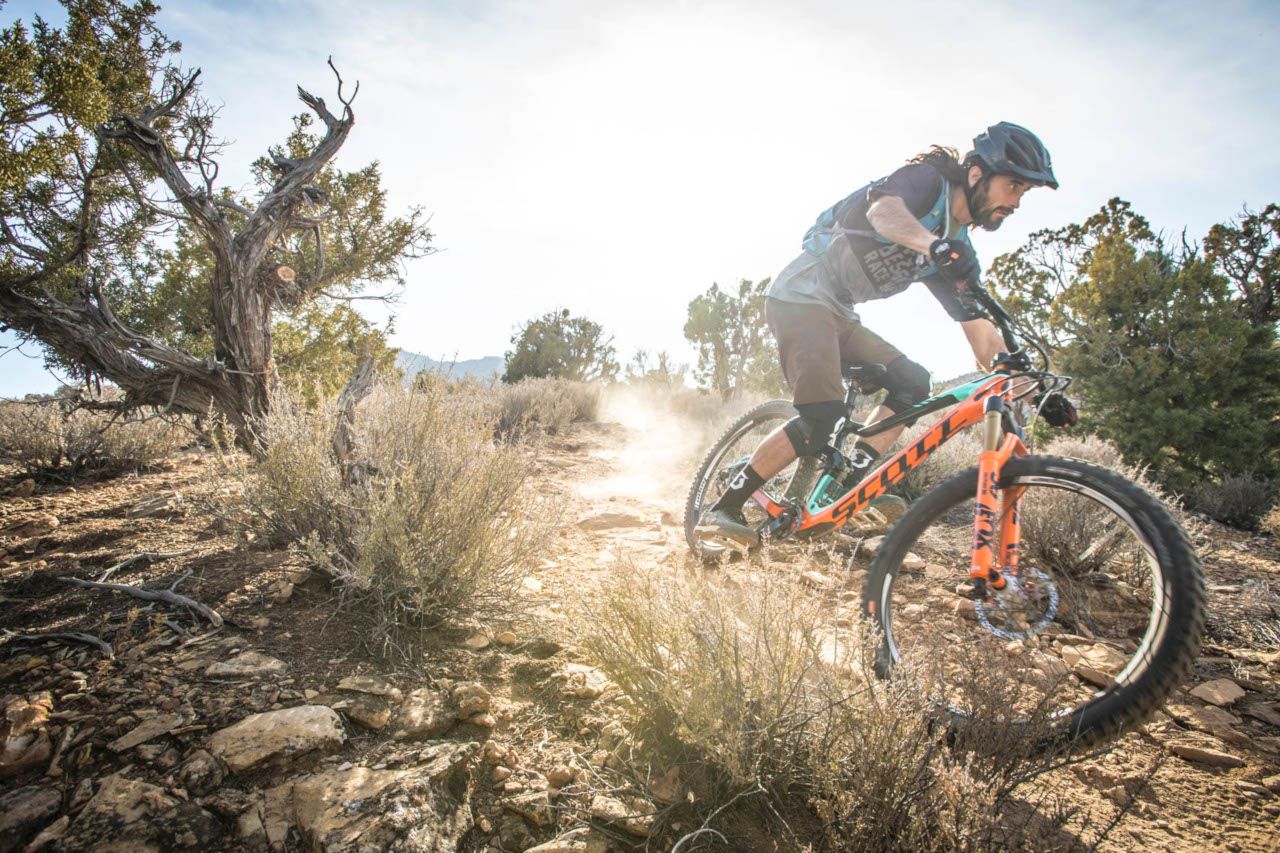
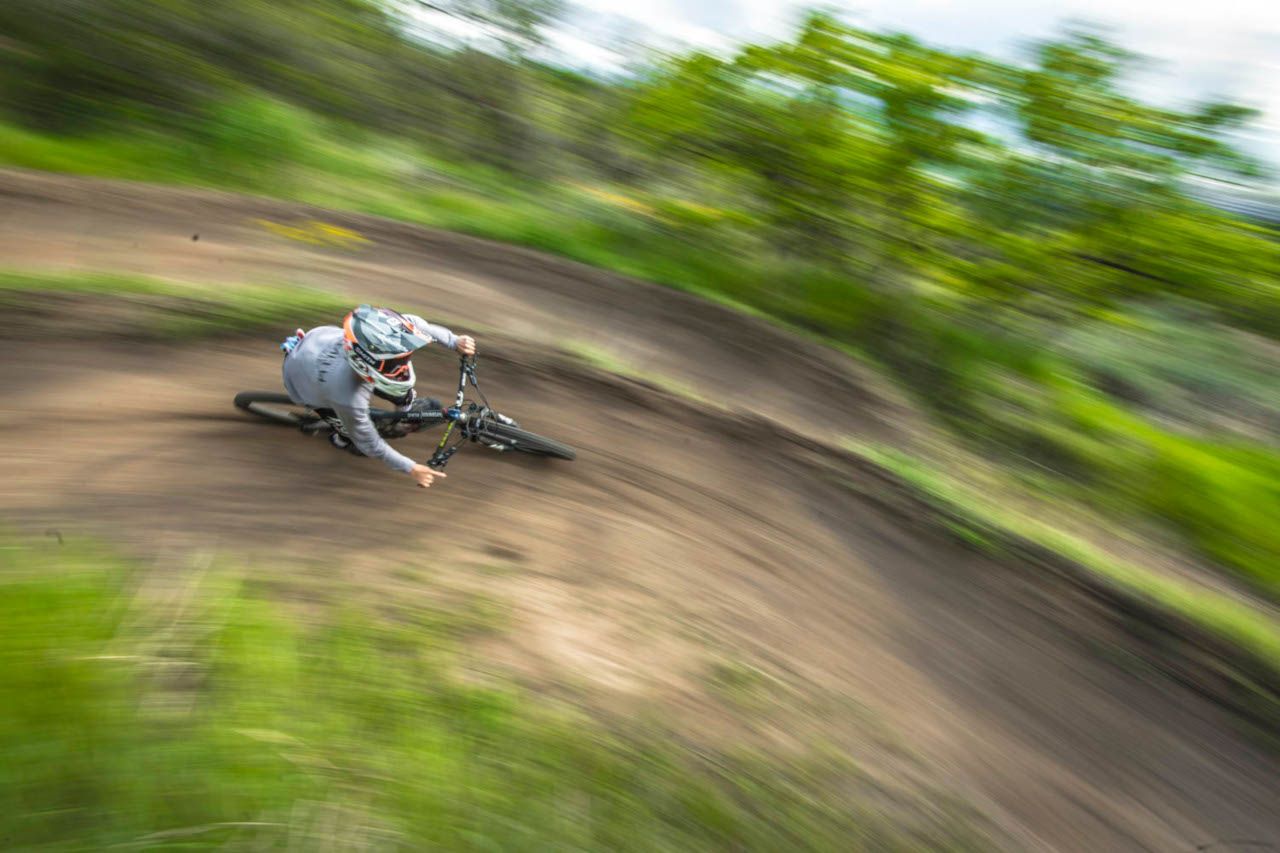
1. SHOOTING IN THE TREES
One of the challenges of mountain bike photography is shooting in the trees, especially on a sunny day where extreme hot spots, splotchy shadows, and harsh contrast can be difficult to work with. But every challenge is a creative opportunity, and there are a few ways you can use this harsh light to create great images. One method is to look for backlit areas where the sun is behind the rider and set your exposure for the shadows. If the image looks too bright on your screen, adjust the exposure down until you find the right balance where the rider looks good and the foliage is lit up, creating nice highlights in your image.

2. GET CLOSE!
Unlike the warning on your car’s side-view mirror, “objects in mirror are closer than they appear”, the opposite is true with photography. When you’re shooting, your eye naturally focuses on the subject and often misses what’s happening on the edges of your frame, and sometimes a great action shot can get lost in the distracting stuff around it. To overcome this natural tendency for tunnel vision, either move in closer or zoom in tighter. It may seem too close for comfort, but once you get used to it, you’ll be able to capture more dynamic and engaging action images.

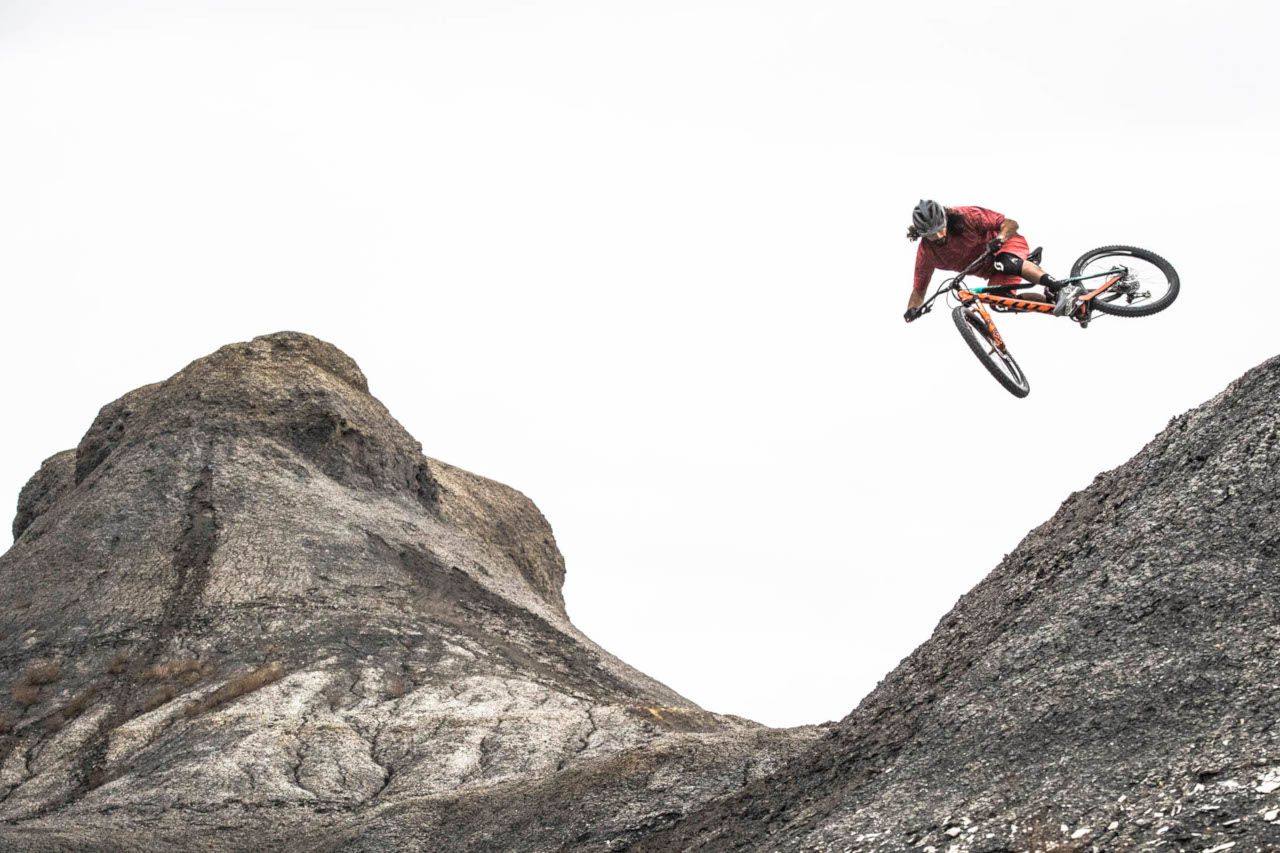
3. CREATIVE PERSPECTIVE
Finding new and interesting perspectives is a creative challenge for every photographer. One technique I’ve found that consistently produces results is to use foreground elements to add perspective and depth to my compositions. Look for rocks, trees, leaves, and other objects that you can use to frame your composition around the rider. With your lens focused on the rider, these foreground elements add depth and perspective to your composition and lead your eye to the action in the background.
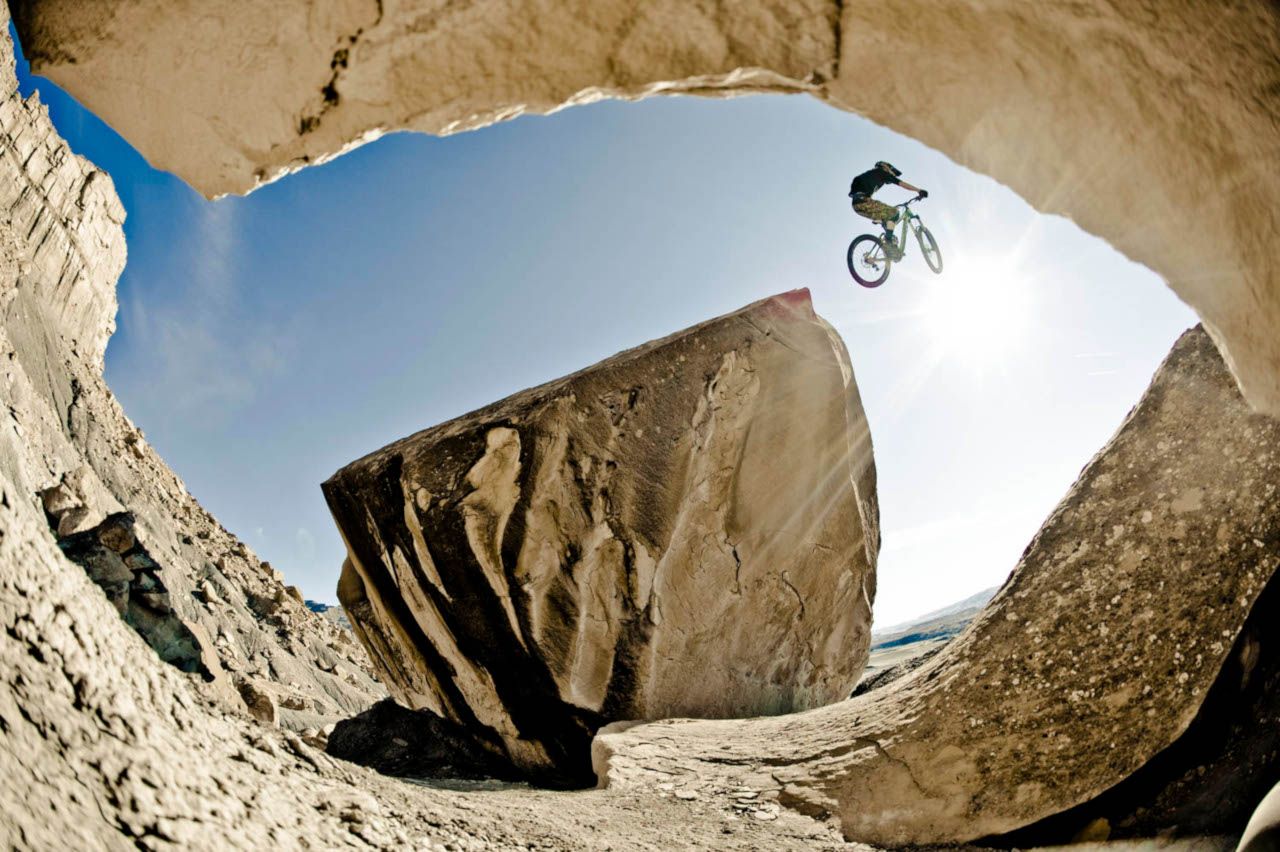
4. THE PAN BLUR
The pan blur is a staple in every sports photographer’s bag of tricks. The concept is simple. Set a slow shutter speed on your camera, 1/30 sec is a good guideline, adjust your ISO and aperture for correct exposure, and follow the subject as they move past you, giving the image a sense of motion. The challenge is to follow the rider precisely so that they’re sharp in the image against a blurred background. For better results, use one of the focus points in your viewfinder to track the rider, follow them through the entire sequence, even after you’ve stopped shooting and breathe out steadily as you shoot to keep your body relaxed and the motion smooth and consistent.
5. KEEP IT FUN!
One of the keys to being a successful photographer is developing a good rapport with the riders. No matter how hard the shoot is or how long we’re out on the trail, I want everyone to enjoy the experience. Keep the communication open, take the time to explain to the riders what you want to achieve and get their feedback on your ideas. If they’re part of the creative process and everyone is on the same page, your chances of success go way up. And remember, mountain biking is fun! The more fun you have on a shoot, the more it’s going to show in your images!.
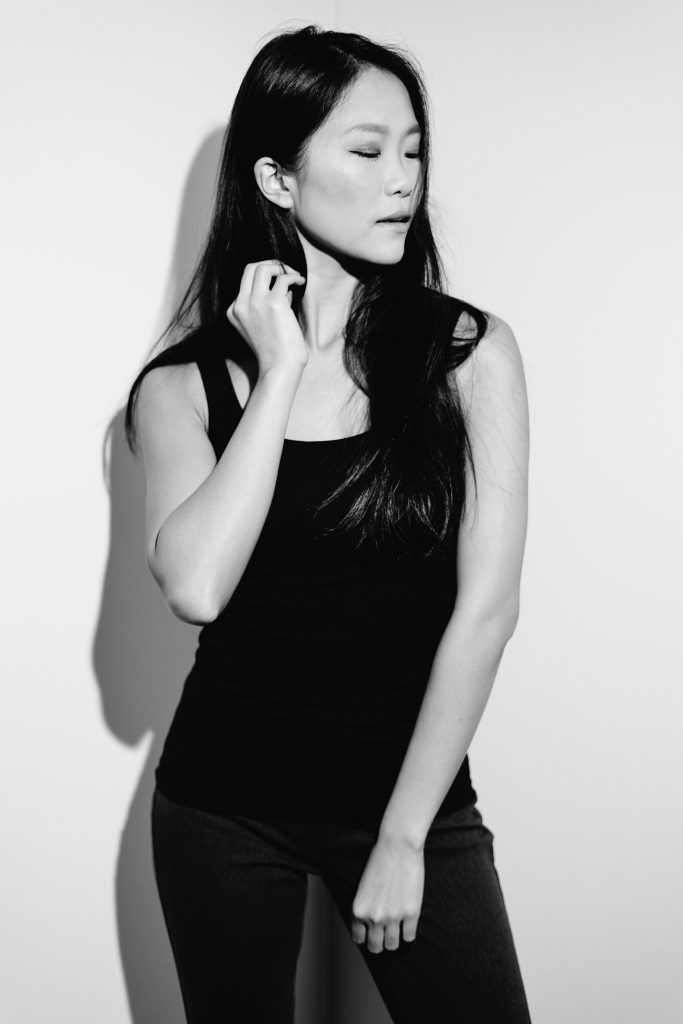
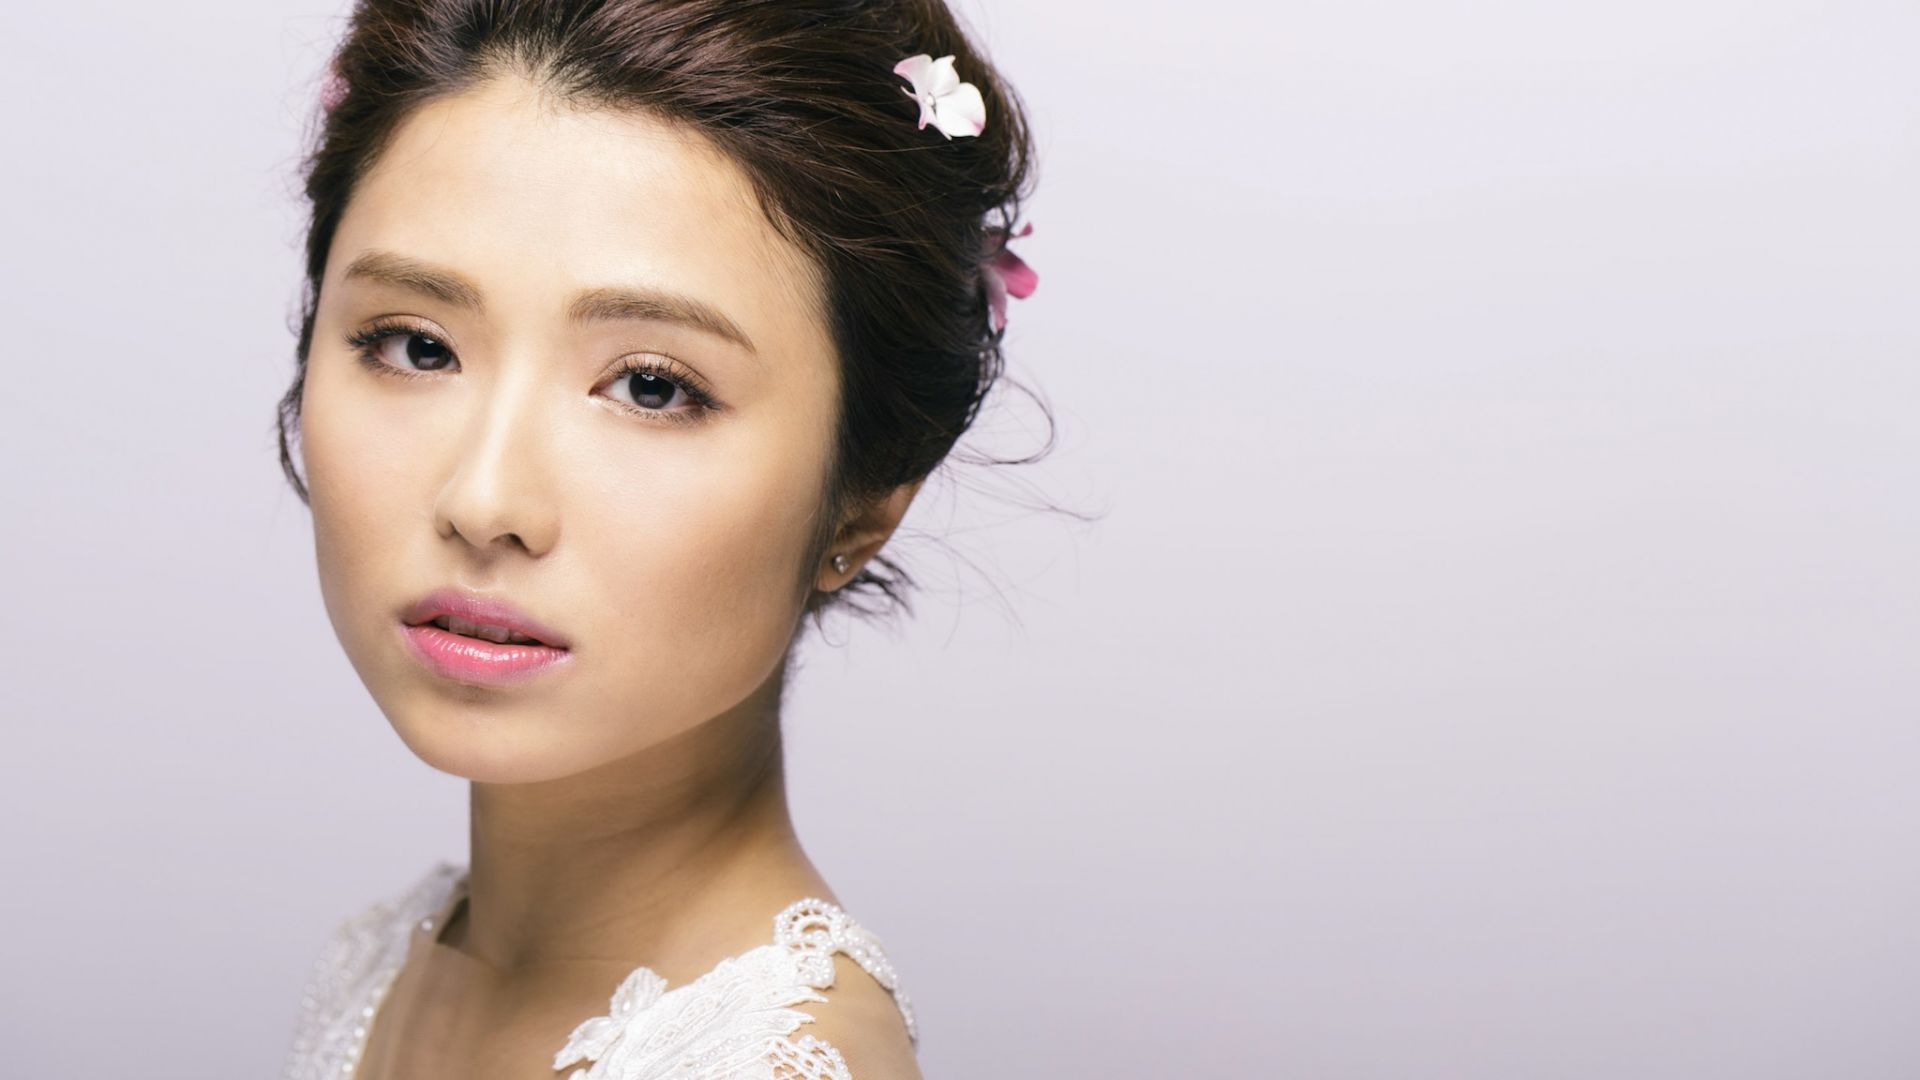
1. LIGHTING IS THE KEY!
Make sure to have good lighting while you are making portraiture. The light can be natural (ambient) light or artificial light. It all depends on how you want the end product to look.

2. GET THE RIGHT BACKGROUND
The background can change the mood of the photo, so make sure to have it right.
A white background is a good start, or you can create your own background pattern by adding shadows that fall on the background. Another option is to let the shadows be a foreground pattern that fall on the model.

3. SEQUENCE SHOTS
Take sequence shots to show the personality of the model.
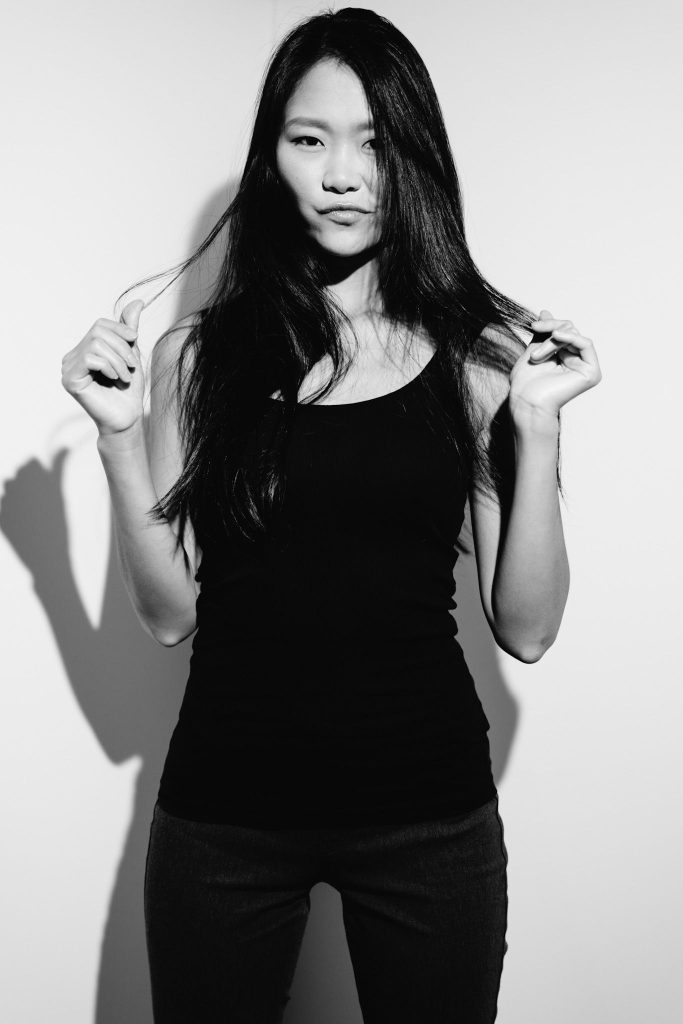

4. FOCUS ON THE EYE THAT IS CLOSER TO THE CAMERA
This will make the eyes stand out. Also, focusing on the nearest eye will keep the "out of focus area" behind the point of focus.


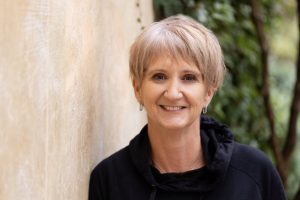
Henry CK is an artist, photographer, and filmmaker based in Hong Kong. He has been attracted to photography since childhood and taught himself to be a professional photographer through self-mentorship. Henry CK specializes in the music and entertainment industry, creating images and videos for emerging artists, bands, and musicians.

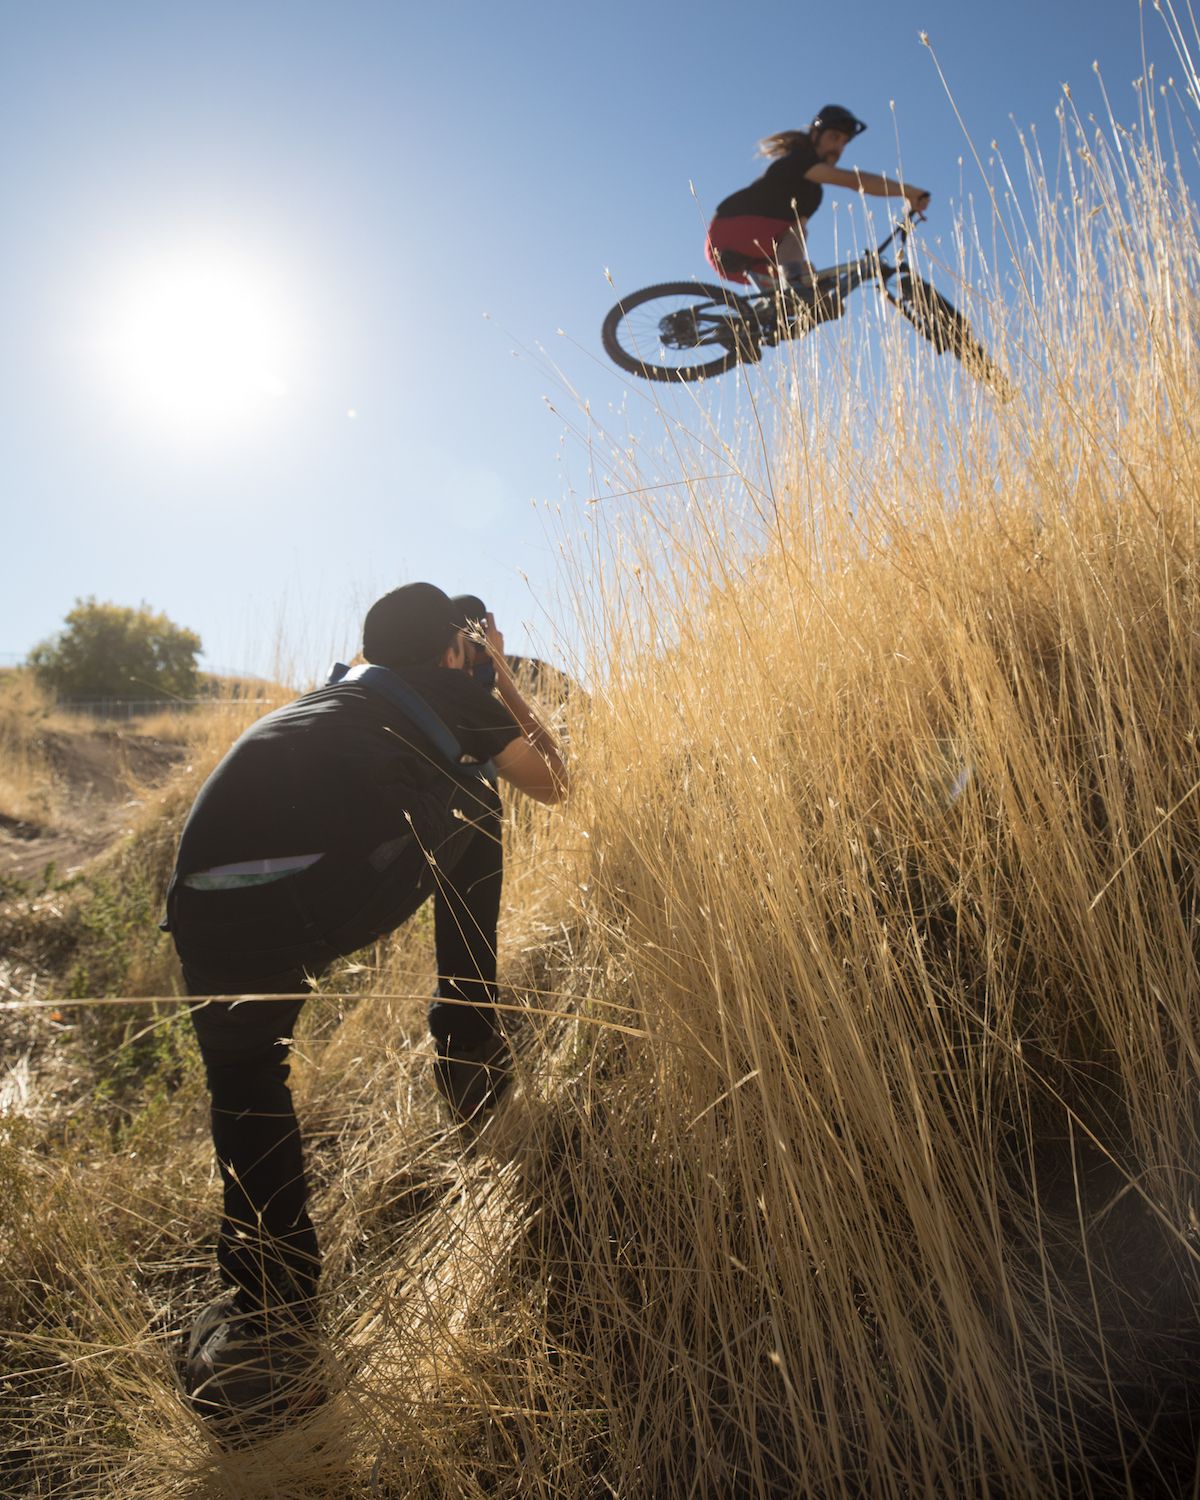
SHARING SINGLE TRACK VISION: BEHIND THE SCENES OF A MTB WORKSHOP WITH SCOTT MARKEWITZ
Scott Markewitz has been shooting mountainbiking all the way from it's renegade roots to the superhuman feats of Red Bull Rampage this year. His love for the sport and photographing it shines on, so Scott teamed up with mtb helmet and apparel brand, Giro to share that passion in a workshop with him - free of charge! Take a look behind the scenes with Scott at how this workshop came to life, and how the participants got hands on in Park City, Utah.
How it came together
The idea for this workshop started with a visit to the Giro office in Park City, Utah this summer. Giro was looking for community events to host in their office space, I suggested a photo workshop, they liked the idea and since Giro is the market leader in cycling helmets and Park City is a world class mountain bike destination, a mountain bike workshop was the obvious choice.
To get the word out we created a week long Instagram contest where anyone could enter by posting photos on their Instagram page and tagging #scottmarkewitzphotosession and #scottmarkewitzphotosessionutah. At the end of the week we selected 9 local winners to attend the workshop free of charge and one national winner to win an all expense paid trip to the workshop from anywhere in the US along with a complete Giro cycling kit, all compliments of Giro.
Workshop Time
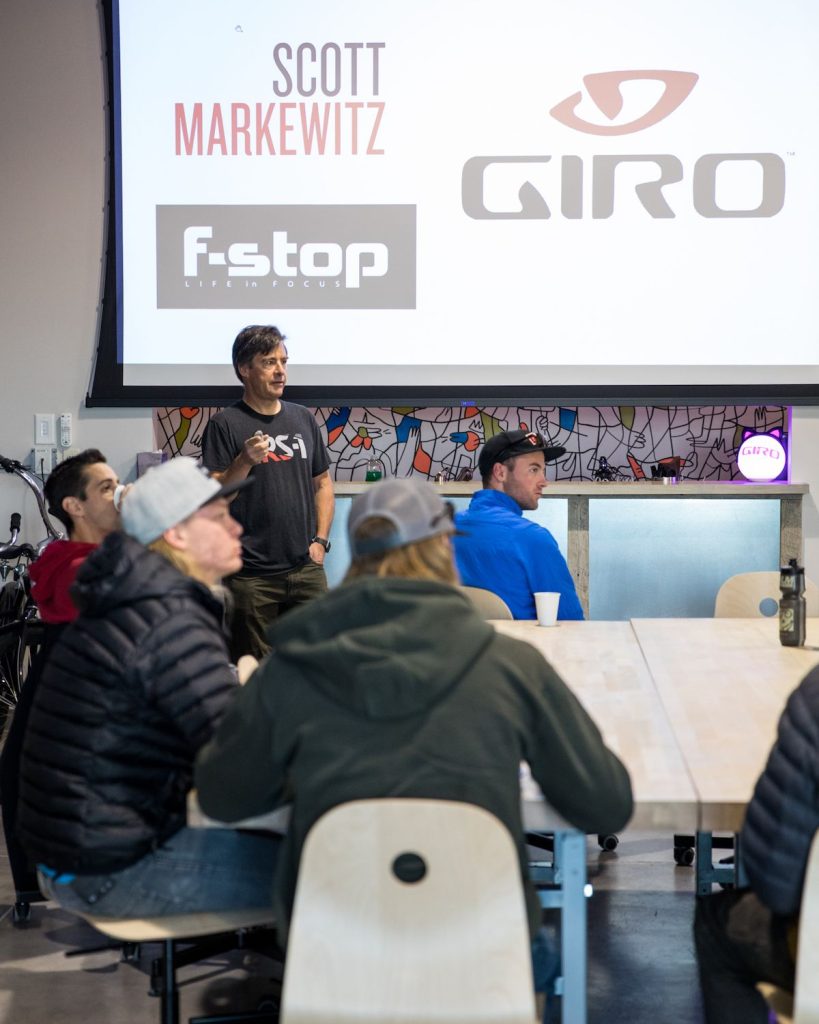
We met the group at the Giro office early on a crisp, clear fall morning. It had snowed in the mountains a few days earlier and covered most of the trails around Park City, so we made a last minute decision to take the group down to Salt Lake City, where it would be warmer and drier. After a quick meet and greet and a short presentation, we jumped in the vehicles and headed down to the I Street bike park in Salt Lake.
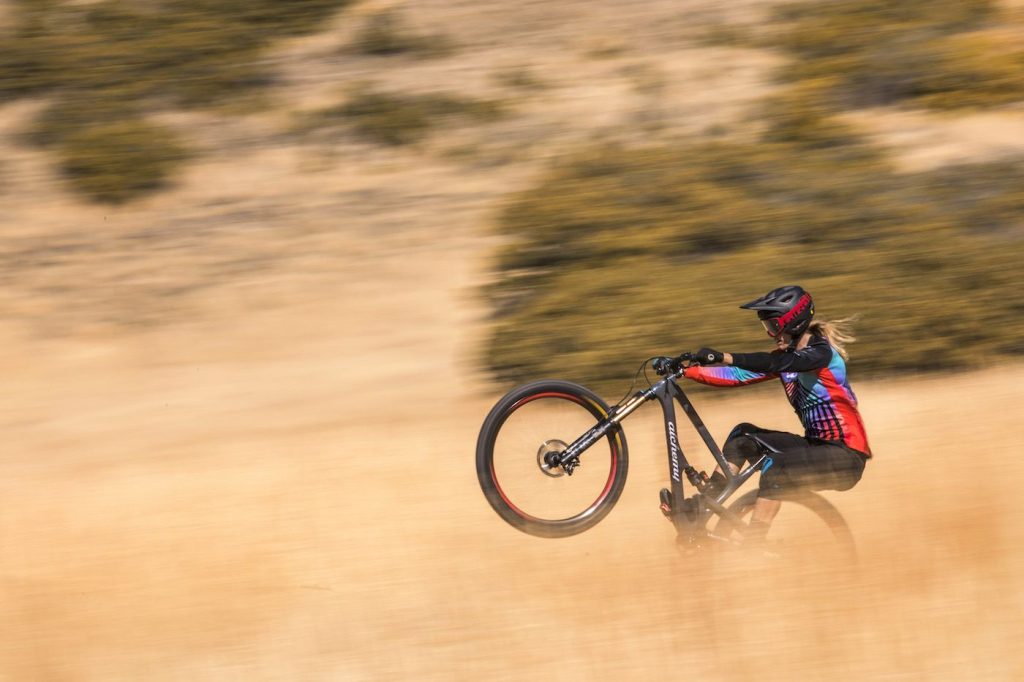
We had a great group of riders to photograph – Giro athlete and pro EWS racer Cody Kelley, local pro and overall wild man James Perri, and my son Julien, a junior downhill and enduro racer. I Street was a perfect venue to show off their skills and as we jumped out of the vehicles, everyone was excited to start shooting and get some ‘banger’ shots.

My Approach
My goal with every workshop I lead is to work on skills development and guide people to expand their creative vision. Since this was a one day workshop, I planned to keep it simple by presenting a few concepts to the group and letting each photographer experiment with their own ideas and creativity from there.
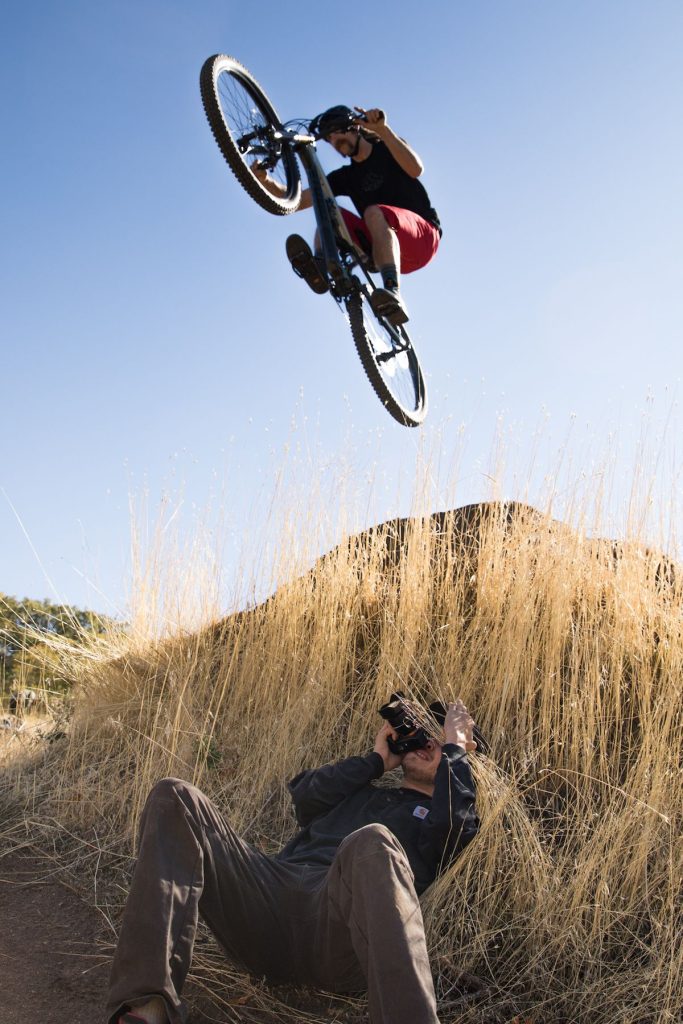


After discussing the plan with the riders and figuring out what tricks they wanted to do, we set up around one jump as the riders cycled through. This allowed everyone to shoot the same jump multiple times, experiment with different angles and lenses, and progressively learn from one shot to the next. When everyone felt that they had the shots they wanted, we set up on another feature, giving the photographers enough time to try out their ideas and get creative with each setup before moving on to the next. Throughout the day I moved around, interacting with the group and giving individual feedback and tips on composition, exposure, lens choices and other subjects we discussed at the beginning of the day.
It was striking to see the group dynamics take hold and watch the photographers interact, share images and talk about their ideas and setups with each other. It created a powerful learning environment where everyone was working together to get great shots and building their knowledge collectively.

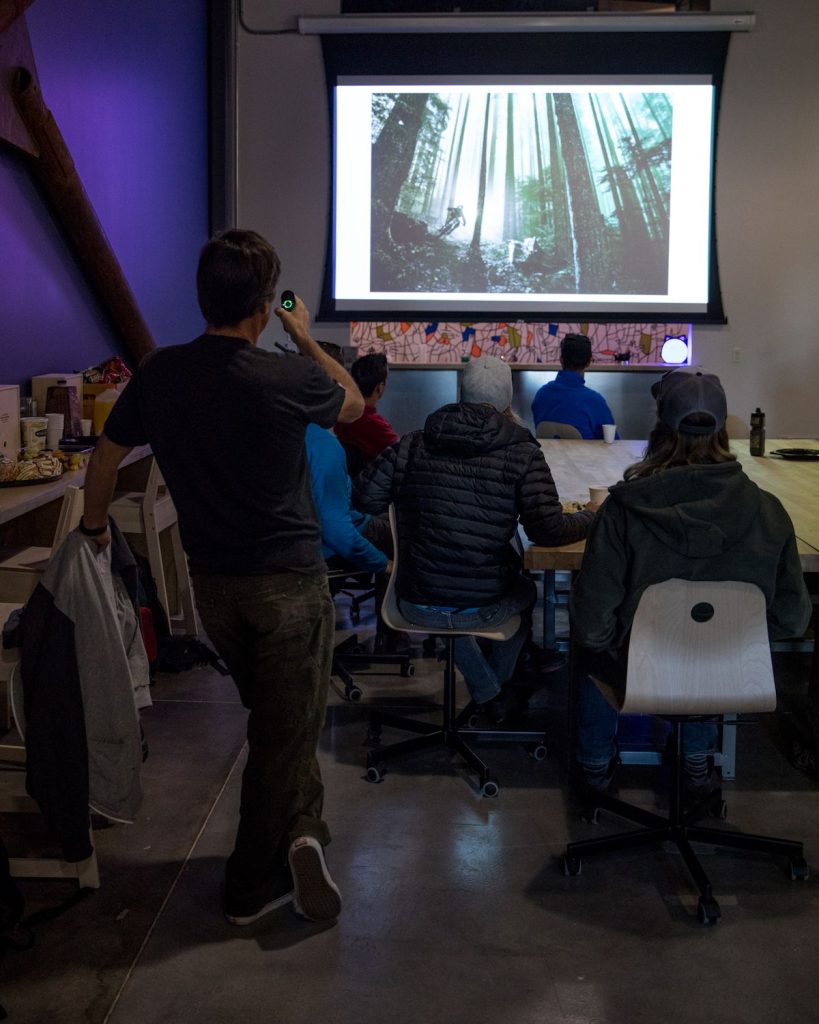
After a few hours of shooting we headed back to the Giro office for lunch, editing and review. I asked the photographers to select and process 5-10 of their favorite shots from the day, and when the images were ready we projected them on a screen for review and critique.
This is my favorite part of every workshop, where everyone sees the results of the days shoot and we analyze the images in detail. It’s a real learning experience to see what worked and what didn’t work in each image and how it relates to the concepts we discussed at the beginning of the day. It was clear from the start that this was a high level group, and I was really impressed with the images that every photographer was able to create.

Afterwards, the Giro team and I got together to pick our three favorite images from the day and award prizes to the winners. First place, and an f-stop Lotus pack with a Large Pro ICU went to Avery Stumm (@avery_stumm):

...while David Martinez (@dmartphoto) took second and was awarded an f-stop lens barrel and Giro riding kit for his image:
....and Dylan Cirulis (@cirdylan) took home a Giro riding kit for his third place image:

Attending a workshop can be one of the most productive ways to push your photography to new heights. f-stop Ambassador Erin Babnik runs workshops in stunning locations that read like a bucket list of picturesque places to visit for landscape photography. We caught up with Erin to hear about her path into photography, what it takes to run these workshops, and her pick of essential gear to bring to a workshop.

Can you tell us a little about yourself, and how you got into photography?
Immersion in the visual arts has been the one constant in my life, including extensive formal education in various studio arts, graphic design, and in the history of art. Before I decided to pursue my photography career full-time, I was an art historian specializing in ancient Greek art. I needed to produce photographs for my dissertation and also for the classes that I was teaching while I was in graduate school, so it was then that I first began to travel widely with camera equipment. I photographed thousands of artworks inside museums and went to great lengths to photograph archaeological sites all around Europe and in the Middle East, which was expensive and time-consuming. I eventually started funding my trips and equipment upgrades by getting into stock photography and assignment work.
As I began devoting more of my time and resources to improving the quality of my photographs, it became increasingly clear to me that photography was capturing my imagination and my heart. I was still very passionate about art history, but I knew that I had found an even more inspiring calling that needed to be a larger part of my life. Craving more immersive and creative experiences, I began going on photography trips into wilderness areas, far from any of the cultural treasures that had always given me a reason to use my camera. During my college years I had drifted away from the outdoors activities that had been a great source of enjoyment for me earlier, so returning to wilderness areas with photography in mind became a major tipping point in my life. I could not get enough of it, and I finally admitted to myself that I was on course to a career change.
The idea of leaving academia was very difficult for me and only became a serious plan when I realized that I would be able to retain everything that I truly enjoyed about it. As a photographer, I would still be able to teach, to write, to lecture, to travel widely, and to draw upon my formal education in art and art history. Teaching photography workshops brings all of these interests together for me at once, which is why I have made teaching a focus of my career as a full-time landscape photographer.


Your talks and articles have made you one of the most notable voices among the current generation of landscape photographers; can you tell us a bit more about how you bring your ideas about photography to the workshop experience?
The ideas that I express in my writing and public speaking become a part of the workshop experience in a variety of ways. Most directly, they come out in the seminars that I schedule into most of my workshops to supplement the in-field instruction. Depending on the length of the workshop and the location, I include anywhere from one to four creativity seminars in addition to my usual post-processing instruction sessions. The topics vary, but they have included seminars on composition, on the history of landscape photography, on the creative process, and on portfolio development. I first started integrating these seminars into my masterclass series, and they were hugely successful, so now I have made them a regular part of my teaching programs.
The other outlet that I have for sharing these ideas is through impromptu discussions with students during the course of a workshop. Many of my workshop participants have questions about articles that I’ve written or else ask questions that relate to what I’ve written, and the resulting conversations tend to be enormously productive. I really enjoy discussing all aspects of photography and its relation to other arts, and it is always very rewarding to hear that my students have found these discussions helpful and inspirational.

Like all things in life, there must be some challenges while planning a workshop. What do you see as the biggest challenges to delivering a successful workshop?
Logistics probably present the most challenging problems to solve when planning a workshop. In order for everything to run smoothly, I have to consider a huge range of issues that all need to work together: where we go, what conditions to target, how we will get there, when and where people will eat and sleep, how much physical activity the average person can handle in an outing and how they might feel the next day, how much everyone can carry, and how to store what they cannot carry. I invest an enormous amount of time into planning a workshop in order to ensure that everyone has a great time and is able to make the most of the photographic opportunities and instruction.

You've been to some stunning places to shoot. How do you pick your locations for workshops?
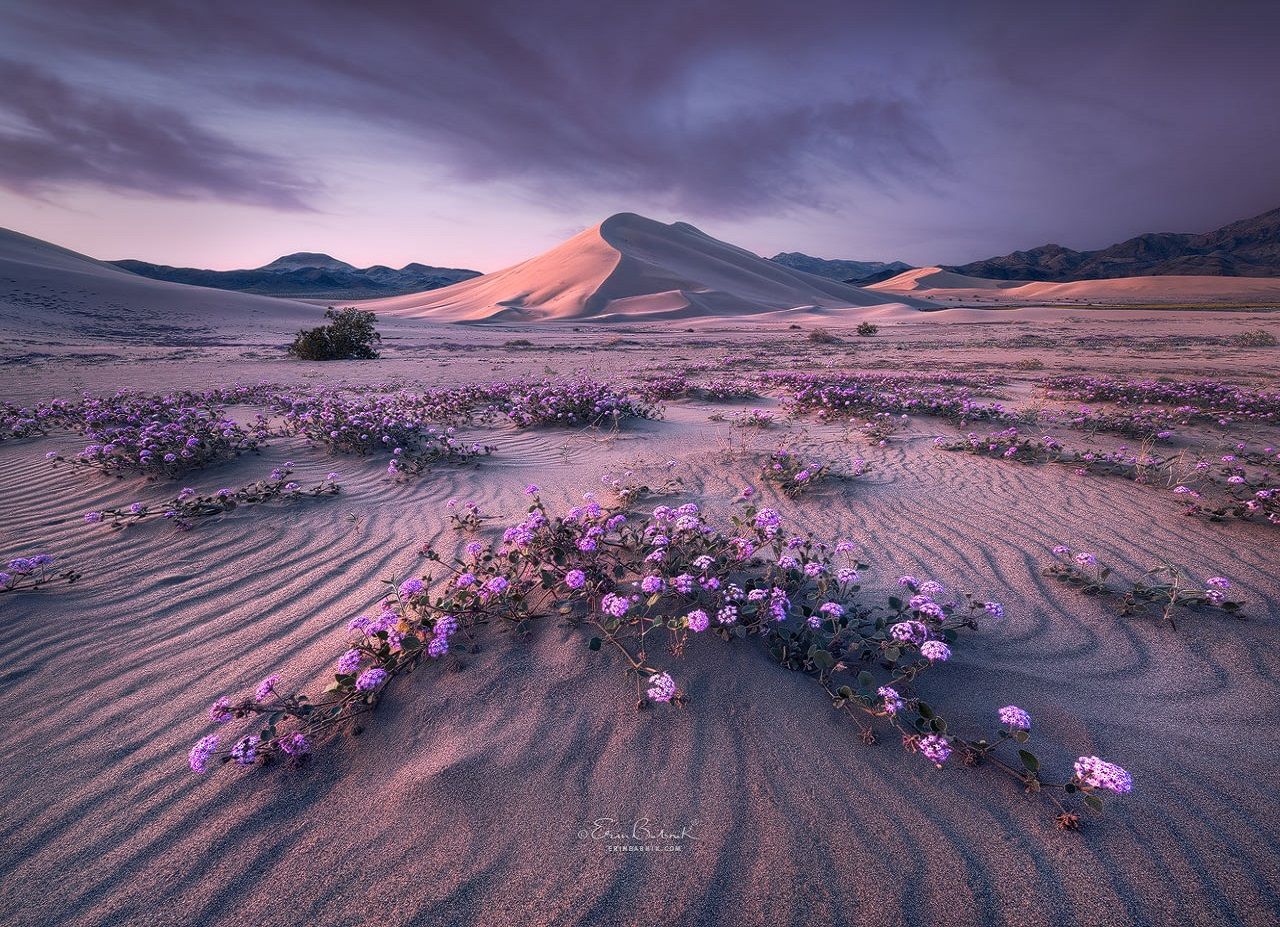
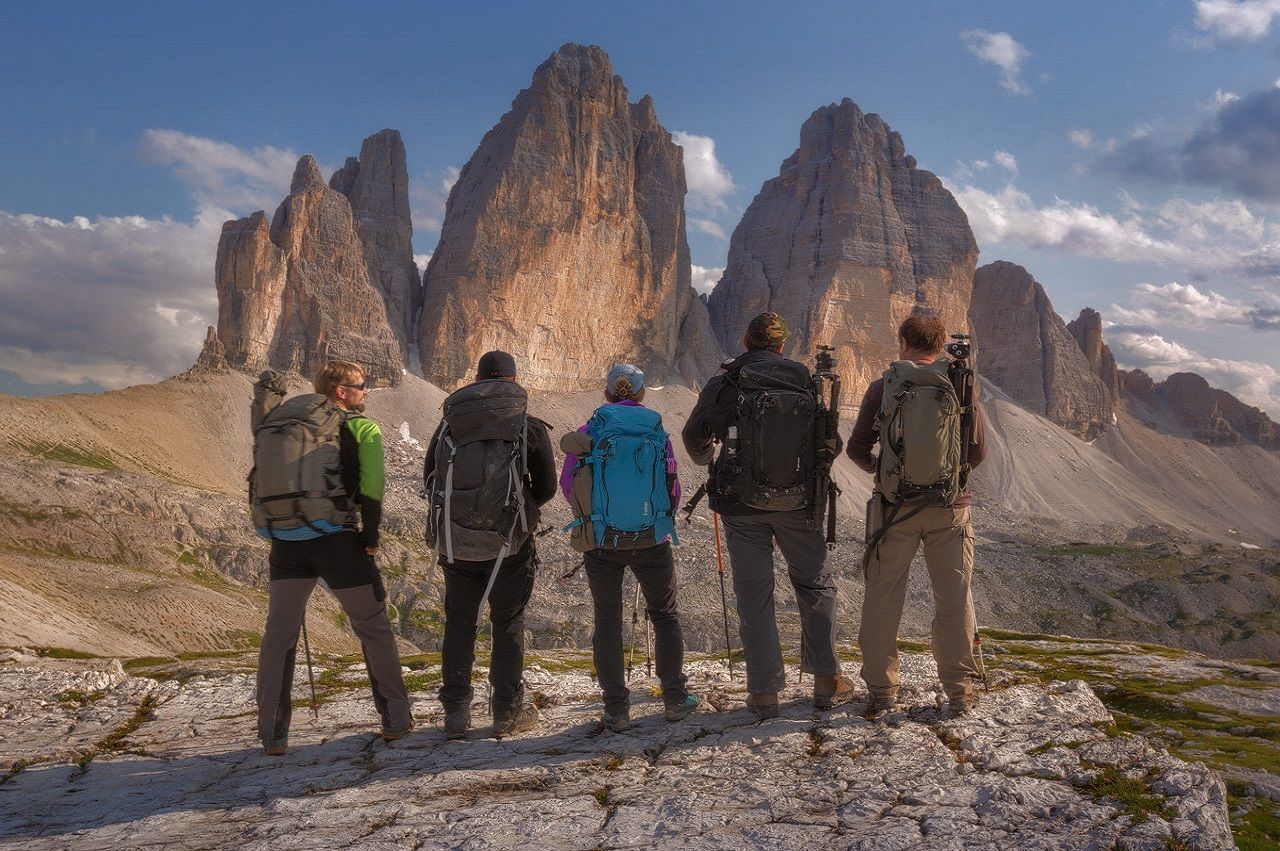
Most of my workshops feature unique locations that I discovered through my own exploration, in combination with locations pioneered by some of my co-leaders, and also with a few classic areas included. I try to choose locations that are not only highly photogenic but that offer a good range of options for being creative. Even the more classic areas that I feature are of this sort, such as the Mesquite Sand Dunes in Death Valley, an area that has been highly photographed for decades and yet provides endless opportunities for photographers to create unique and rewarding photographs. My extensive exploration of the Dolomites has turned up dozens of locations where my students can experiment with a variety of focal lengths and compositional styles all in one spot, making my Dolomites workshop series extremely popular. Not only do my workshop participants appreciate such versatile locations, but I am able to stay inspired myself by returning to these areas that always seem to have something new to offer.
For participants coming to shoot in those locations, what are your top picks of essential items that they should pack or bring?
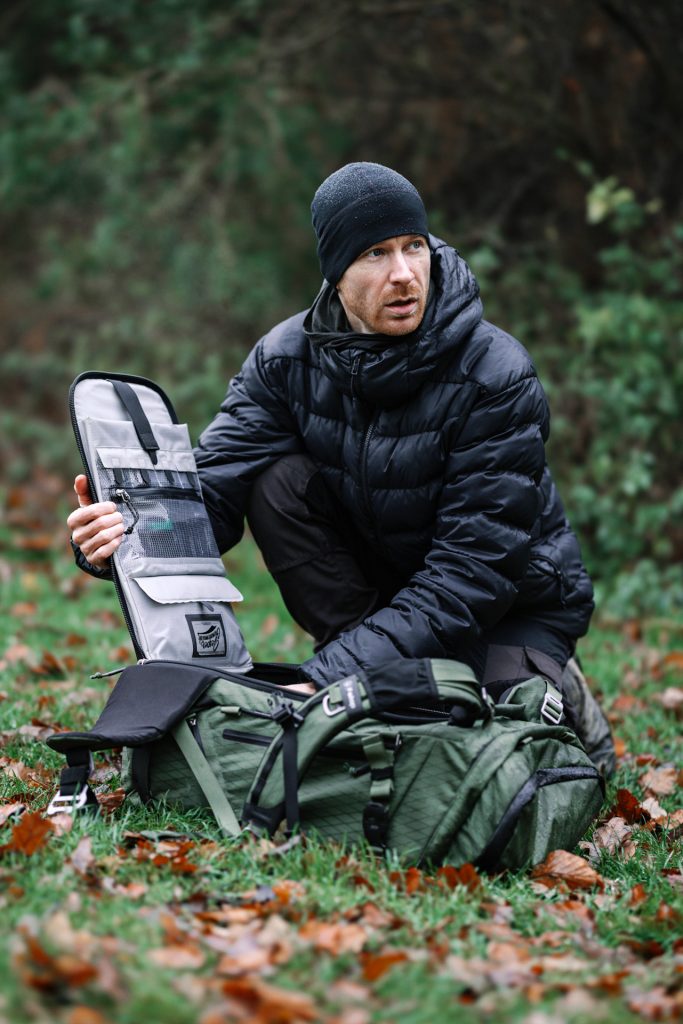
Because my workshops are based in wilderness areas, we are usually doing some walking or hiking to reach them. A walk might be anywhere from fifteen minutes to two hours long, depending on the workshop, but regardless we are not usually right next to any vehicles or buildings and therefore need to carry whatever we will need to use while we are out in the field. A good photo backpack is therefore an absolutely essential item, and I always recommend that participants bring one that can carry more than just their camera gear and that stands up well to the elements and to whatever rocks or damp surfaces may be beneath a backpack when it is on the ground. For those workshops where we are backpacking to mountain huts or are even just doing longer day hikes, I also consider trekking poles to be essential items because they make the hiking much easier and improve balance on uneven terrain. Of course there are a lot of standard items that I recommend in addition, such as a tripod, a headlamp, and protective clothing, but the choice of a good backpack and trekking poles makes it easier to carry all of those items comfortably and safely. Aside from these essentials, I always advise my participants to bring their spirit of adventure!
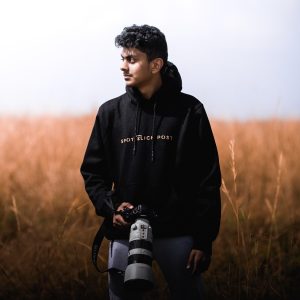
Words and photos by Alex Grymanis
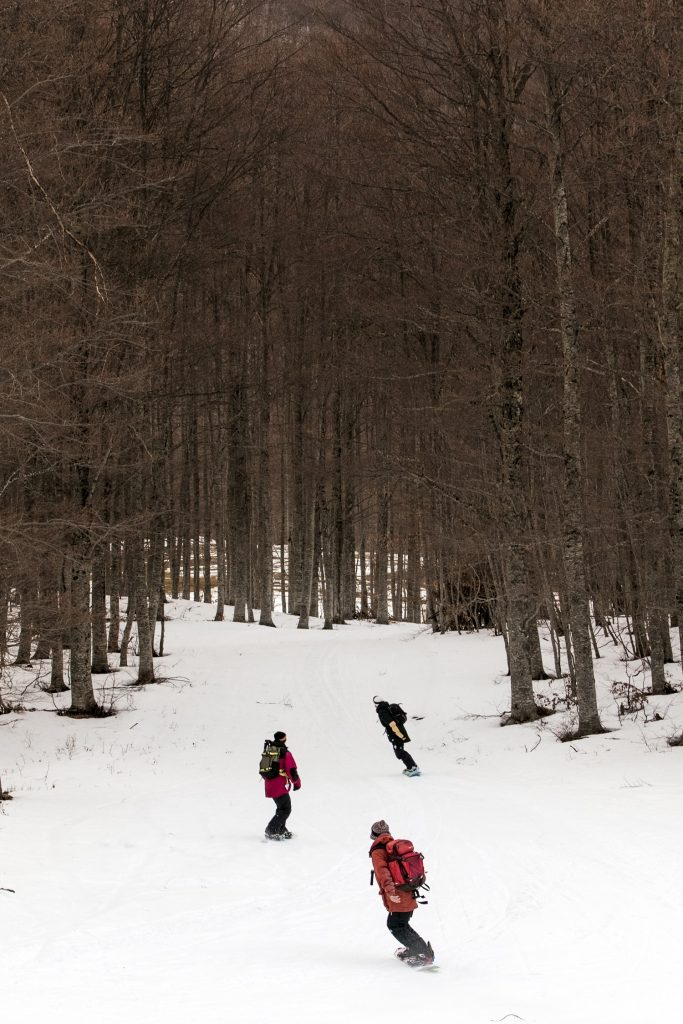
Snowboard photographers traverse the globe following the best riders and searching for the most epic snow conditions in far-flung locations. However, sometimes the most meaningful experiences can be found closer to home, as f-stop Ambassador Alex Grymanis found. He explored the beautiful landscapes of Northern Greece through snowboarding.
Greece might not be the first place that springs to mind for snowboarding, but for Alex, the trip gave him the chance to hit the road with close friends and re-experience what made them fall in love with snowboarding and adventure.
This trip taught us that we can achieve anything as long as we have the will and the aspiration to do our thing and we do hope that it will inspire you to do the same.
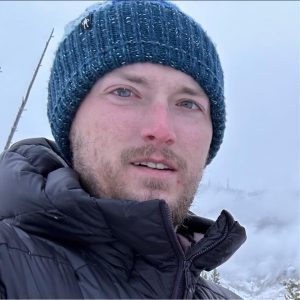
Alex Grymanis
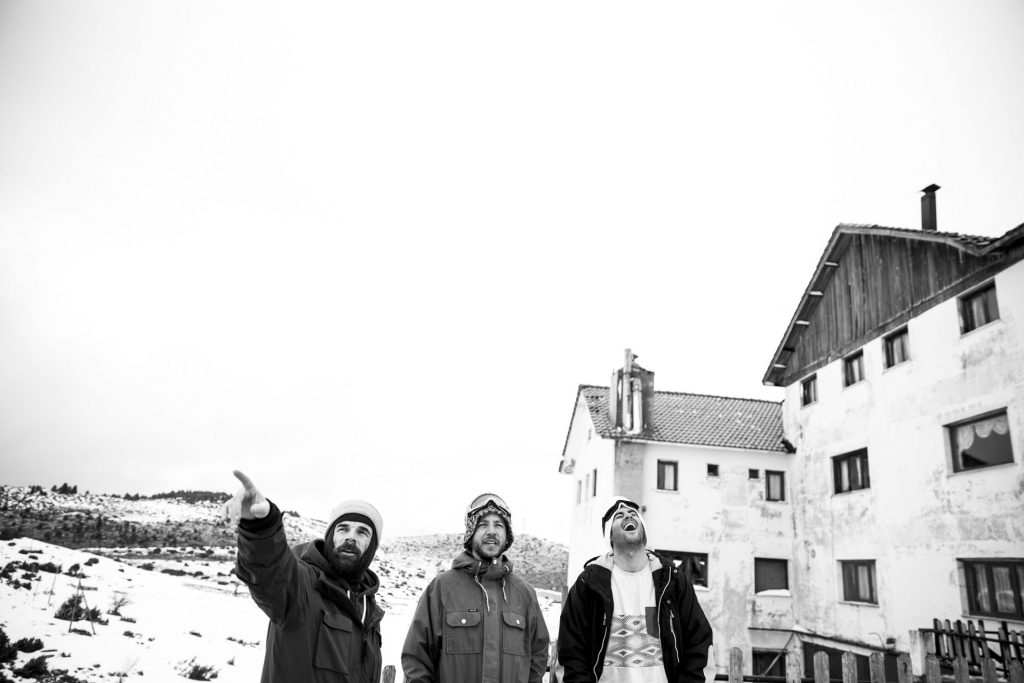
Last February, almost a year ago, I traveled through northern Greece. This trip started with a few friends, in an RV, for 10 days in search of snow and new places in our country, Greece, where we could snowboard. The fact is that it came to be a trip about creativity, relaxing, and being once again carefree. During these 10 days not only did we become children again and remember the feeling of being away from the concrete and loud city, but we also learned how to coexist in a small, confined space and we reconnected with nature.
Now that a year has passed by, a book, a video, and these photographs keep that trip alive in our memory and make it possible to share this experience with you.
Everything seems fun and normal until you wake up the first morning surrounded by snow and by your friends all in a tiny four-wheeled house. The sweet lullaby from the wind and the sound of the trees at night become your guide and sooner or later you realize that you need to adapt to this new environment along with all of your gear, cameras, and wardrobe along with its frustrations. You learn to respect other people’s privacy, needs, and weirdness and start working together as a team. In places without electricity and no internet, the real connection between you, your friends, and the people you meet happens.
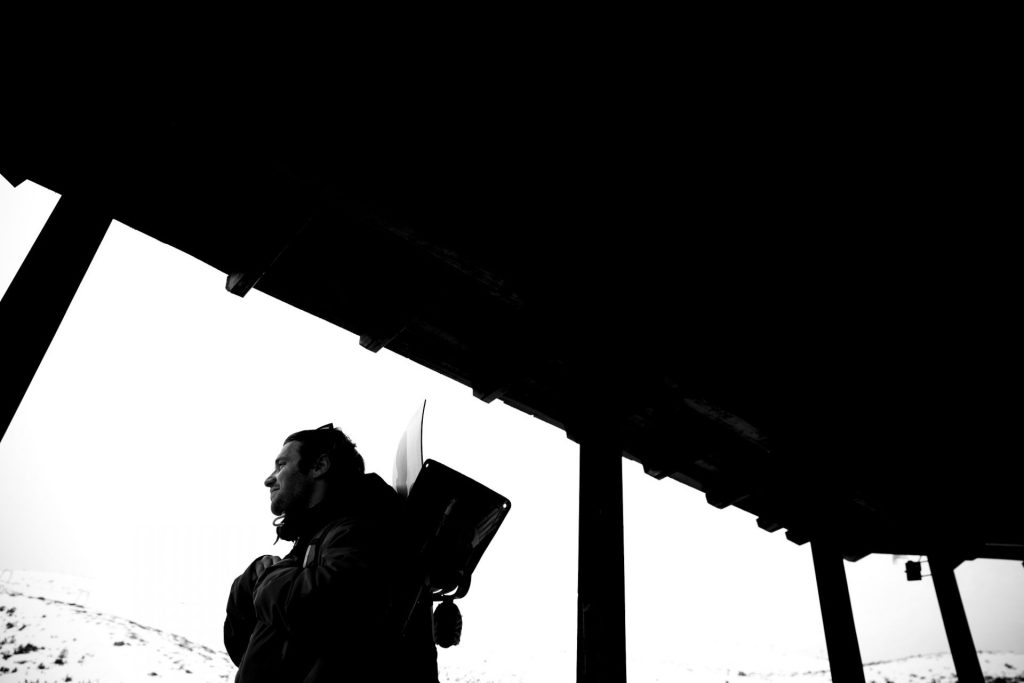

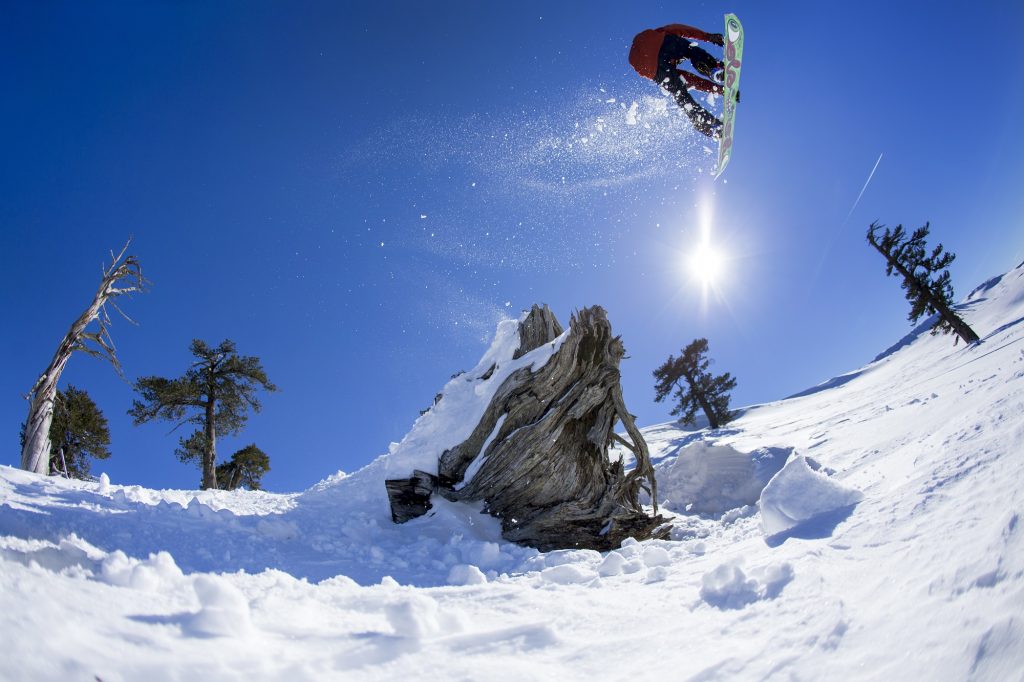
Growing up and having to work more to make your living, tends to shift your mind away from the things that you really love and make you feel happy and free. The deeper search in locations already known wakes up that feeling of rebirth and connection with the mountain. We got blessed with a heavy snowfall in Vasilitsa in the middle of the trip and decided to explore the “already known” slopes but from a different angle.

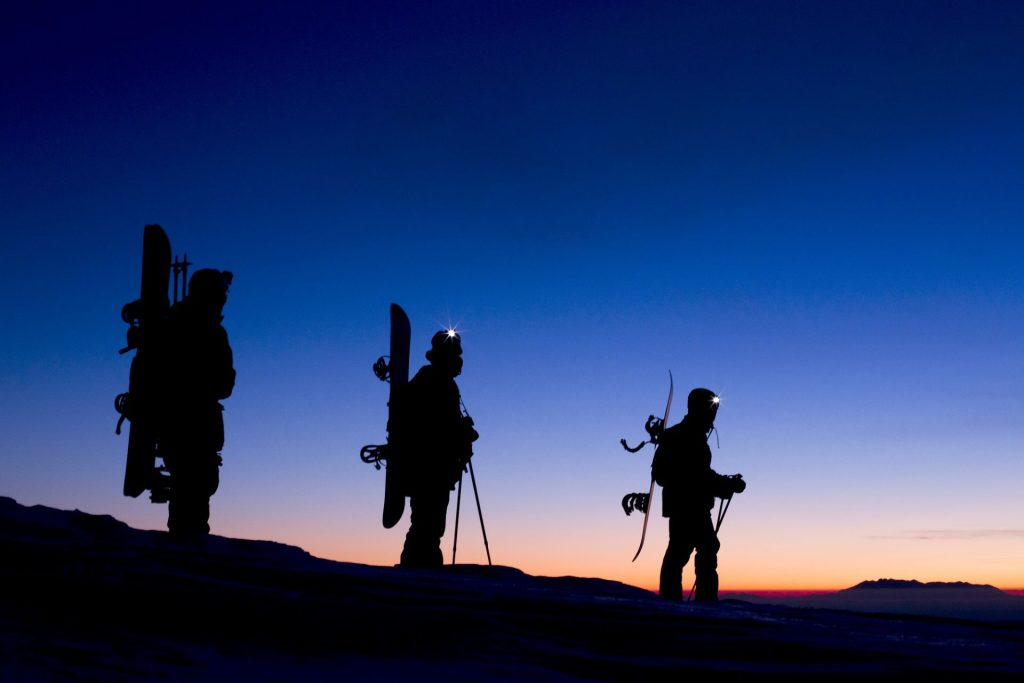
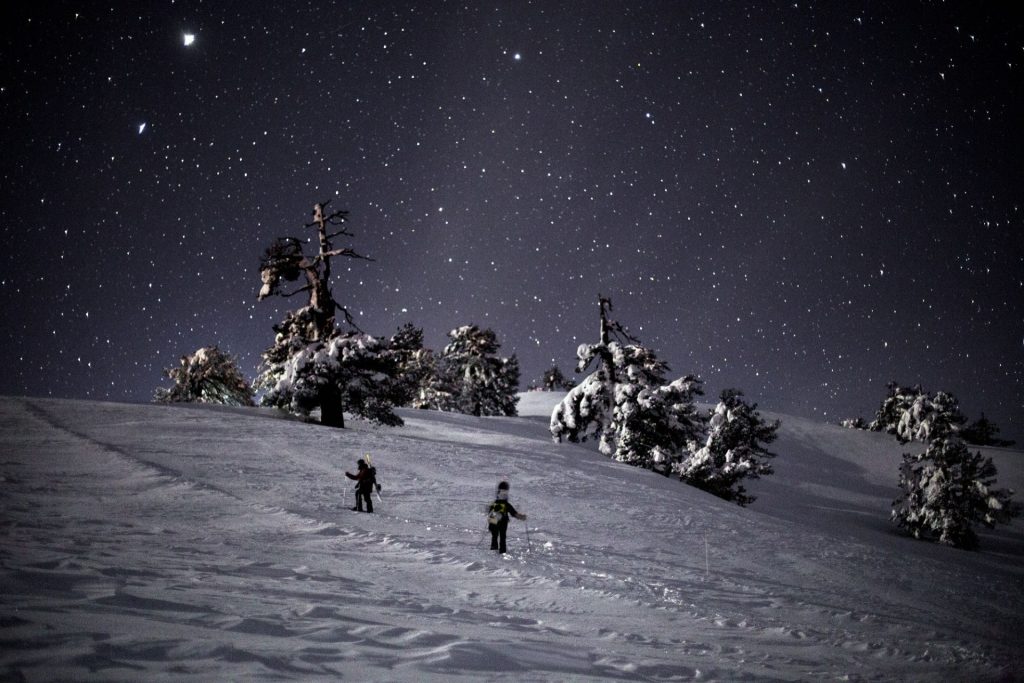
Snoozing the alarm was our biggest fear for that night’s mission. It was the coldest night of the trip but at the same time the most beautiful of them all. The sky was clear and full of stars so bright that it seemed we were walking on the moon. Our motivation for the hike soon became stronger and we made it to the peak slightly earlier than expected. After a short rest, we strapped in our boards on the backpacks with Gatekeeper Straps and when the first sun ray hit the slope we dropped into the line that would shift our perspectives of snowboarding forever.
Making every day count was the main idea since day one. Downdays came with heavy rain on the mountains and it was time for us to hit the road. On the way to Metsovo, we made a 180-degree turn and drove even further north to the Prespese Lakes. We got to experience the life of local fishermen and saw farmers burning their fields to prepare them for the following season in a place that stood out from the rest of the trip. Needless to say, we had the best feast on the whole trip.


Ever since his first skydive, f-stop Staff Pro Jesper Grønnemark had the idea of doing a photo shoot while in the air. This is how it went. Even though as he says, his first skydive was more than enough for him, this idea remained stuck in his mind.
The idea became a reality when Jesper teamed up with the guys from Flux Freefly, gave them a Profoto B1X, and jumped out of an airplane at 13,200 feet to take his photography to new heights.
His heart is racing, adrenaline is gushing into his veins as the door of the airplane opens. 13.200 ft. (4 km) under him the ground stares back. This is it, one chance, one shot. His grip on the Sony A7R II tightens as they move out the side of the plane, 45 seconds of free fall awaits, 3, 2, 1…
FLUX: Benjamiin Laudrup, Jacob Lundsgaard Madsen and Emil Landeværn Kristensen; Head of the project: Michael Boe Laigaard; Lights: Profoto; Camera equipment: Sony Nordic; Video: Kasper Sveistrup - Frame2film; Graphics: Niels Borup - Saftig; Article: Kira Andersen; Pilot: Fillip Højlund Aarhus skydive club Red Bull Denmark
The eternal strive to push the boundaries of what people believe is possible in sports photography has put Jesper Grønnemark in a position he did not imagine himself in again. After his first skydiving experience, some years ago, it wasn´t an immediate love story. Now, here he is again on account of his own creative thinking. Why would he do it again you might ask. Well, the answer is, he needs to. In order to push those boundaries, he is more than willing to put himself in extreme situations.
When trying to capture the emotions of a skydiving experience, safe is not part of the vocabulary.
Jesper Gronnemark
How do you make it happen then? In short, you need a man with a plan, and that man was Michael Boe Laigaard, head of the project in terms of finding the right people, and those people came in the form of the Danish national team in free fly - FLUX.
They are the best when it comes to jumping out of planes and falling controlled through the air. The original plan was that they would all have their parachutes out, Jesper with the camera and Benjamiin with the Profoto B1X flash. It would have been easier to track the skydiver, or Mr. Bill as the “model” is called in skydiving, through the air. However, shortly before the jump, it was deemed too dangerous due to wind and the plan changed to free fall. This new challenge was going to put an even greater demand on Jesper's skills as a sports photographer since they only had one jump and now had to nail the shot in a fall going 200 km/h.
Benjamiin with the Profoto B1X flash
GO! As Jesper is falling through the air, he sees the skydiver approaching from above, he gets his camera in place and suddenly he is cool, calm, and collected. The workflow is such an integrated part of him, that even in a time like this, it overthrows the adrenaline rush. Furthermore, he only has one shot, so he better make it count! The skydiver is head down, shots are fired, and not long after it parachutes out and a touchdown. Fingers are crossed on all parts. How did it turn out?
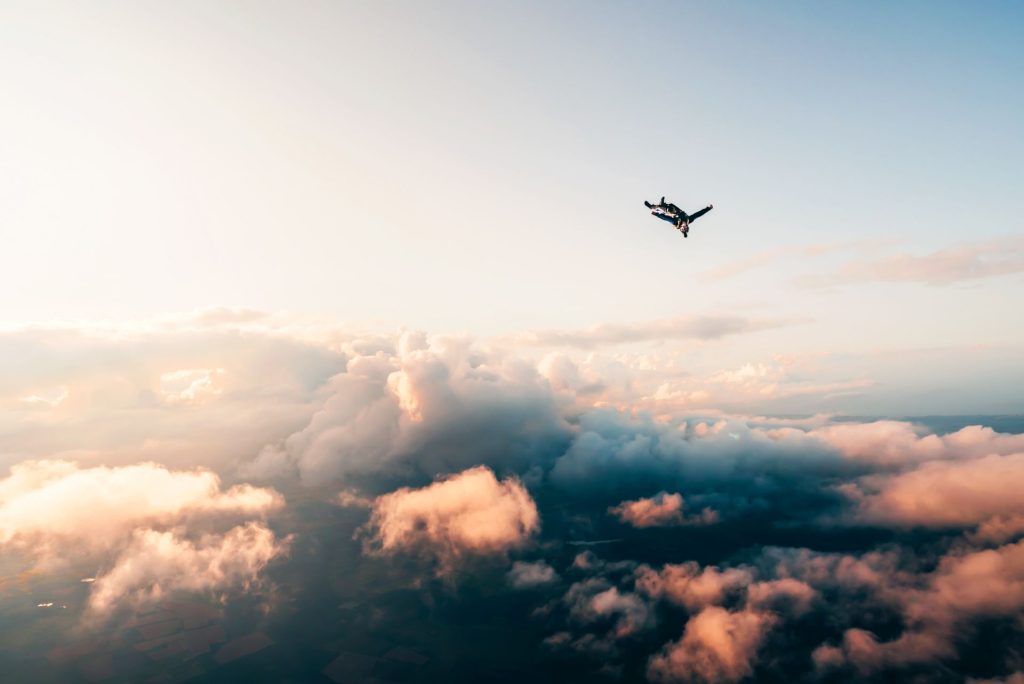
Emil approaches and gets into position for the desired skydiving photo
I only have one Shot, One Jump..and that's it. Once I got my camera to my face while flying through the air at 200 km/h, I was focused. There was no sound, no sense of falling and I didn't feel @michaelboelaigaard on my back.
My only mission was to get the shot!
Jesper Grønnemark
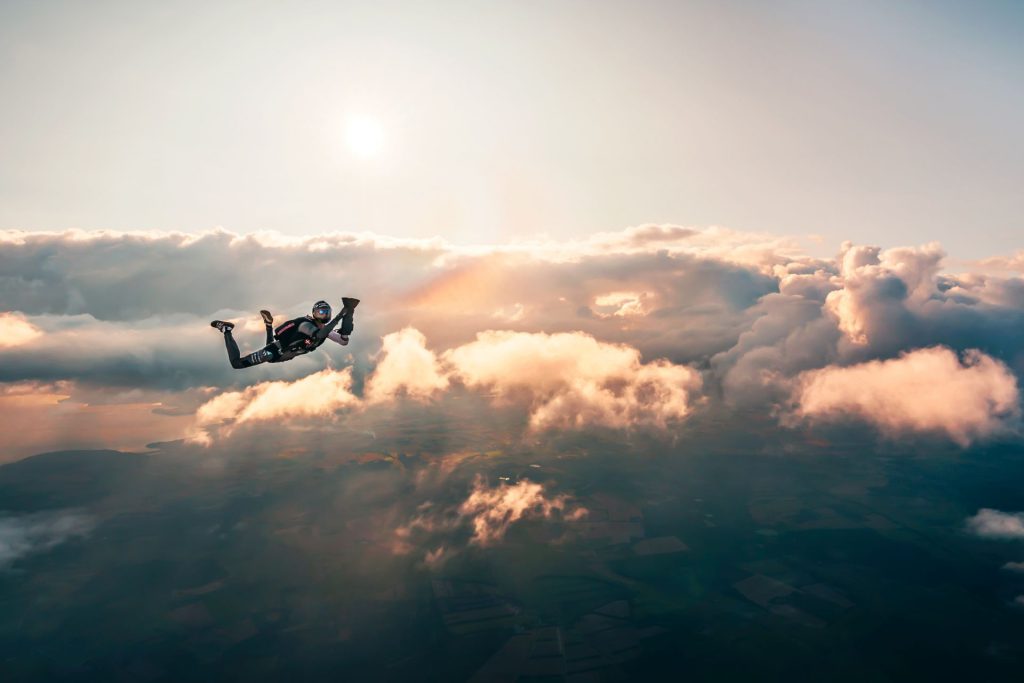
Once again Jesper proves that hard work and quite a bit of sacrifice pays off. A lot of planning went into this shoot and even so, they changed. However, it was for the best. Jesper got the image he originally envisioned! A man hanging in the air above the clouds, head down. It feels as if it would be safer if his head was up, but when trying to capture the emotions of a skydiving experience, safe is not part of the vocabulary.
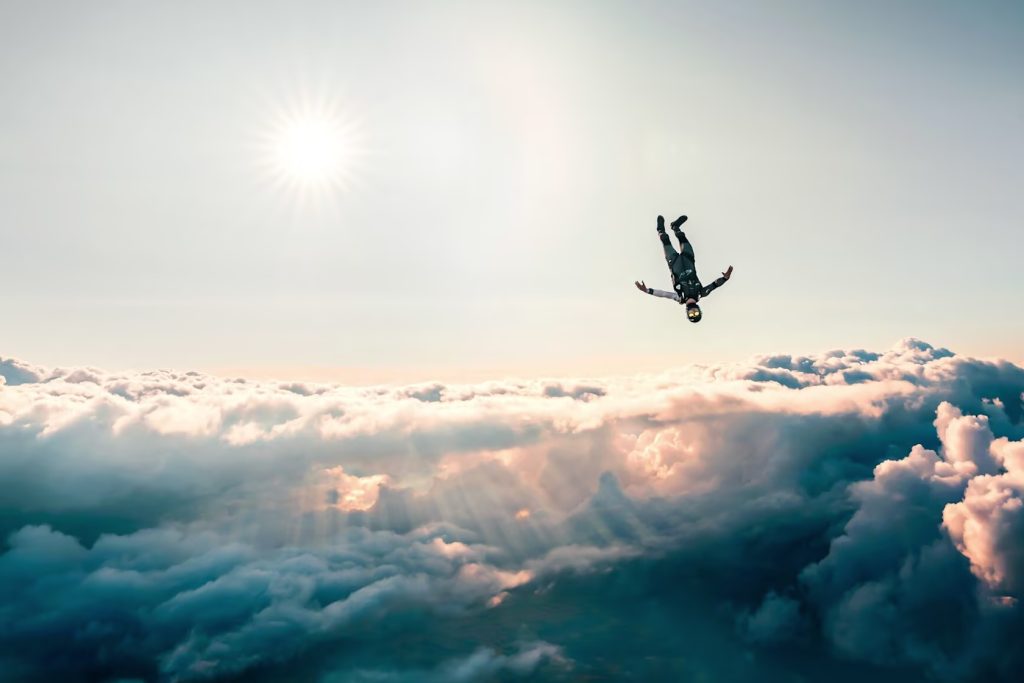
Skydiver Emil from FLUX heads down above the clouds at Sunset
Shot with Sony a7r II | Sony 24-70mm f/2.8 GM | Profoto B1X | SHUTTER SPEED: 1/1600, APERTURE: 10.0, ISO: 640

The Skydiving Team from FLUX; From Left to right: Jacob, Benjamiin, Emil

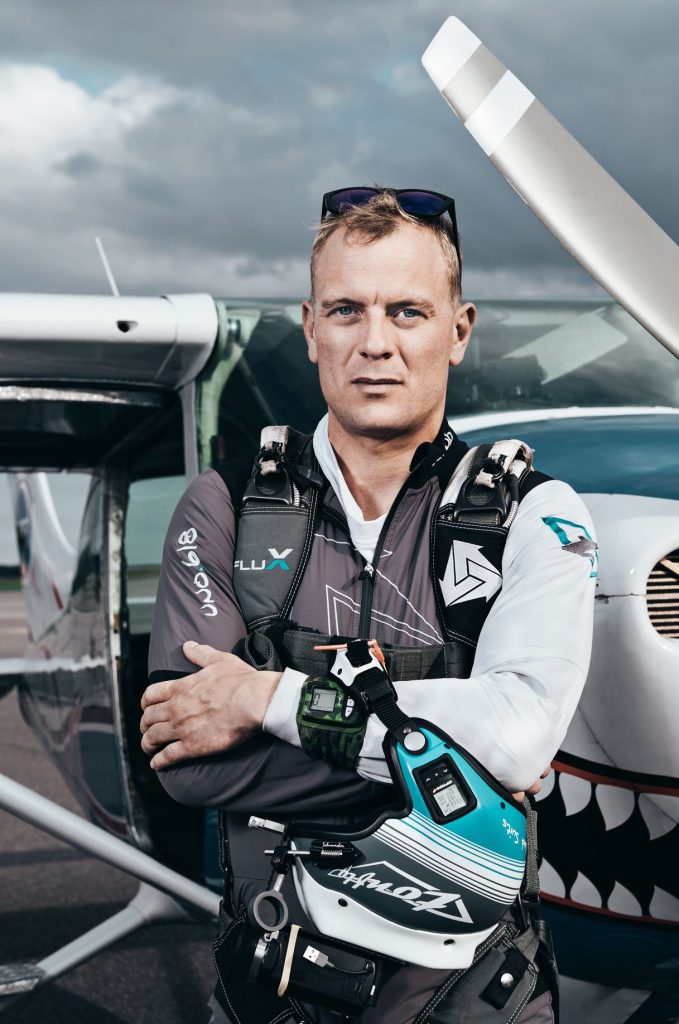
Benjamiin was the one holding the Profoto B1X at the free fall at Jesper's skydiving shoot. It isn’t normal to skydive with anything in your hands, but Benjamiin is an experienced guy, who already tried skydiving with fishing nets, fruits, and other crazy stuff
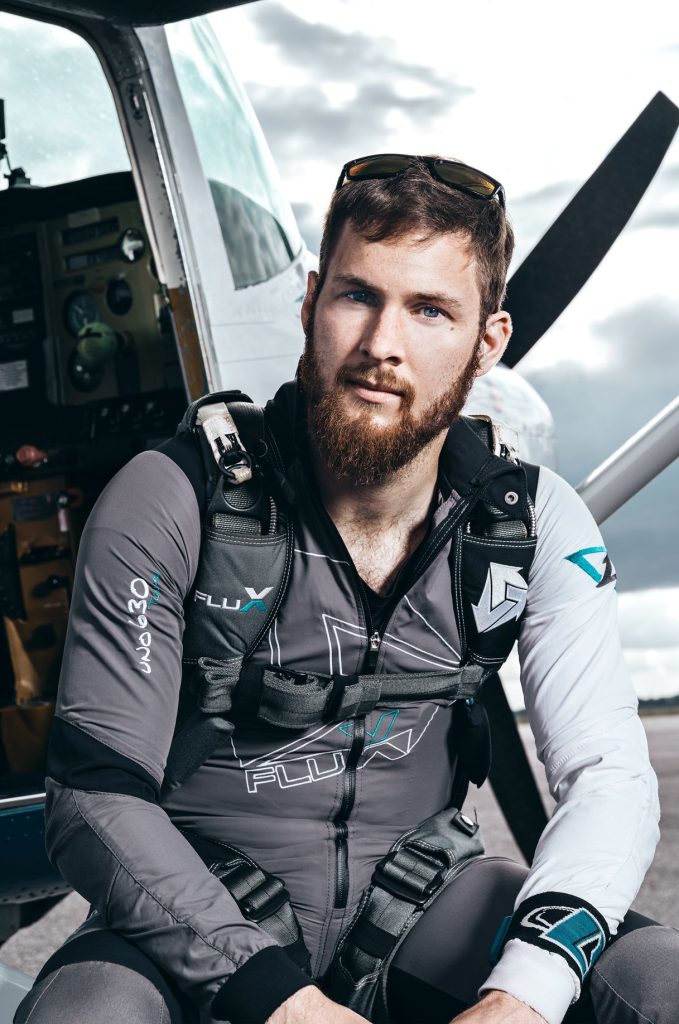
Jacob's role is to film Emil and Benjamiin from a close distance using a helmet-mounted camera while they perform. He usually does that by being flat in the air with his back facing the ground. He was also the one filming me from the air for the behind-the-scenes video for my skydiving shoot.
Emil was the athlete in front of the lens at Jesper's skydiving shoot. Emil recommended shooting him while he is doing a trick easily described as a front layout from the belly - a reversed Jesus rising to heaven. Jesper loved the idea because it starts a lot of thoughts at the one looking at the image when a guy is flying head first towards the ground.
[bc-component id="436" type="image"]
[bc-component id="383" type="image"]
[bc-component id="399" type="image"]
[bc-component id="437" type="image"]
Jesper Grønnemark is renowned for his innovative approach to adventure and action sports photography, redefining the genre's conventional boundaries. See more of Jesper's work!

Discount Applied Successfully!
Your savings have been added to the cart.