


f-stop backpacks are designed to carry and protect its contents from rigorous mountain terrain, airborne elements, and moisture. If you are doing battle with these elements, they can cause damage to your bag. Therefore, maintenance is required to ensure your bag is in optimal performing condition. There are simple steps you can take to ensure your pack has a long life, while still doing its job in the field.
Below is a simple guide users can follow to help keep your pack in an optimally fresh and functional condition.
When cleaning your f-stop backpack you should never use abrasive pads, detergents, or a washing machine. Those cleaning tools can cause damage to the material and its water resistant coating. Hand washing with mild hand soap in warm water is the best method to keep your backpack shell materials clean and functional.
Follow these simple steps:
1. Use a non-abrasive soft sponge to hand wash contaminated areas of the product.
2. Only wash dirty areas as the unnecessarily brushing of clean areas can remove DWR* surface coatings
3. For more difficult stains and filth we suggest Nikwax® Tech Wash (or similar products). Again hand wash with a sponge and be sure to read the product directions for detailed cleaning use.
4. It is best to avoid any unnecessary agitation with the outer shell DWR and Advanta™ undercoating. Agitating either surface can reduce water-repellency
5. Optionally, users can also clean SR buckles, ladder locks, zipper heads and Hypalon® areas. Airborne elements and ground dirt can build up on the components. In general these items are very durable but it does not hurt to take a fine soft brush (tooth brush) to clean out the corners for greater performance and longevity.
6. When hand cleaning is complete hang dry at a neutral room temperature. Be sure all zippers are open and air is flowing through the bag. Using a circulating fan on a low setting can aid in the drying process.
It is best to store hang your backpack in well-ventilated area that has a neutral room temperature. A damp basement is the worst place to store your backpack and should be avoided if possible. Airflow is incredibly important when not in use to allow your backpack to breath and avoid moisture build up.
If you do not use your pack daily - and even if you do, we recommend removing all the contents after every use. Leaving any items in the pack reduces the bags ability to breathe and resist moisture build up.
Following the simple steps below will help keep you and your backpack happy.
1. Empty your backpack and clear out all pockets. Be sure to double check for sandwiches and wrappers hiding in the corner of the pockets!
2. Do a hand cleaning of the shell and components - if required.
3. Unzip and open all pockets and access points. Clean out any contamination from inside the pockets.
4 Leave pockets and zippers open and hang dry in a well-ventilated area. (Air circulation through the product is recommended and required for long-term storage)
DWR and Advanta™
DWR or Durable Water Repellant, is a coating applied to the outer shell of a textile. DWR adds water-resistance by sealing the fabrics weave. It causes water to bead into droplets and run off the shell instead of building up and penetrating into the material.
All f-stop bags use DWR treated fabrics. Over time and depending on use- the coating can wear and may eventually need to be re-treated. To bring new life to your exterior shell material, we recommend using waterproofing DWR treatment like Nikwax® Tent and Gear Solar Proof. When re-treating your DWR coating- follow the directions provided by the product you chose to use.
Advanta™ (featured in the 2015 Mountain Series) is a specially developed film that is laminated to the underside of the Nylon shell textile (DWR coatings exist on the exterior). The film lamination actually creates a waterproof barrier preventing any water from penetrating the Nylon surface. It is important to note the difference between Water Proof and Water Resistant. ‘Resistant’ generally is the first layer of protection but can be penetrated in consistent rain fall or soaking. ‘Water Proof’ actually stops water from entering through the Nylon. f-stop uses both for the 2015 Mountain Series as means to protect the contents of your bag.
As a result is it very important to exercise care if you are cleaning the inside of your pack. On Mountain Series products the Advanta™ laminate is white and very obvious to the eye. Please take extra care if cleaning the film. Again do not use detergents, strong soaps, and avoid heated storage. Always avoid using cleaners with alcohol or ammonia when cleaning your backpack. These items can easily remove the protective coatings.
All f-stop bags use Industry Leading zippers. While these are widely recognized as the best zippers available, they are not 100% invincible. Proper care of zippers will not only extend the life of the zipper, but also for the life of the backpack.
Most zippers on our packs have added aids to provide more efficient usability such zipper protection and pull-tabs. Hypalon® zipper garages, Hypalon® zipper pull-tabs and slider pull cords all aid to the user experience.
If it starts to rain - stop and tuck the zippers under the zipper garages. Use the zipper pull tabs to get a straight line when zipping (one hand on the pull the other on the zipper - this helps create a straighter zip path). Pull cords help sooth out kinks/corners and provide easy locating and grip of a zipper.
Below are some precautionary tips for keeping your zippers healthy, smooth and functional.
1. Operate zipper in a calm smooth manner for best results.
2. Avoid awkward jerk motions when closing or opening zippers (use the Hypalon® zipper pull tabs).
3. Keep zipper track in a straight line when operating if possible.
4. Do not over pack your bag at the zipper track areas (avoid sharp bends in zipper track - especially the PU zippers).
5. Do not store product with any weight placed on the zipper areas.
6. Tuck zippers in 'zipper garages' for best water protection.
In point ‘4’ we mention ‘PU’ zippers, These are commonly referred to as Waterproof - but do not be fooled they are not. They follow the same Water Resistant VS waterproof story mentioned in the DWR/Avanta™ treatment section. PU zippers are very water resistant and do a great job keeping elements out - on the PU surface. You still need to take care around the seams (if no storm flap) and also use the zipper garages to keep out water. Where two zipper sliders meet there will always be a space between them potentially allowing elements to pass, but if you cover that space with the zipper garage, you will get much better protection.
Industry Leading zipper manufacturer says: “Trying to forcibly close a zipper in a bag that has been overfilled will cause an excess load on the elements. This stress may cause the elements to slip out from the tape. This is a fatal problem with a zipper. The zipper should be closed only after bringing the two element's sides near each other so that the slider can move more easily.”
This simply means if you force your zippers you may loose or damage the elements (teeth) and your zipper will become unusable. Please take caution and do not force or over stuff your pack.
There are numerous ways to keep your zipper clean and smooth, from wax to non-tinted lip balms. But since we solely use Industry Leading zippers and we will adhere to their advice.
“The elements' gears can be damaged by forcing a slider that does not open or close smoothly. Apply paraffin or the lubricating spray "ZIPPYCOOL®" to the front and back side of the elements and move the slider up and down several times to work in the lubricant and make the slider work smoothly.” - Industry Leading zipper manufacturer
As mentioned, there are numerous ways to keep your zipper smooth and you can do a search online for numerous alternatives- although we recommend sticking to Industry Leading zipper manufacturer advice.
Ski boots love to smash zipper pull cord ‘clips’ - the plastic end piece. If you do experience an issue with a lost or damaged pull cord, please contact customer service and we will do our best to address the problem.
In general replacing the clip requires a box cutter and new clip. Simply separate the two plastic parts of the clip (at the ‘seam’) and replace.
There are a variety of deodorizers available that can be used for the padded areas of your bag. Often times sweat will lead to fungal growth and odors if your bag is not properly stored or ventilated. If you’re ok with a strong minty smell (which will eventually go away), then tea tree oil may be an effective solution. Tea tree oil is incredibly potent with a powerful natural scent and antibacterial/antifungal properties. Read on for suggestions of how to use it for treating smells or odors in the back panel and shoulder straps.
(Caution – Avoid eye contact as it can cause irritation)
1. This first step will come down to personal preference as the concentration can be varied. To start, add 5 - 10 drops of tea tree oil to one cup of warm water. Then add it to a spray bottle and give it a good shake to mix
2. Spray the affected area and wipe with a clean damp cloth
3. Dry in a ventilated area
4. If the odor remains, increase the concentration and spray more generously to the affected area before wiping with a damp cloth.

If your sternum strap was snagged and become detached from your legacy or classic Mountain Series pack, reattachment is simple, easy and secure.
All you need to do is follow these simple steps to get you ready for your next adventure:
1. Make sure that your strap/buckle is facing outwards from the pack
2. Position the sternum strap attachment point against the rail on your shoulder strap at around a 45 degree angle and push towards the rail
3. Wiggle the sternum strap attachment point as you push in a downward motion. This will encourage the attachment point to wiggle onto the rail.
4. Keep pushing and wiggling until the attachment point is firmly on the rail. That's it. You're ready to get back out there.
Remember: Enjoy the Journey. Be safe. Keep telling stories!
Note: This applies to legacy or classic series f-stop Mountain Series camera packs such as the Lotus, Ajna, Tilopa, Sukha and Shinn.
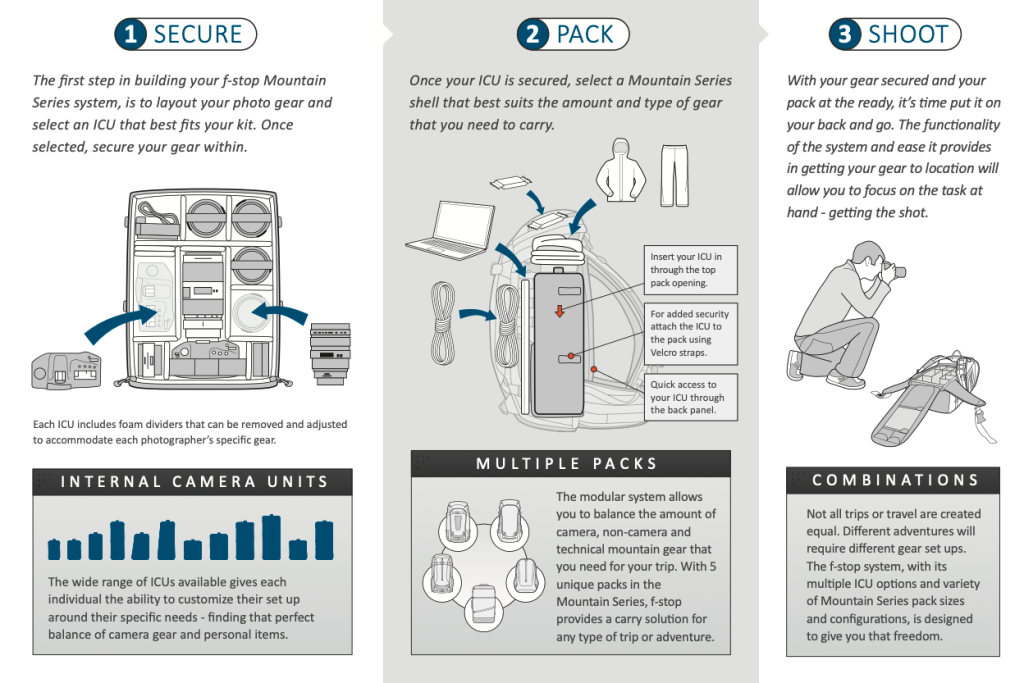
This is what you need to know about our camera packs! We give you an overview of what really matters in the Design or Functionality of the f-stop System. Furthermore, we give an outline of what thoughts go into building this f-stop System, designing our packs, the build, the carrying system, and most importantly, the modular design of f-stop Packs. This article focuses on providing an Overview to better understand

A camera backpack needs to be tailored to the needs of photographers. Everyone has different gear, scenarios and where they bring the gear.
Photographers are no strangers to the ever-evolving world of camera gear. The need to carry various lenses, camera bodies, accessories, and sometimes even drones has led to a demand for camera bags that offer both protection and organization. Since its founding, f-stop has specialized in providing technical camera bags for serious visual storytellers with flexible camera insert arrangements. f-stop is known for its rugged build, comfortable carrying system, and, most importantly, the modular system. As a result, the f-stop System allows users to customize their packs to their exact specifications.
We have more articles diving into the Camera Inserts or also the Differences between the packs so make sure to check out our blog for more.
It really comes down to understanding your needs first and the purpose your pack needs to fulfill. As an outline, the f-stop System consists of the pack itself and then furthermore the Camera Insert which is actually the heart of the Setup. The main purpose the pack needs to fulfill is to carry and protect your camera of course! After all, we have a range of sizes and styles of packs and Inserts to cater to different preferences and gear requirements. Whether you need a compact daypack for a short hike, a big backpack for an extended photo expedition, or Cine gear.
When you answer these questions you are on the best track to finding your perfect setup.
Since f-stop Camera Packs and Bags are technical Camera Carry solutions they are designed with high durability and rugged construction to last for years. Following this mindset, we design and develop all of the packs packed with practical features that make it a highly advanced tool for your equipment to withstand the demands of outdoor photography. All the following points make the packs ideal for photographers who venture into challenging environments


Whether you're a landscape photographer, a wildlife enthusiast, or a documentary filmmaker, f-stop's modular system allows you to protect and organize your gear efficiently. As the world of photography continues to evolve, we offer you a trusted companion for visual storytellers and photographers who demand flexibility and functionality from their camera bags.
If you need advice or have questions please do not hesitate to reach out! We are here to help


Need further help or assistance?

Although many Camera Insert options are available, users are not limited to a single option per bag. This is something we address in this f-stop Tips & Tricks about different options for arranging your gear which we call: Camera Insert stacking and hatch-backing.
Our Mountain Series systems have become widely recognized for their comfort and modularity. A feature our hardware people always speak highly about has been the compatibility with our Camera Insert system ( also known as the Internal Camera Unit (ICU). It enables users the ability to balance their load and compartmentalize their gear. Aside from this, there are different arrangements
Camera Insert stacking is simply placing one Camera Insert on another. Position the camera units to both be accessible through the rear.
Camera Insert hatch-backing is stacking and rotating a small-sized camera insert for access from the top. One thing to be aware of when stacking the Insert is the size of the opening of your f-stop pack.
For example, a Lotus has a rear access opening the size of a large Camera Insert.
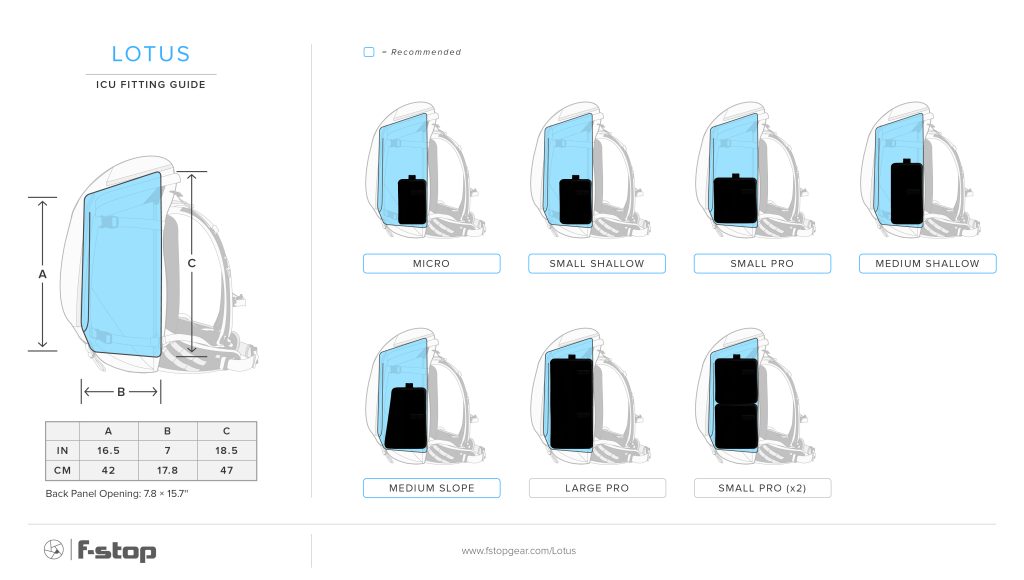
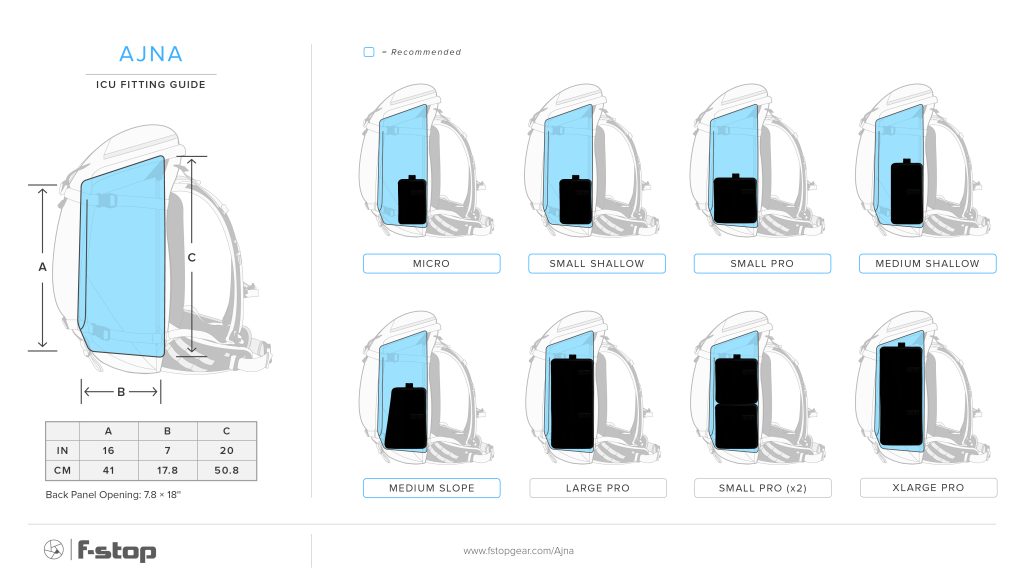
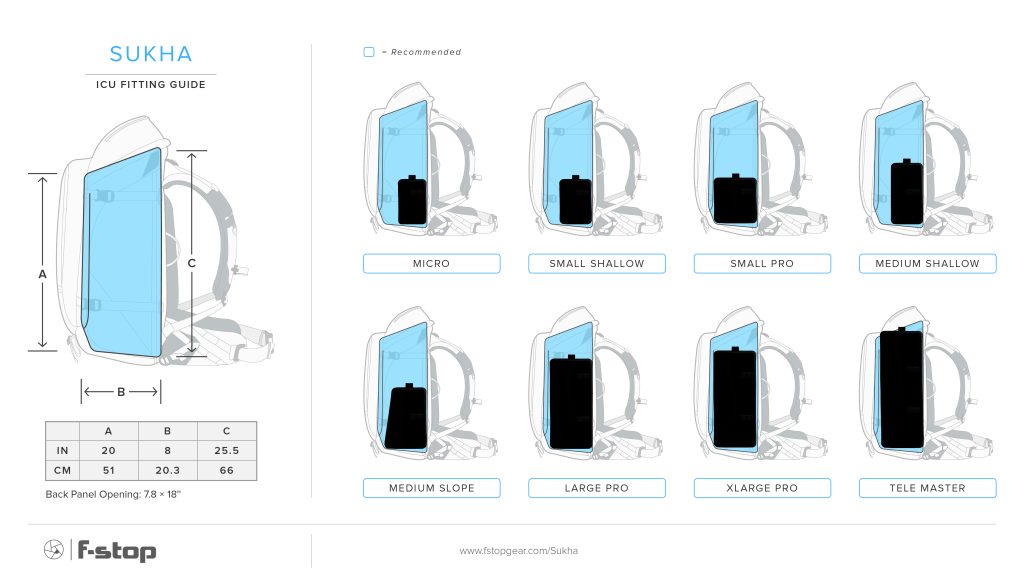
The rear panel opening on the Lotus and Kashmir is 16” ( 40.6cm ) while the opening on all of the larger bags is 17” ( 43.2cm ). The depth will vary, but all of the packs are at least 7” in max depth. When choosing a Camera Insert-compatible bag, note that larger bags provide extra volume but also have higher empty weights to support heavier loads.
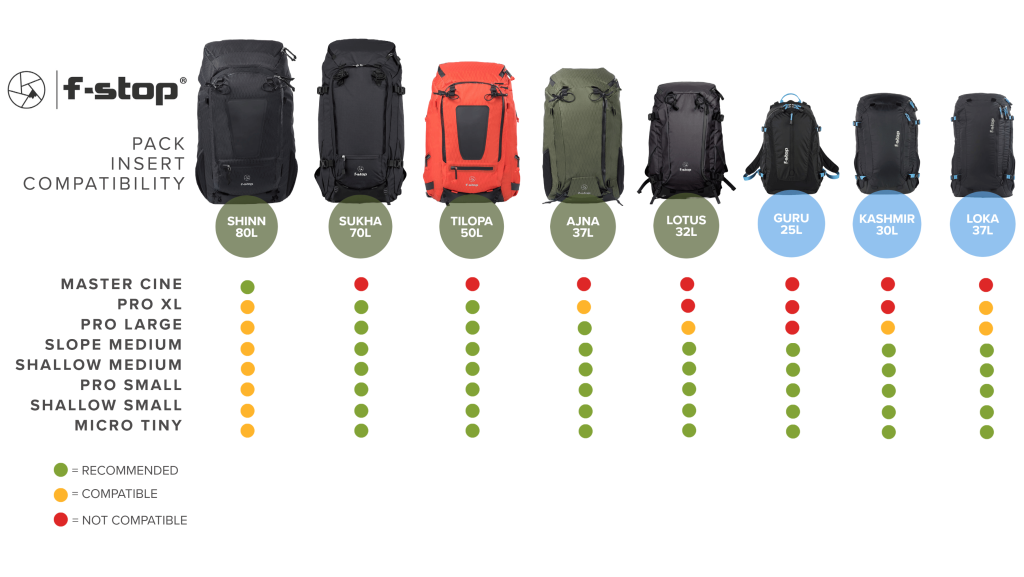
Please reference the compatibility chart to see what combinations work best with each of our current Mountain Series bags.

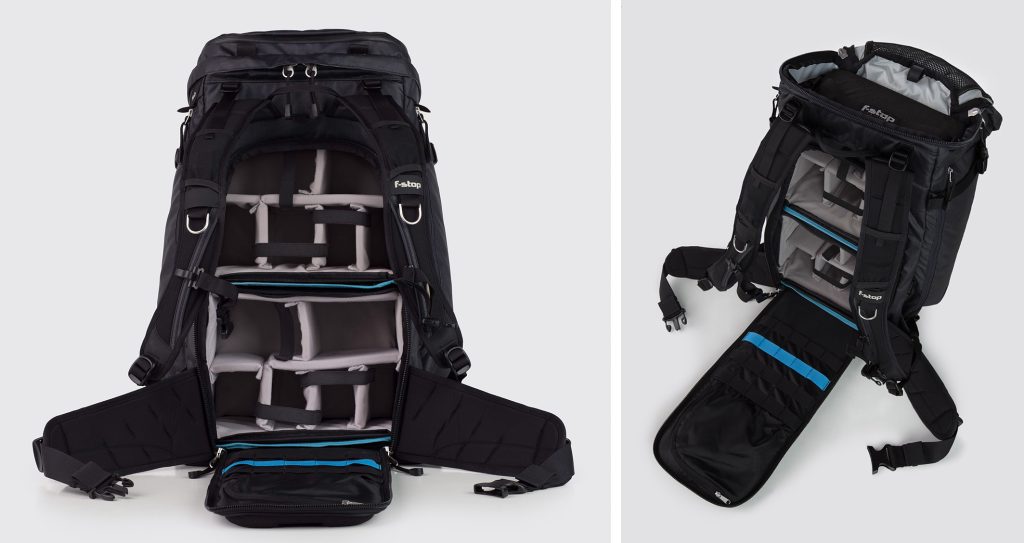
For those needing to utilize the entire main compartment for strictly camera gear that potentially varies, Camera Insert stacking is one of the most efficient methods of doing so. There are countless configurations possible.
The ability to stack and separate different kits could be the optimal setup for your workflow. With different arrangement options, you can choose to bring what you need and adapt it to your specific kit.

The heart of each Camera Pack is the Internal Camera Unit which carries your kit. The Camera Inserts are interchangeable and each pack is compatible with various Camera Inserts.
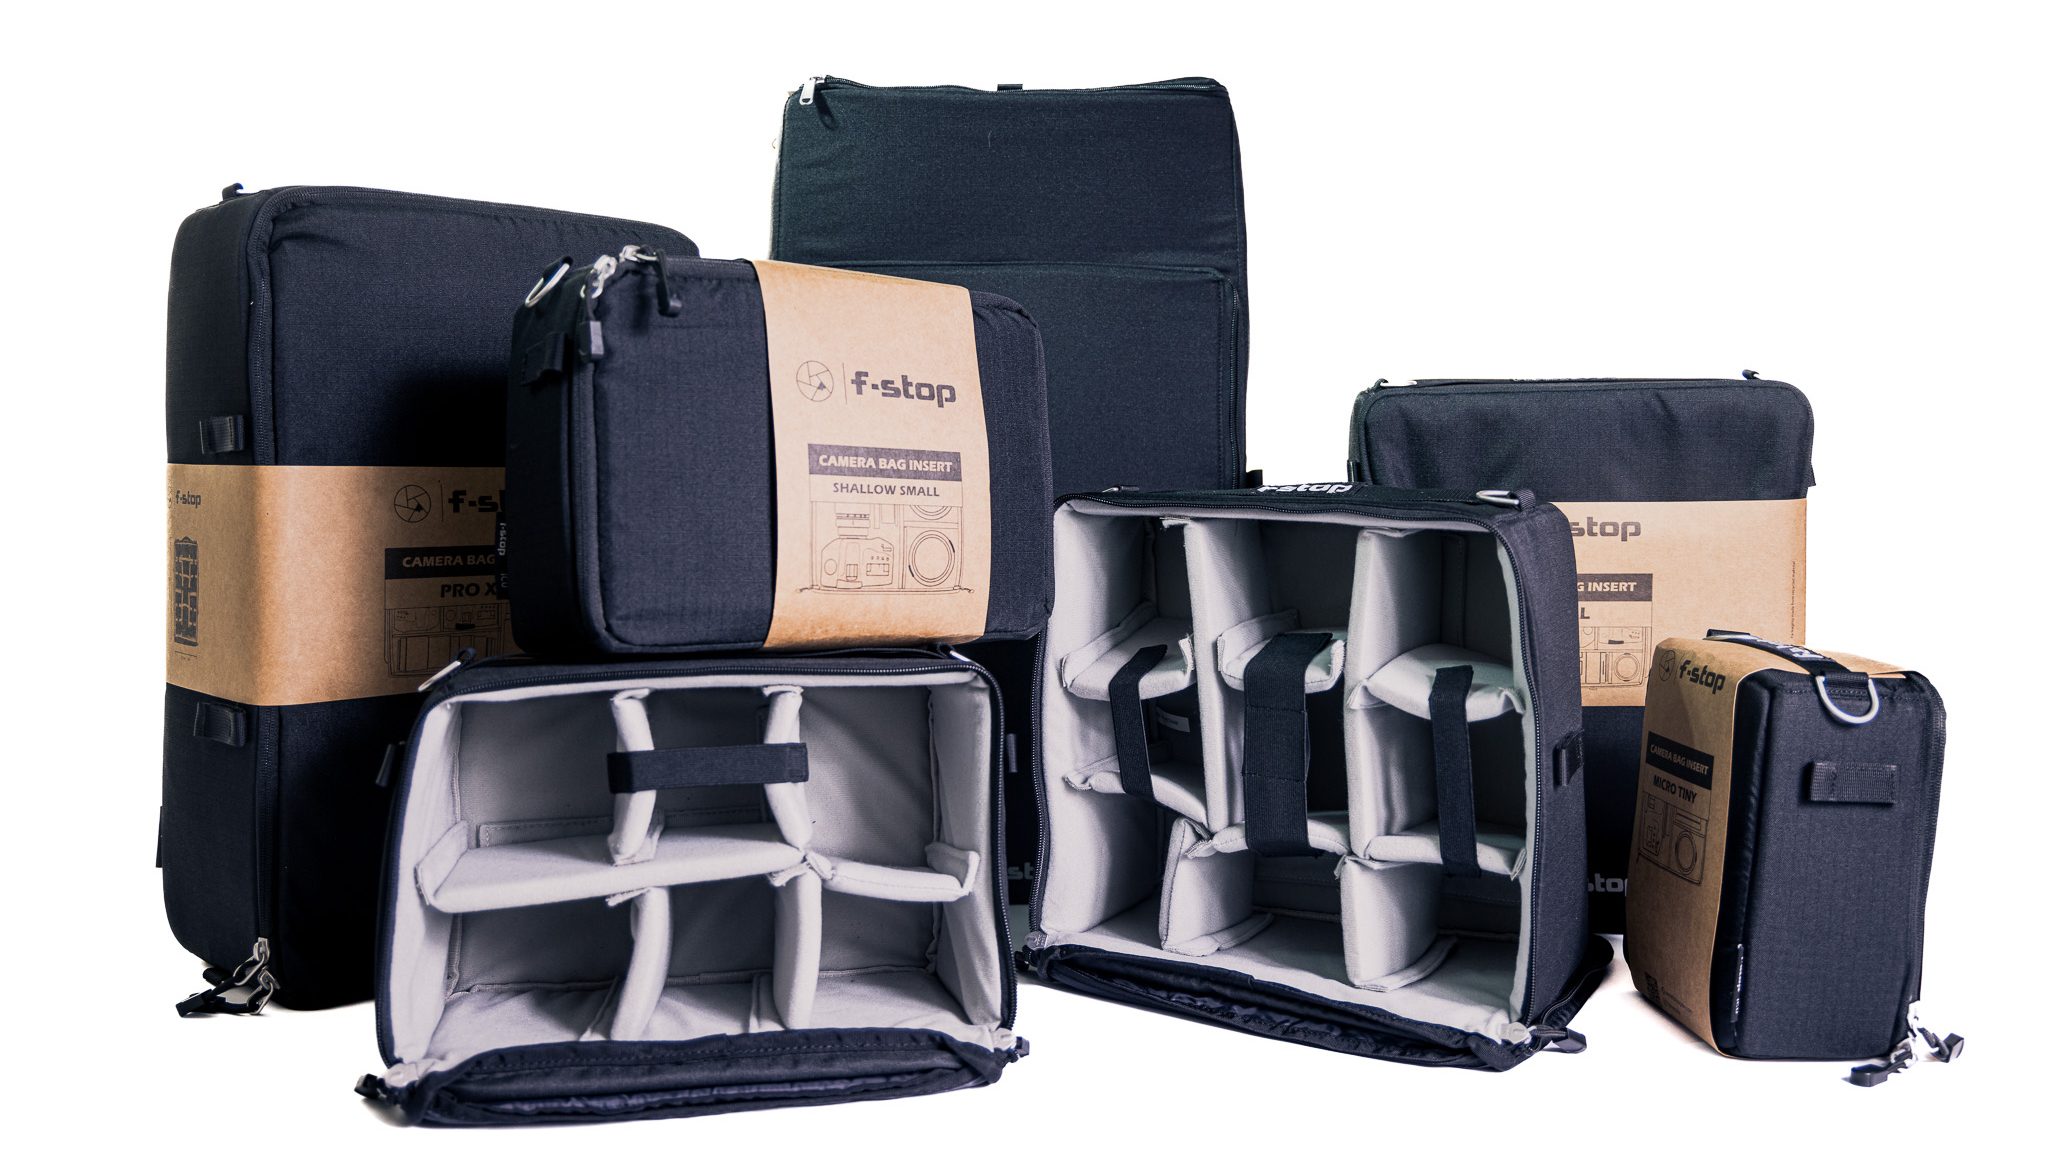
We will visually guide you through the diverse Configurations that you can achieve with each individual pack.
Not every pack is compatible or recommended to go with each Camera Insert. For instance, the Shinn 80 L is designed to accommodate large camera/video equipment. To fulfill this purpose, both the pack as well as the Cine Master insert have greater depth compared to other packs. The Cine Master Camera Insert is significantly deeper than the Pro XL Camera Insert. Therefore, when you are using an XL Camera insert it will not fill out the pack fully. As a result, you can avoid any movement of the Camera Insert in the pack you can attach it to the side attachment loops inside the pack ( next to the Aluminium frame)
Furthermore, when choosing your Camera pack, you also want to consider how much extra room you need for additional equipment such as clothing, food accessories, etc. Gain a sense of the available extra space in the Packs with a variety of compatible Inserts.


Learn more about how to select the best Camera Insert for your needs.
https://shuttermuse.com/f-stop-icu-size-guide/
Now that we've got some time on our hands, I've started spring cleaning at a full force. If you want to join me, I'll show you tips and tricks for keeping your f-stop gear extra clean in the article below.
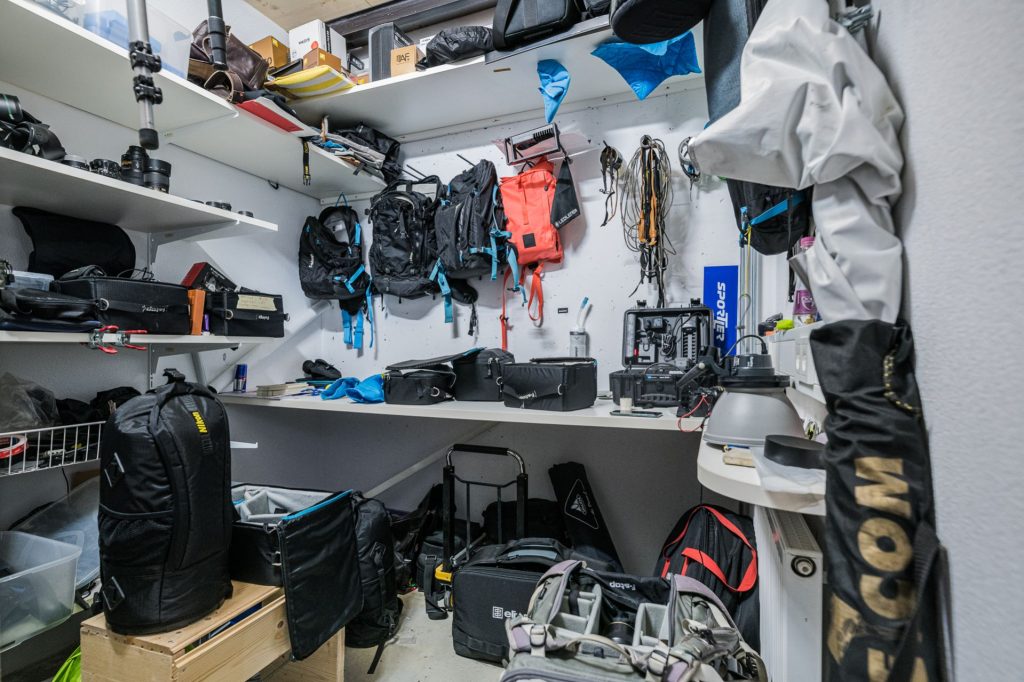
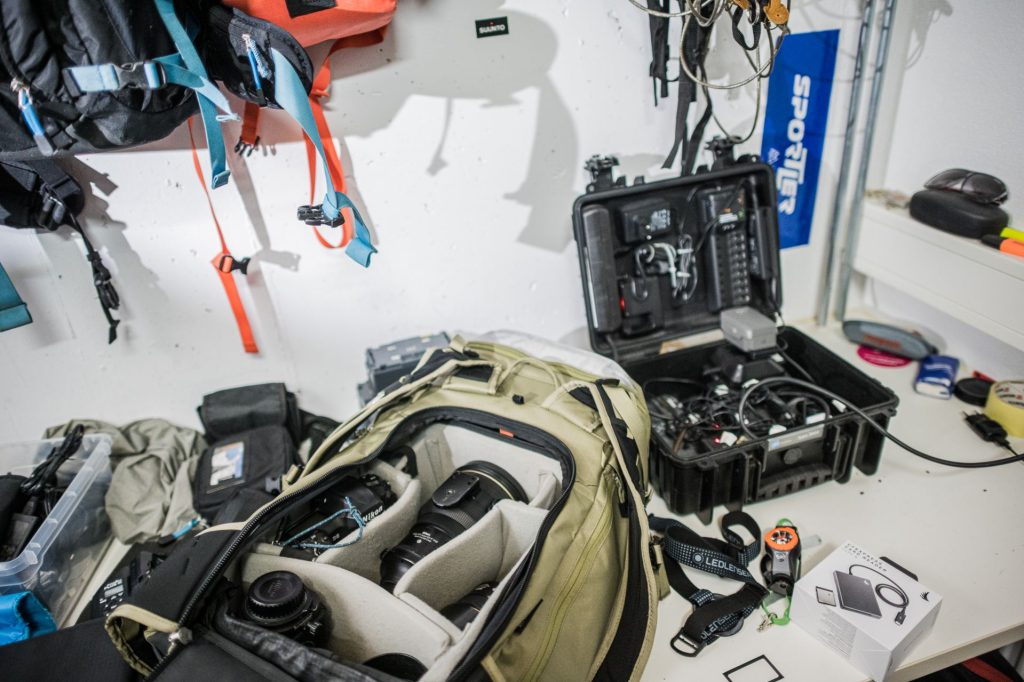
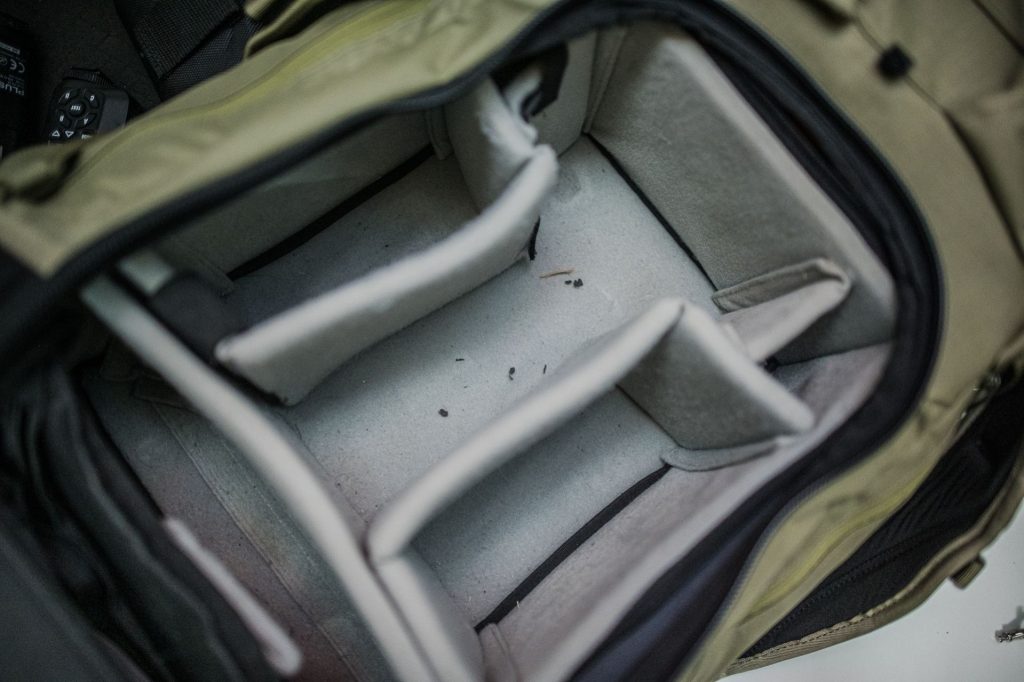
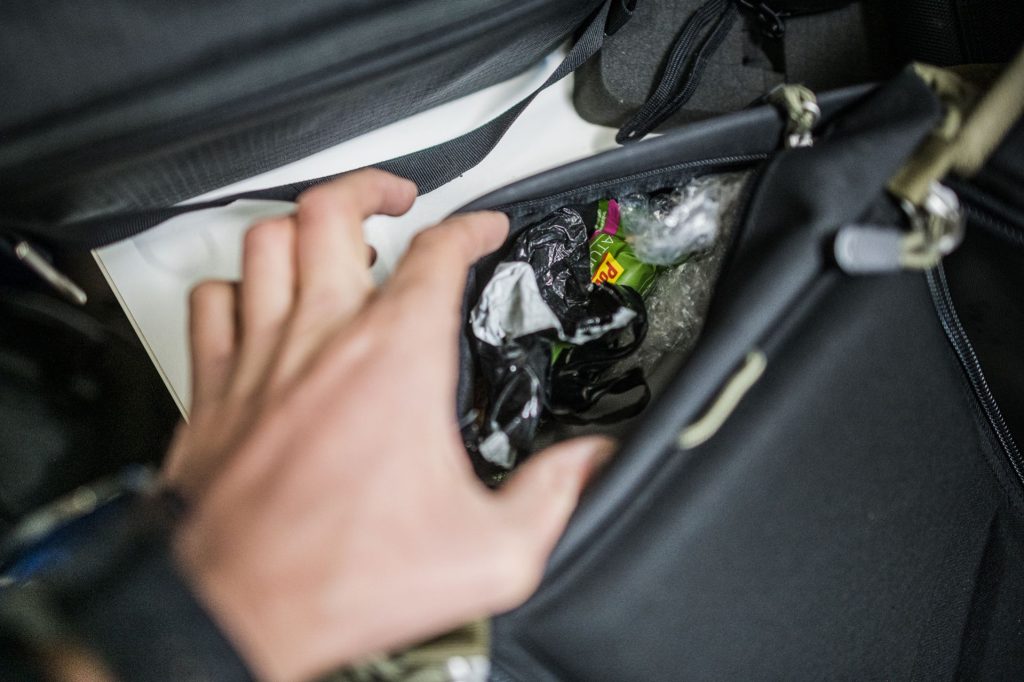
It's at upmost importance to me to have one camera pack and ICU to carry all my essential camera equipment in. As you can see, that's currently not the case. Since right now nothing is in the correct order, it's time to re-organize. Before doing so, it is time to clean the camera pack and ICU.Of course, I take all of my photography equipment out of the ICU and then I suction the internal part by using a vacuum cleaner.I use the vacuum cleaner to clean the main compartment of my camera pack as well.I have a habit of keeping the rubbish piled from snack bars, paper napkins, plastic bags etc. in the bottom pocket of the pack. If you also share this habit, don't forget to take it out of there and into the recycling bin!
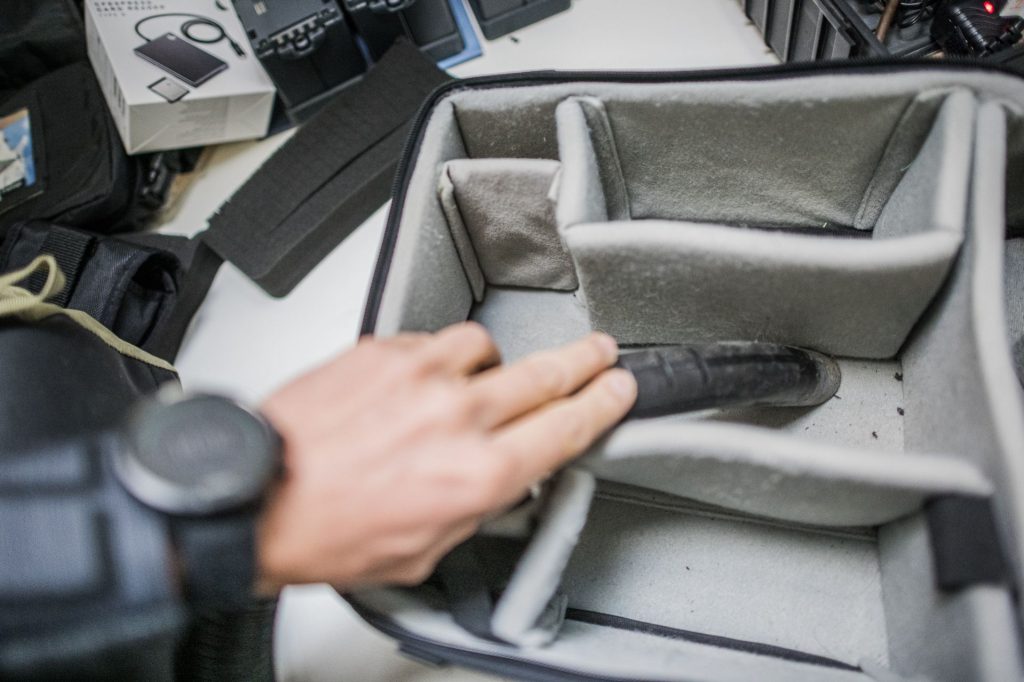
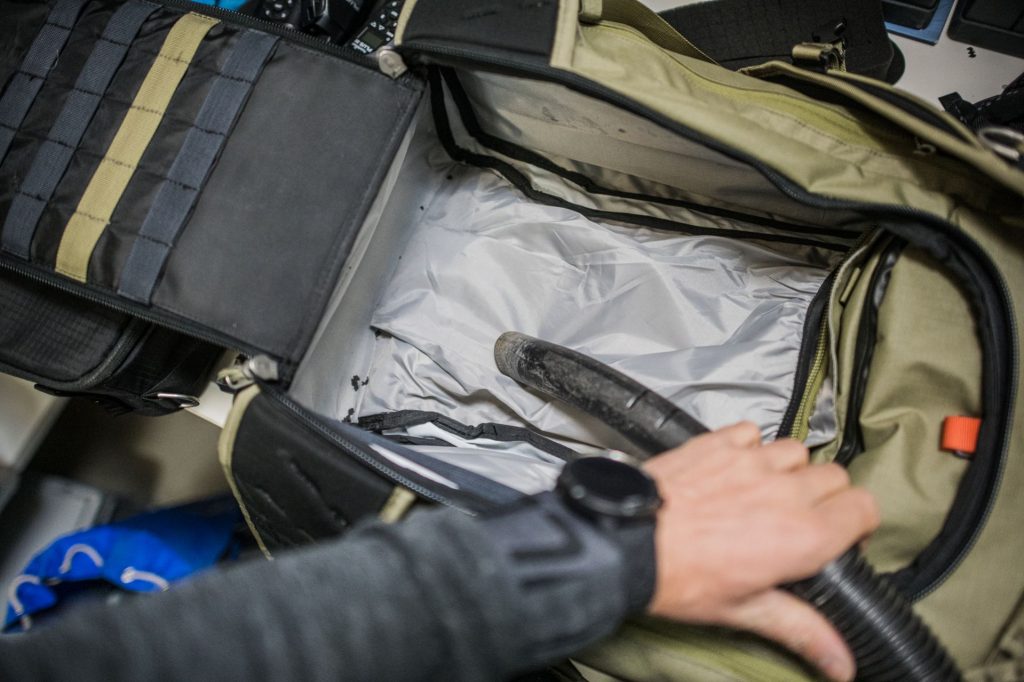
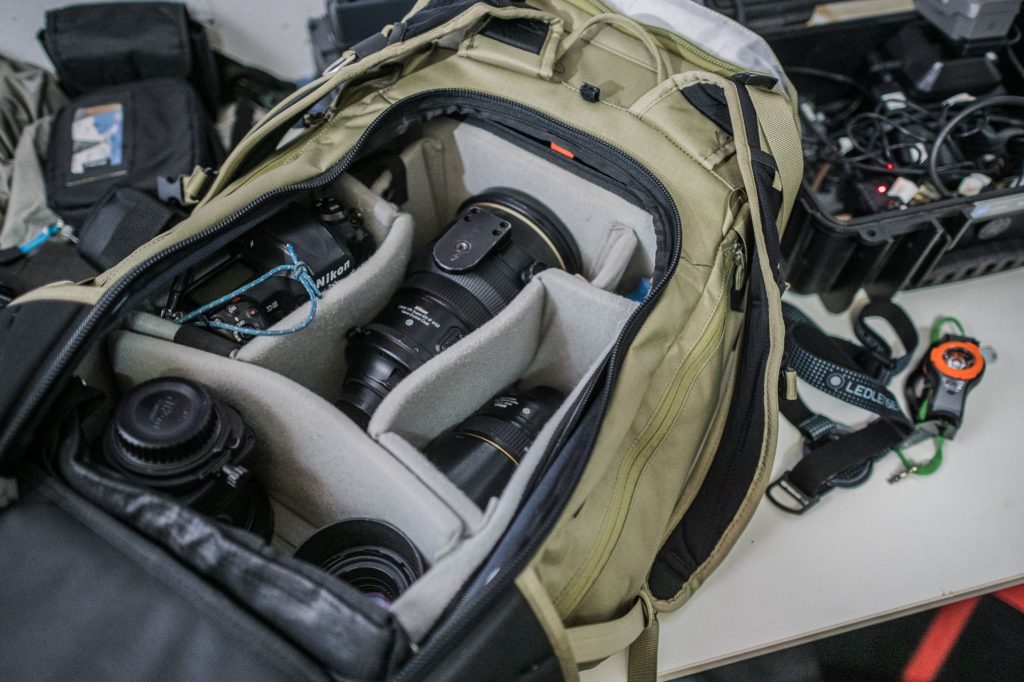
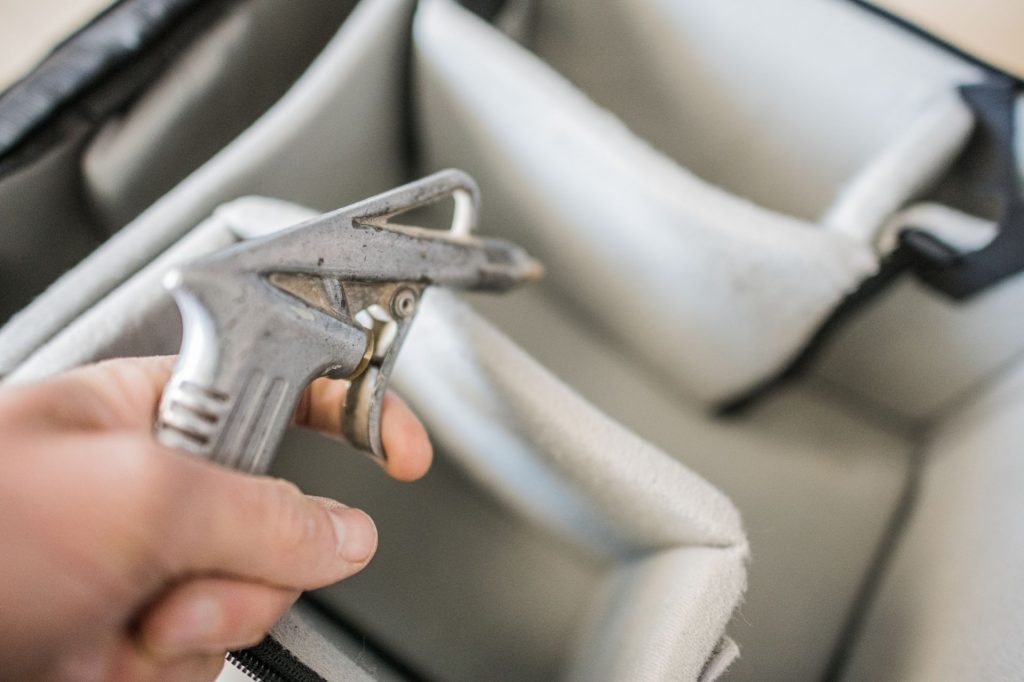
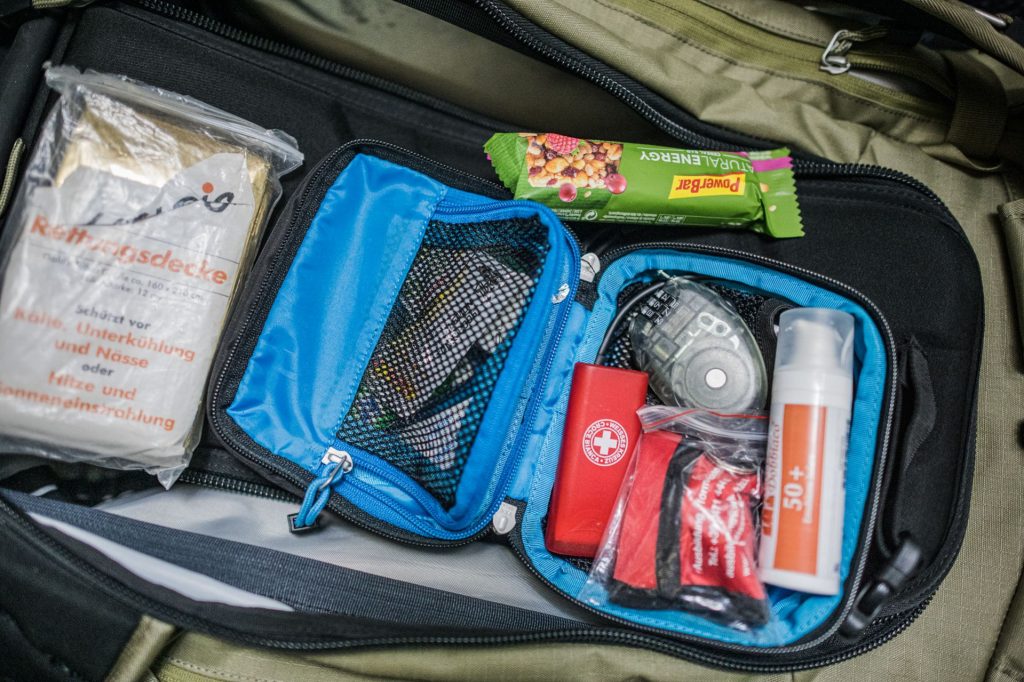
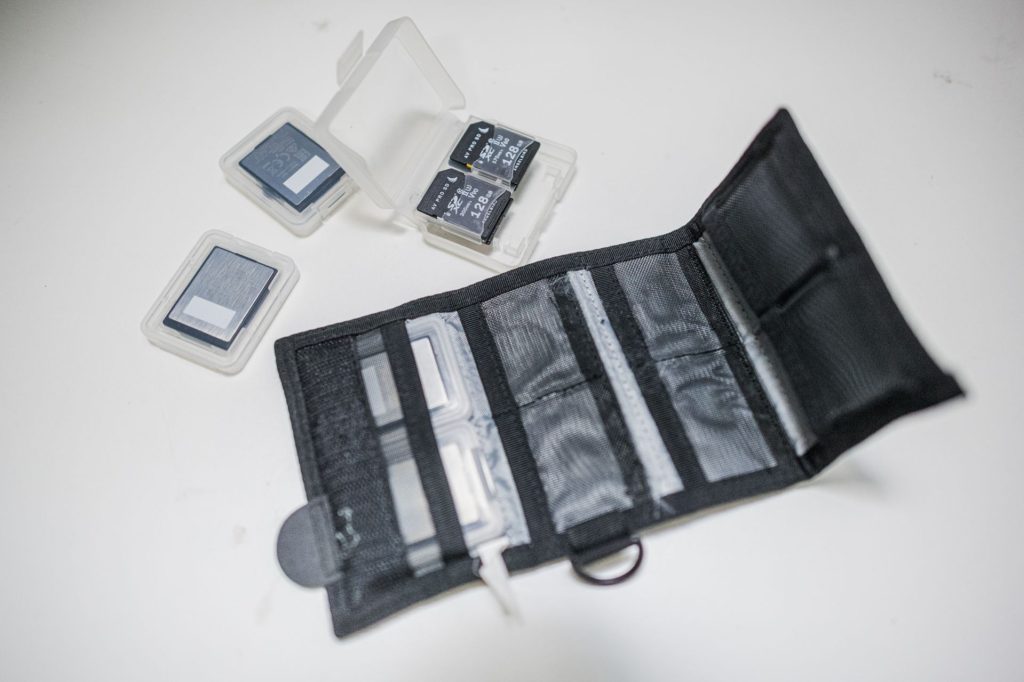
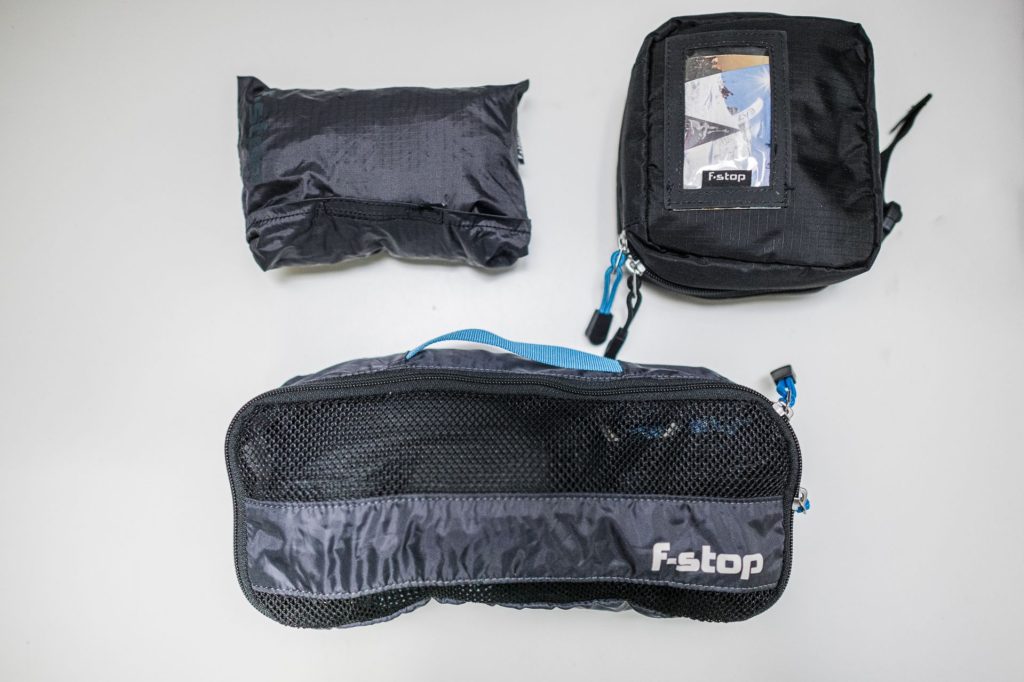
I also go the extra step and use high-pressure air to clean out both the ICU and the pack. If this tool is also available to you, I'd highly suggest you use it too.After all that cleaning and organizing,it's now way easier to access my work space. My Small Accessory Pouch is always equipped with First aid, suncream, power bars, Painkiller, keys, and USB cable. I never travel without my memory cards from angelbird.com
I always pack my rain jacket, headlamp, tape, thin short rope, f-stop rain cover for my camera bag, and homemade rain cover for my camera. My essentials are always packed in the Accessory Pouches so when I switch packs, I can easily grab a pouch and be sure that all my necessities are always in my camera pack. It's a very important step to organize the gear in the ICU. To keep the cables and camera remotes organizes, I use f-stop ICU gate which are perfect for keeping smaller pieces of equipment from moving inside the ICU.

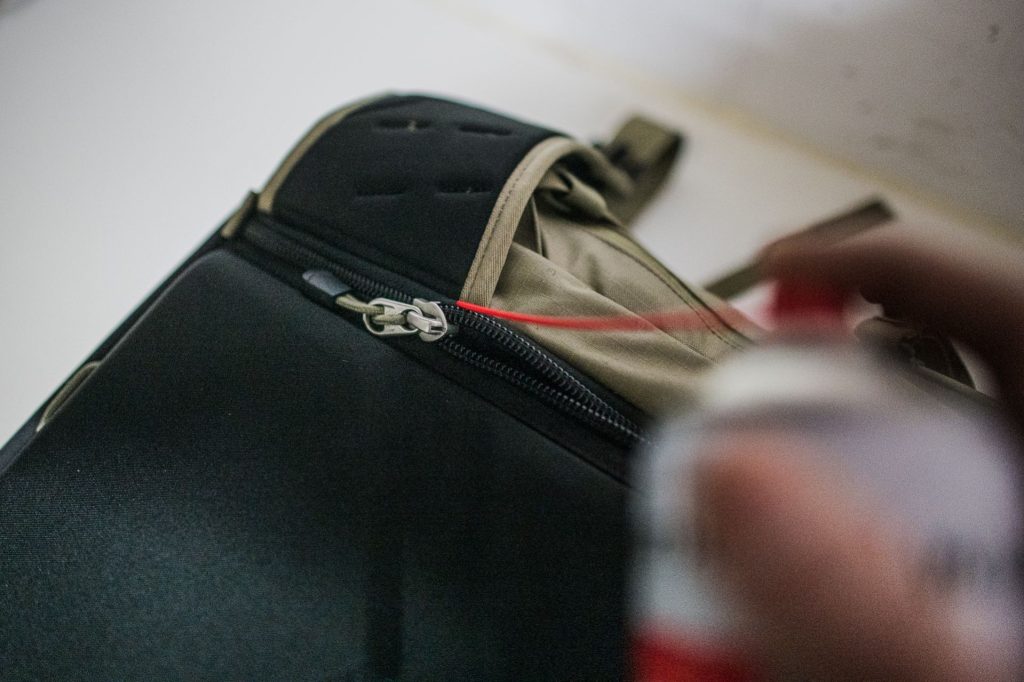
Don't forget to take care of the hardware of the pack. My last step is treating the zippers with silicone spray. This helps them stay in good condition for a longer period of time. I am done for today! It took a while, but everything looks much organized now.


Discount Applied Successfully!
Your savings have been added to the cart.